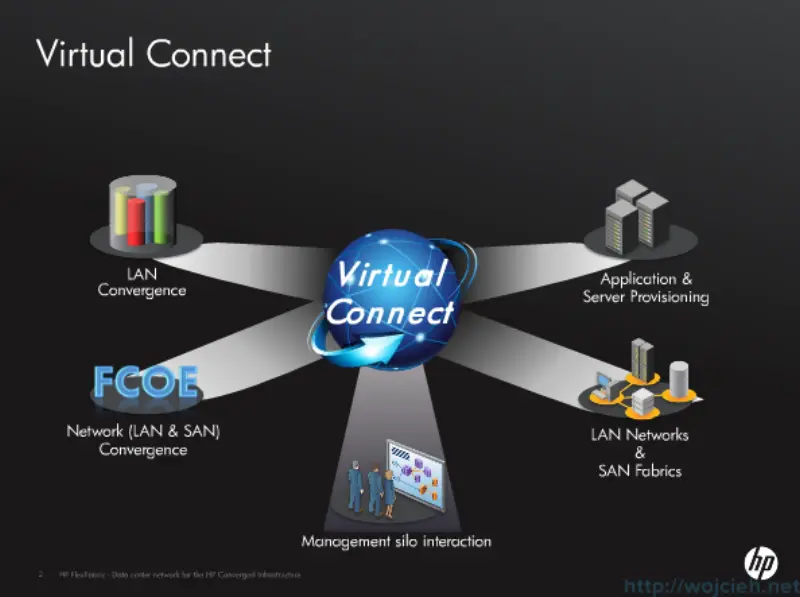
Welcome to first post about HP Virtual Connect Module configuration. In first post we will focus on initial Virtual Connect Module configuration and some additional settings which are important from my point of view.
What is HP Virtual Connect?
HP developed Virtual Connect technology to simplify networking configuration for the server administrator using an HP BladeSystem c-Class environment. The baseline Virtual Connect technology virtualizes the connections between the server and the LAN and SAN network infrastructure. Virtual Connect adds a hardware abstraction layer that removes the direct coupling between the LAN and SAN. Server administrators can physically wire the uplinks from the enclosure to its network connections once, and then manage the network addresses and uplink paths through Virtual Connect software.
Virtual Connect interconnect modules provide the following capabilities:
- Reduces the number of cables required for an enclosure, compared to using pass-thru modules.
- Reduces the number of edge switches that LAN and SAN administrators must manage.
- Allows pre-provisioning of the network, so server administrators can add, replace, or upgrade servers without requiring immediate involvement from the LAN or SAN administrators.
- Enables a flatter, less hierarchical network, which reduces equipment and administration costs, reduces latency, and improves performance.
- Delivers direct server-to-server connectivity within the BladeSystem enclosure. This is an ideal way to optimize for east/west traffic flow, which is becoming more prevalent at the server edge with the growth of server virtualization, cloud computing, and distributed applications.
- Provides direct-attach SAN and dual-hop Fibre Channel over Ethernet (FCoE) capabilities to extend cost benefits further into the storage network.
Configuration prerequisites
I assume that you have:
- existing HP enclosure configured with Onboard Administrator
- EBIPA is configured so you can access Virtual Connect module
- you have local Administrator password for Virtual Connect module
Virtual Connect configuration - initial Wizard
Once you login to Virtual Connect you will see Virtual Connect Manager Domain Setup Wizard. I will guide you through wizard and I will show you additional steps to configure it completely.
- On initial screen click Next.
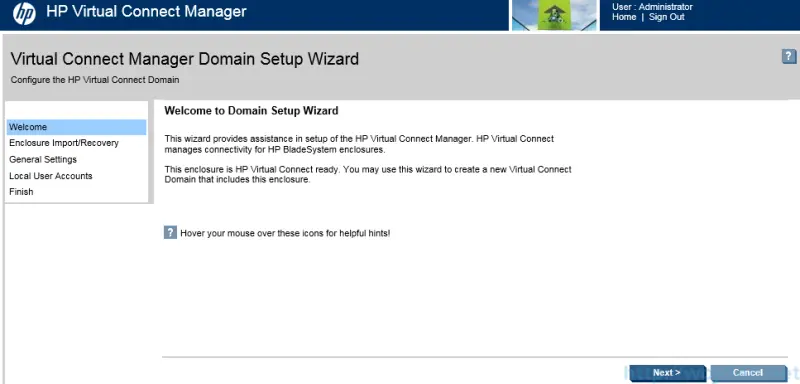
- In the next step we have possibility to import previously exported enclosure - or simply its configuration. We skip this step and click next.
- Next step is to import enclosure. In the initial configuration Local Enclosure is already pre-selected, we need to provide username and password.
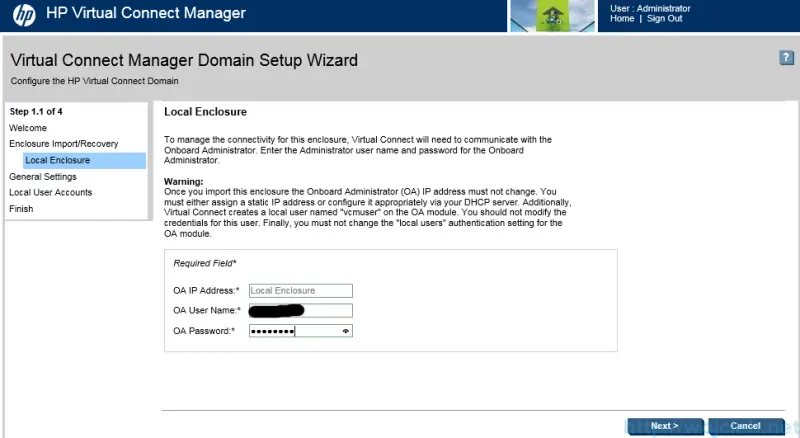
- Click Next and wait for enclosure import.

- Virtual Connect import is done and now you are ready to create Virtual Connect domain.
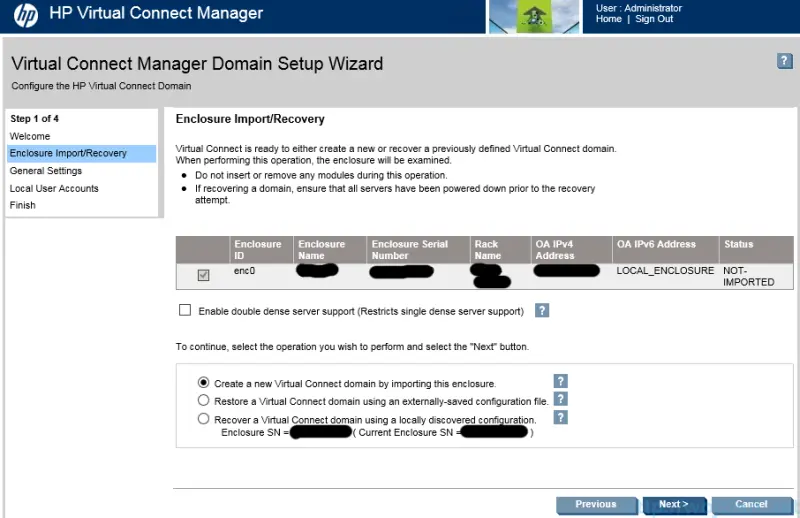
- In my case I inserted previously used Virtual Connect in other enclosure and I have possibility to use locally discovered domain configuration. However we will create completely new domain.
- On confirmation page click Yes.
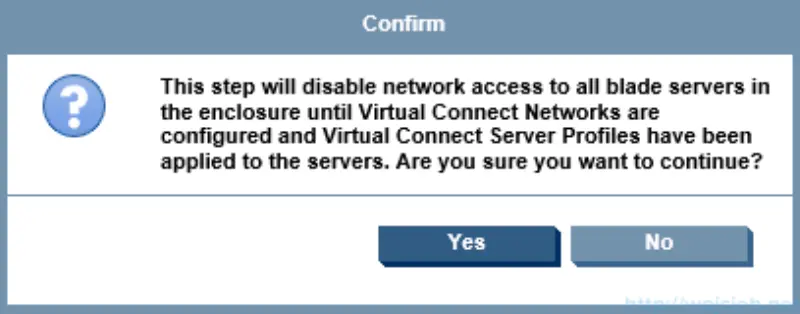
- Wait for import and after a while import will be successful.

- It might take up to five minutes to import enclosure and click Next.
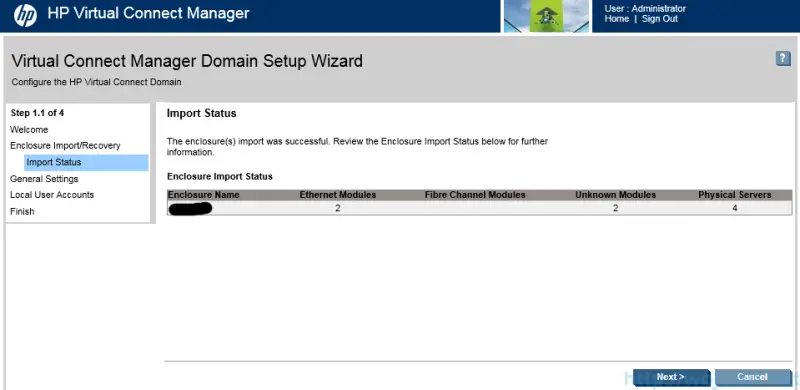
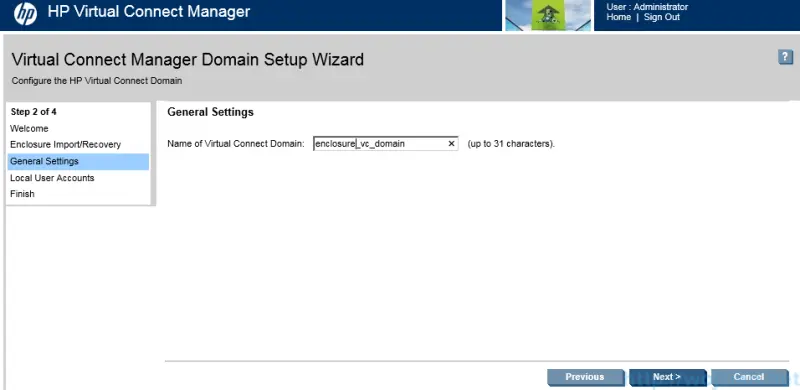
- Provide name of Virtual Connect Domain and click Next.
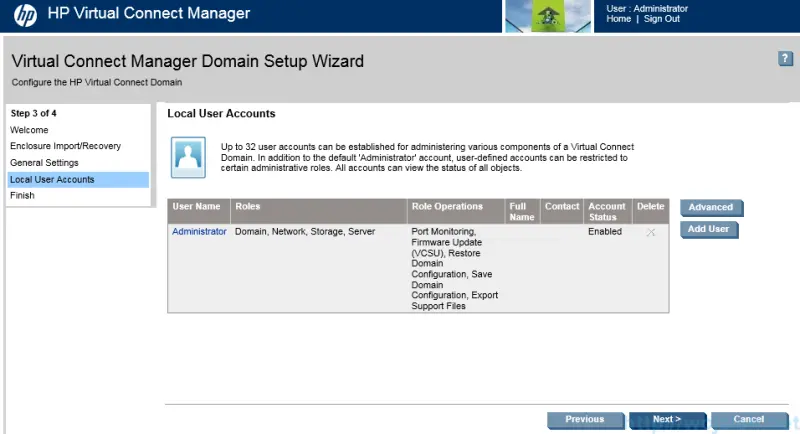
- If needed create additional Local User Accounts. We will skip this because we will configure Virtual Connect with Active Directory.
- Last step in Wizard is the possibility to go through Network Setup Wizard. We will skip this section for now because it will be covered later on.
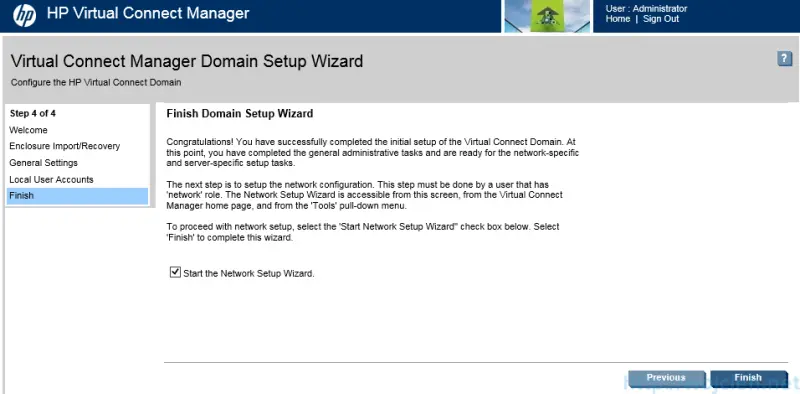
Virtual Connect configuration - Domain Settings
After clicking Finish you will be redirected to Virtual Connect Manager webpage. In this section we will focus on additional settings.
Virtual Connect Domain Settings - IP Address
In the IP Address section I use Virtual Connect Domain IPV4 Address. In short words this is virtual IP address used to manage both Virtual Connect Modules. If you will use this setting there is no longer need to use per VCM module IP but to use one IP.
Go to Domain Settings and click IP Address. Select Use Virtual Connect Domain IPv4 Address or IPv6. Provide IPv4 or IPv6 address, Subnet Mask and Gateway (for IPv4) and Gateway for IPv6. Click Apply.
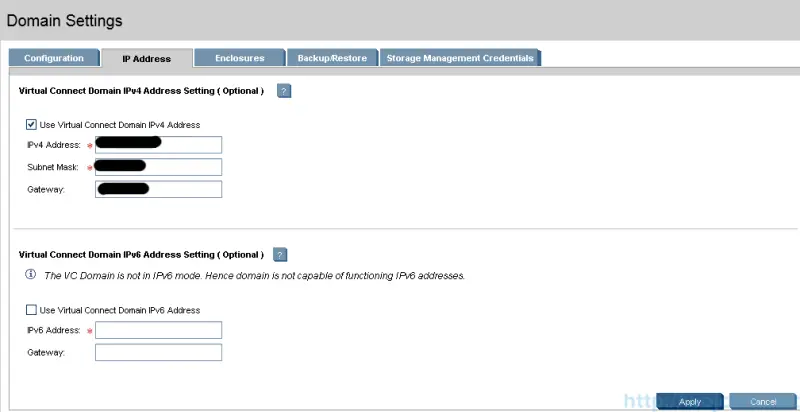
You will be logged out and redirected to virtual IP Address you configured.
Virtual Connect Domain Settings - Backup/Restore
Another quite important section is **Backup/Restore. **In here you can backup you entire Domain configuration with encryption key or restore previously configured domain. ,
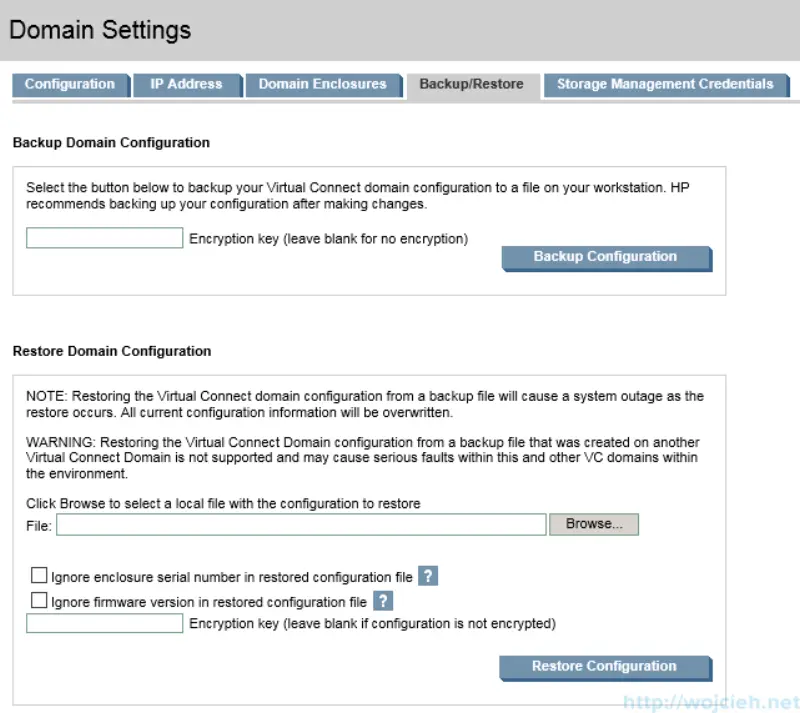
In my opinion there are two interesting check boxes in restore section:
-
Ignore enclosure serial number in restored configuration file
Selecting this check box will allow you to restore configuration of entire domain from another Virtual Connect module.
-
Ignore firmware version in restored configuration file
Selecting this check box will allow you to ignore firmware version during import. Imagine you received new Virtual Connect module with never firmware and you want to have same configuration as the other enclosures.
Virtual Connect configuration - Users/Authentication
Another section I recommend to focus on is Users/Authentication Item. Whenever I can I use Active Directory integrated authentication. Virtual Connect Module is capable of having local and use Active Directory users/groups.
Virtual Connect Users/Authentication - Local User Accounts
If in your environment you can’t use Active Directory authentication local user accounts have to be used.
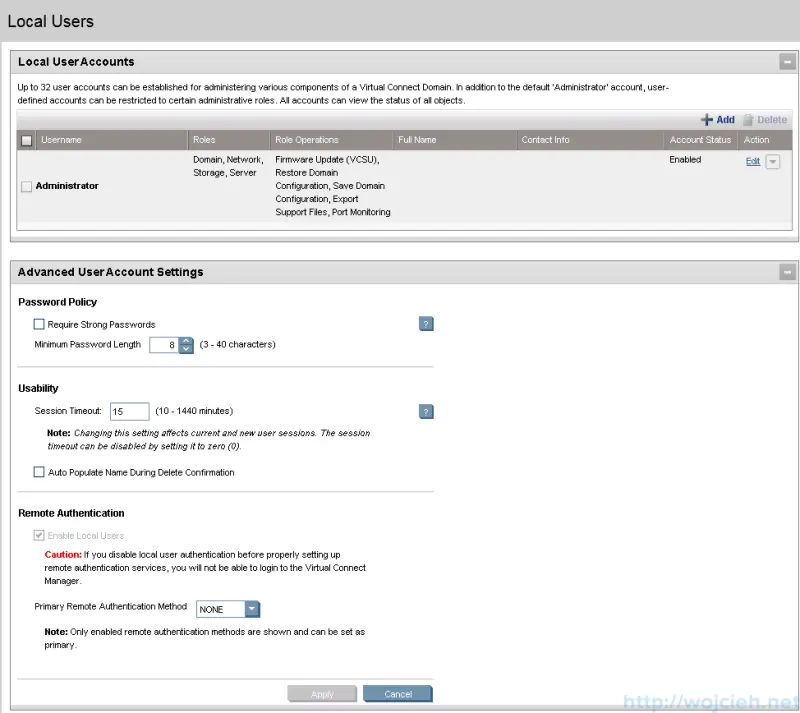
From the settings above I suggest to use policy **Require Strong Passwords **with minimum 8 characters in passwords. From the usability point of view you might extend session timeout to bigger value than 15 minutes. Besides that you can assign specific user to specific role - for example user A can update firmware and user B can configure domain.
Virtual Connect Users/Authentication - LDAP Settings
In order to use Active Directory authentication you need to provide some information.
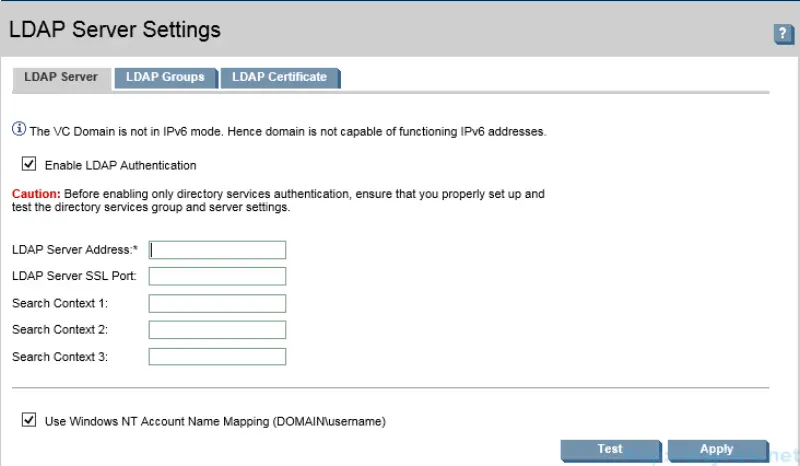
LDAP Server Address: provide IP or FQDN to your domain controller or for example Active Directory Load Balancer.
LDAP Server SSL Port: by default LDAPS is using port 636, if changed enter it.
Search Context. You need to provide distinguished name in format: CN=Group Name,OU=OU Name,DC=your domain name,DC=dot something
Use Windows NT Account Name Mapping: If you select this check box you can login to VCM using this format: domain\user. In case you don’t select it you will have to login using this format user@domain.something
Virtual Connect Users/Authentication - LDAP Groups
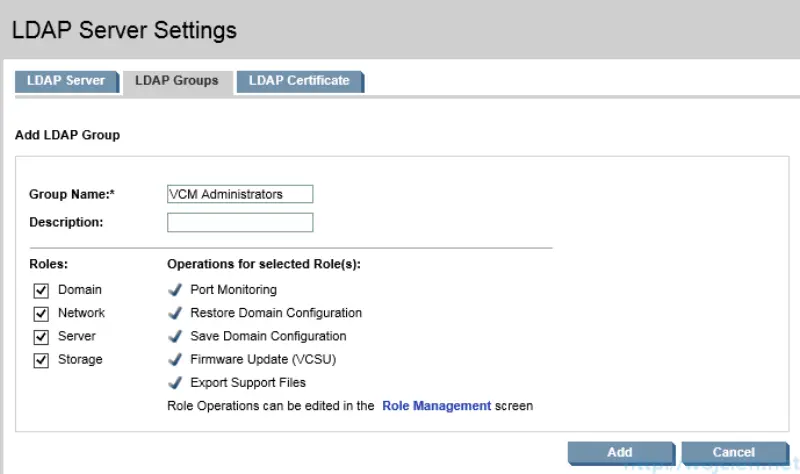
In this section we need to add new group.

Click add and provide Group Name.
Virtual Connect Users/Authentication - LDAP Certificate
The last thing we need to do is to upload X.509 certificate. You can do it from URL or paste it. Once you have it in click Upload and wait.

After configuration of following setting you will be able to use Active Directory authentication with Virtual Connect Module.
Virtual Connect Users/Authentication - SSL Cerificate Administration
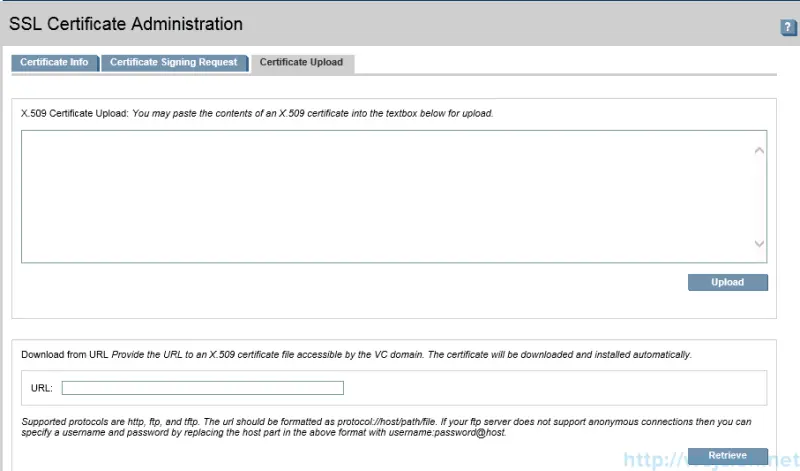
If in your infrastructure you have exisiting PKI infrastructure it is possible to replace self signed SSL Virtual Connect certificate. In order to do it you need to upload it into Certificate Upload tab.
Virtual Connect Users/Authentication - SSH Administration
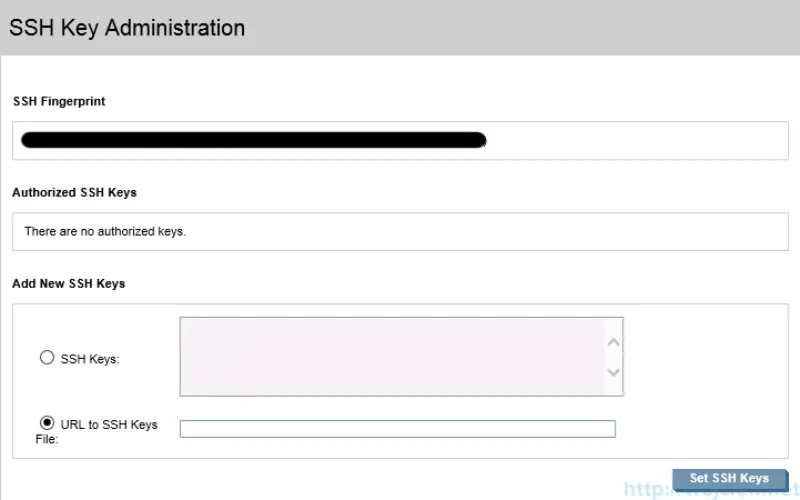
If you prefer to configure Virtual Connect Module through SSH you can secure it a bit more and use SSH Keys. In section SSH Administration you can paste or download SSH Keys from URL.
In this post we configured our Virtual Connect Module by creating domain and configuring base settings. In next post we will configure network connections and we will provide network connectivity to blades.