
Introduction
Welcome to another review of fantastic software on my blog. Today Runecast Analyzer review will show us what proactive monitoring in addition to best practices and VMware Knowledge base articles can do in your environment.
Runecast Analyzer is a startup company founded by Stanimir Markov in 2014. Since then product grew and already Runecast has quite large portfolio of customers.
Installation
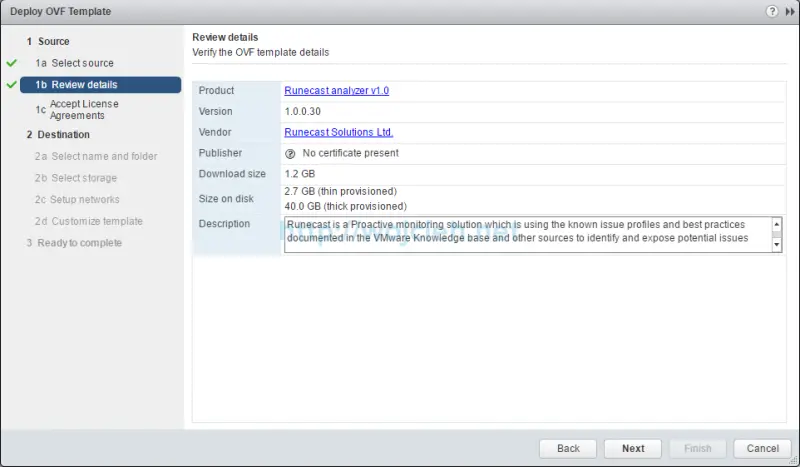
After introduction to Runecast Analyzer I will guide you through installation of appliance in my lab. I used version 1.0.0.30 which requires to install 2vCPU and 6GB of RAM, 2,7GB of disk space as thin and 40GB of disk space as thick.
- Login to vSphere Web Client, select Cluster to place Runecast Analyzer.
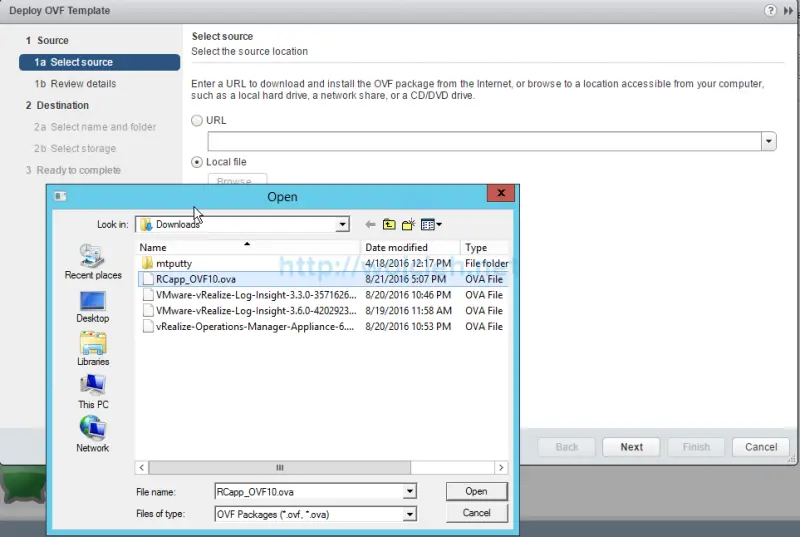
- Click Actions, Deploy OVF Template and navigate to directory where Runecast Analyzer OVA is downloaded. Click Next.
- Review details of appliance and click Next.
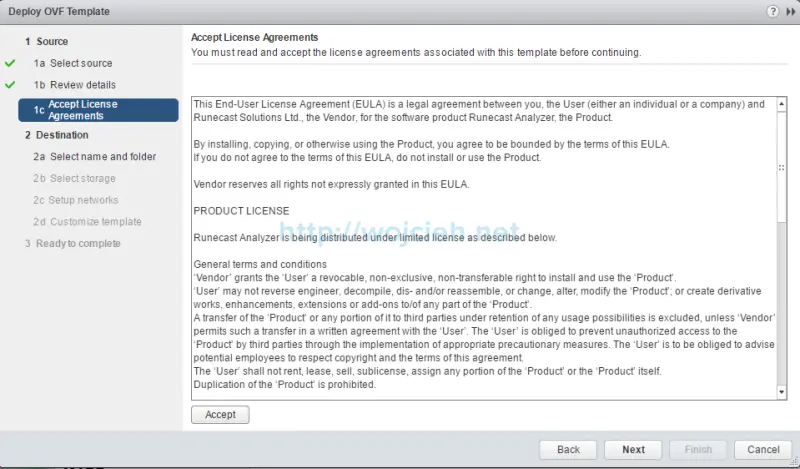
- Accept End User License Agreement and click Next.
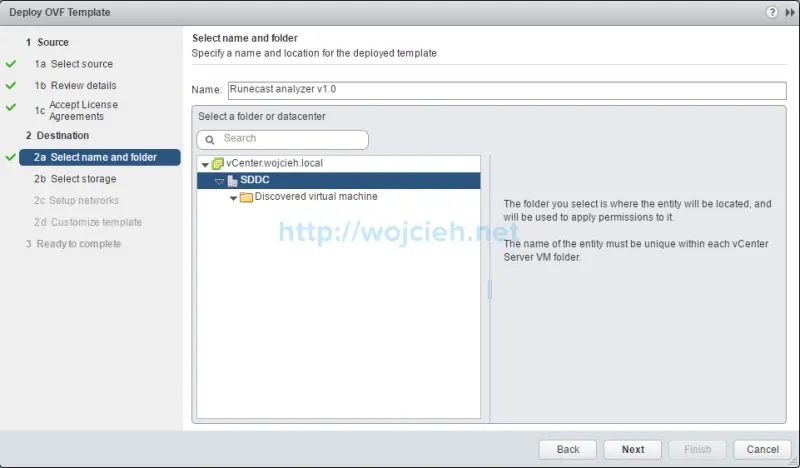
- Choose folder to install Runecast Analyzer and name for virtual machine. Click Next.
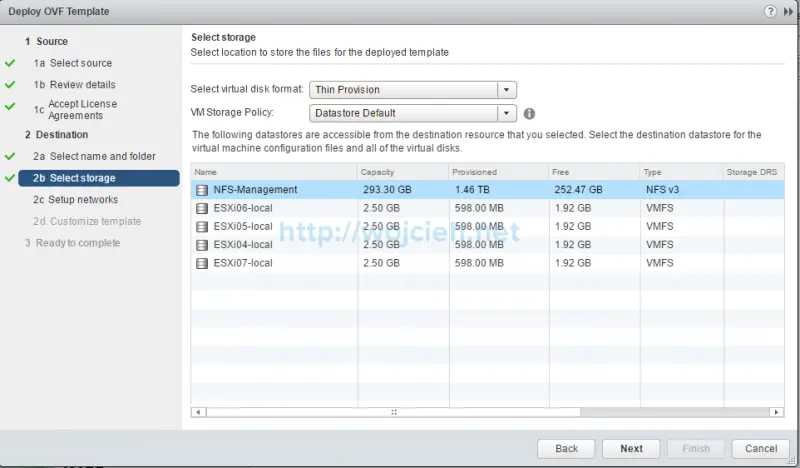
- Choose Thin or Thick Provision virtual disk format and destination datastore. Thin provisioned installation size is 2,7GB and thick provisioned installation is 40GB.
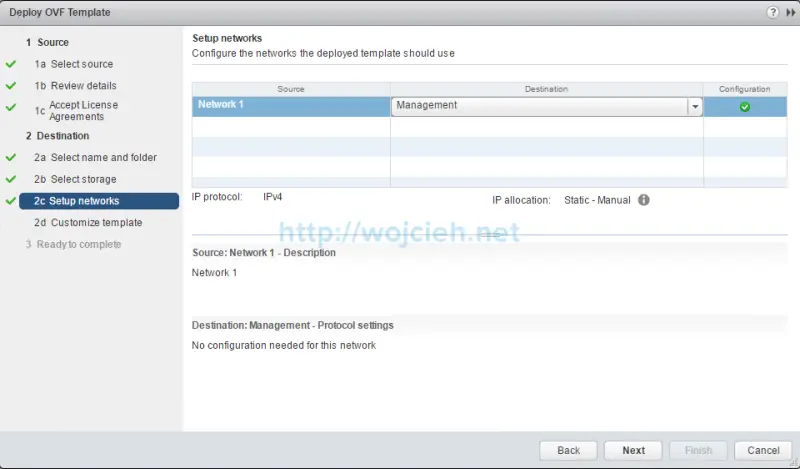
- Choose correct network and click Next.
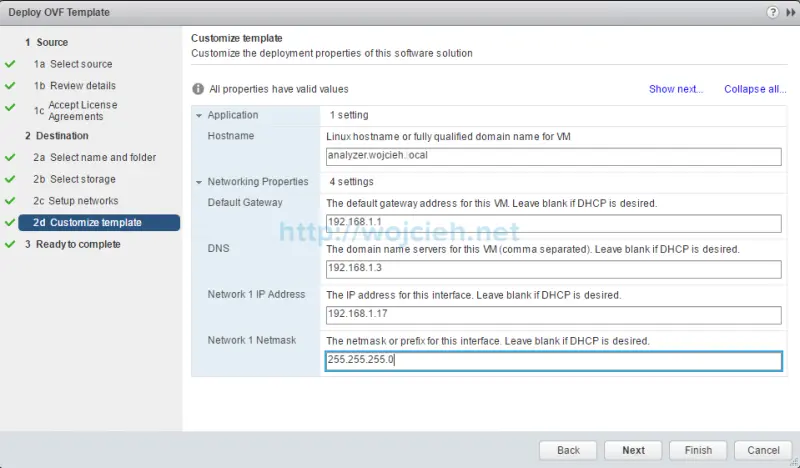
- We are almost at the end of Runecast Analyzer appliance deployment and we have to provide few values: hostname, default gateway, dns, network IP and netmask.
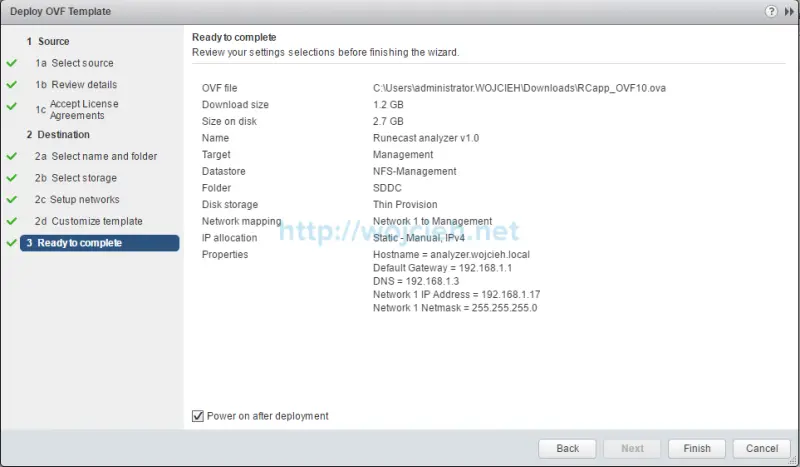
- On last let’s review all settings and to complete appliance installation click Finish.
- Use default credentials: rcuser with password Runecast! to login to appliance.
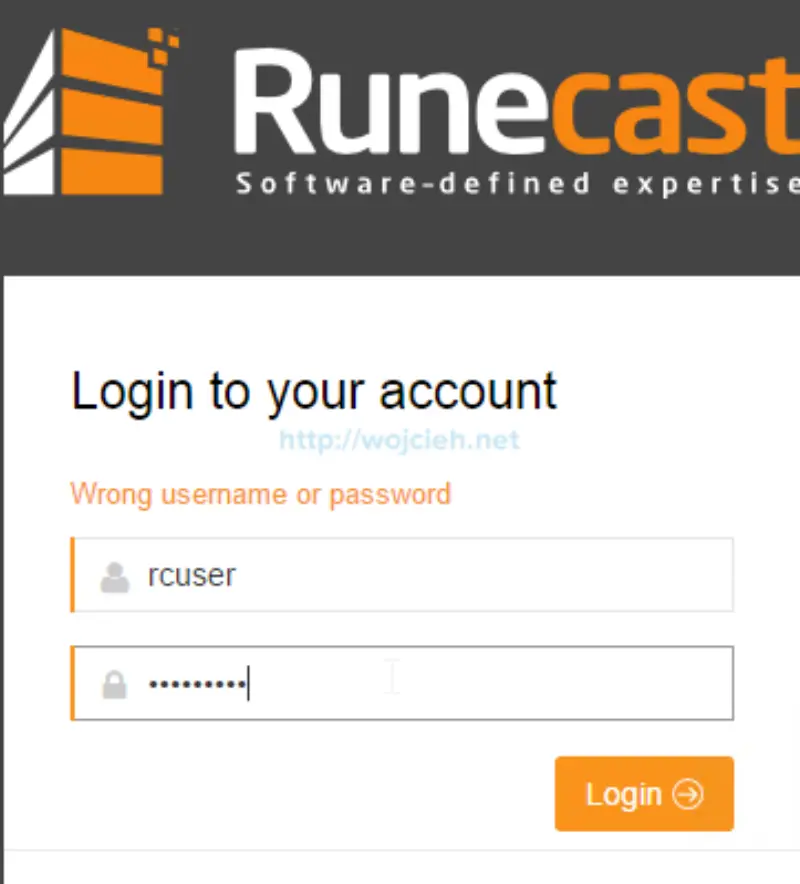
- As we see appliance is up and running, but to make it fully operational let’s configure it.
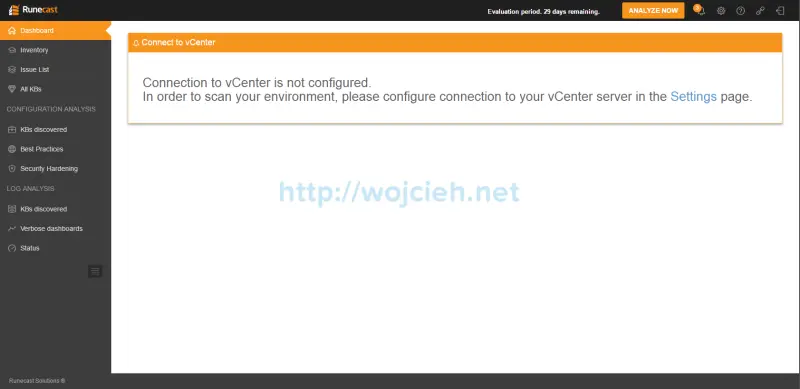
Configuration
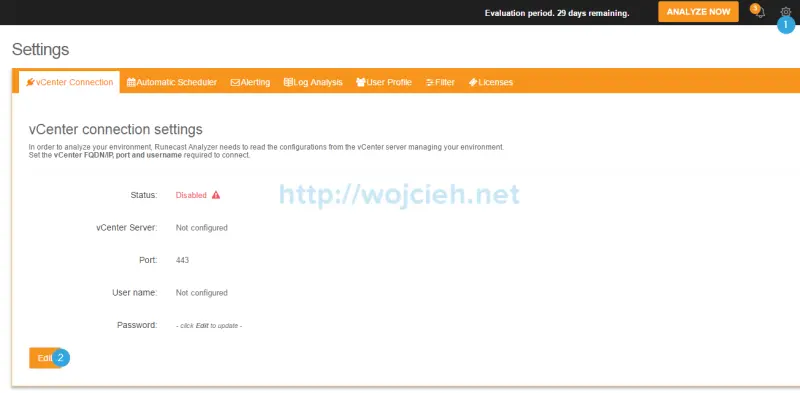
- Go to Settings and click Edit to configure vCenter Server connection.
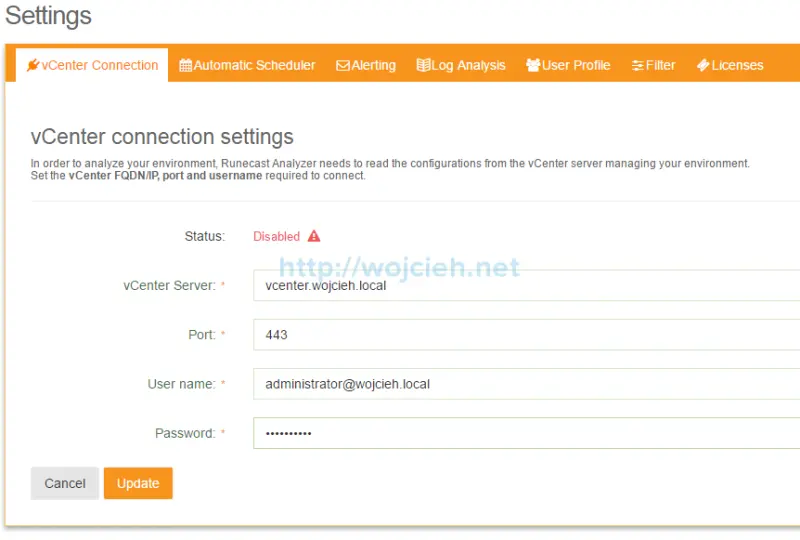
- Enter vCenter Server FQDN or IP address, change port if needed and provide username and password with administrative rights.
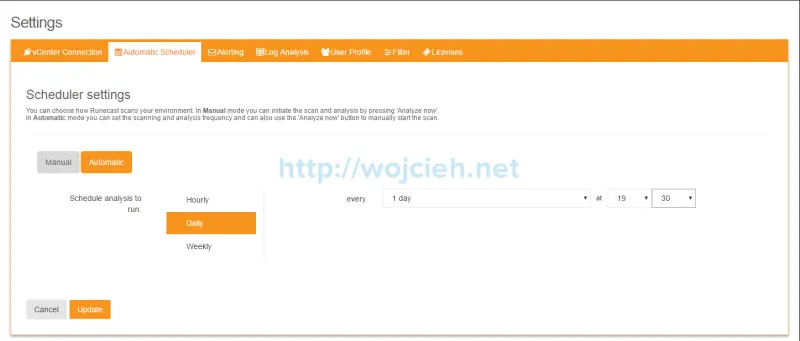
- Next step is to enable Automatic Scheduler. You can set scanning and analysis frequency based on your needs. Click Edit and change it from Manual to Automatic. I configured it to run on daily basis.
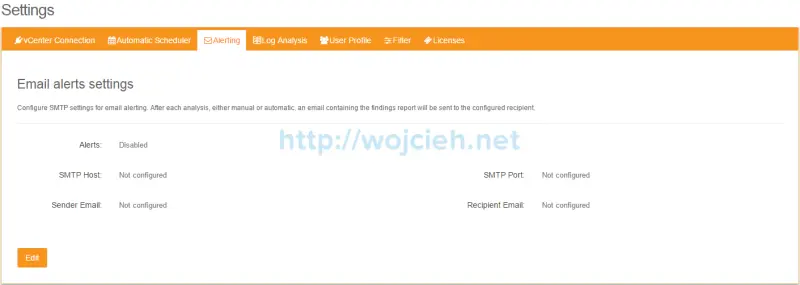
- In production environment Email alerting is most common way to deliver reports. Runecast Analyzer naturally has this functionality as well. Simply click Edit to enter settings from your environment.
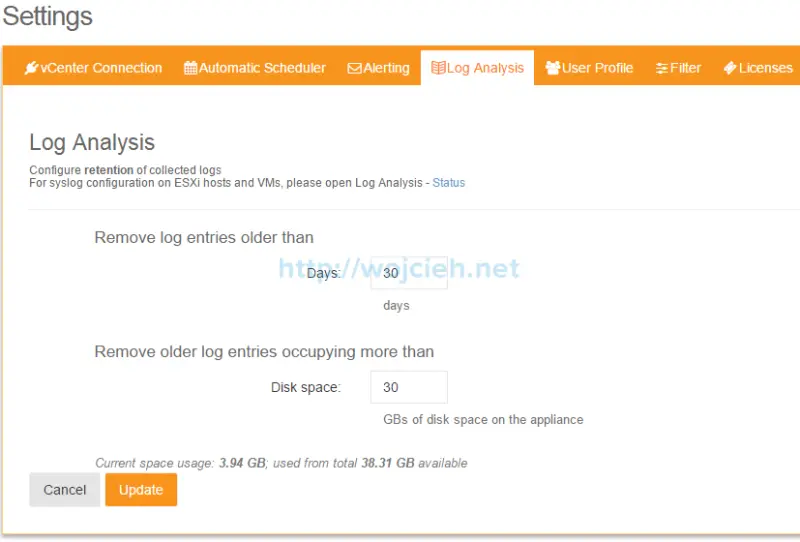
- In section Log Analysis it is possible to configure retention of collected logs. It is possible to choose from Days and occupied Disk space.
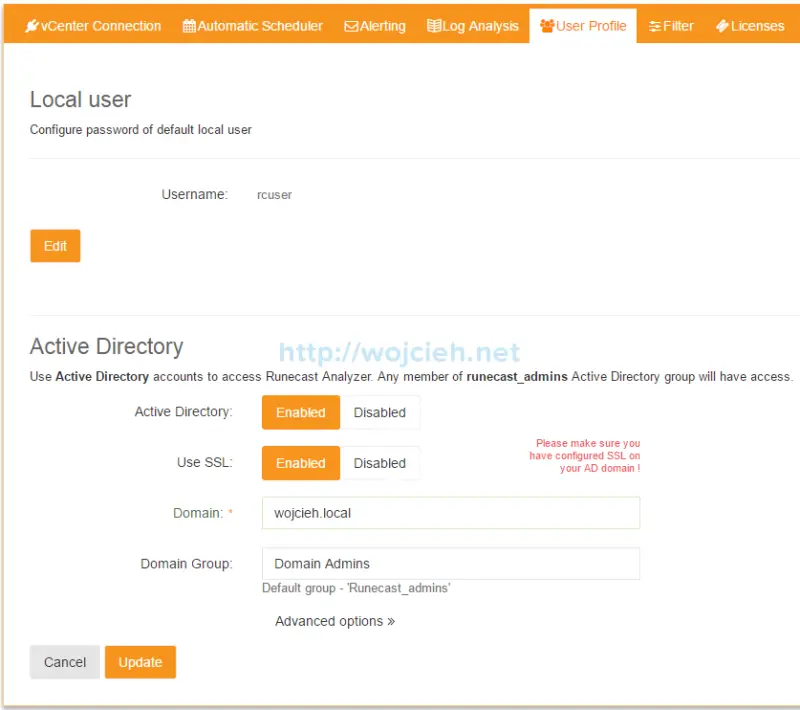
- In section User Profile it is possible to change password for local user rcuser and integrate Runecast Analyzer with Active Directory. By default members of Active Directory group Runecast_admins have access rights to use Runecast Analyzer. I configured it (since this is lab) with Domain Admins Active Directory group.
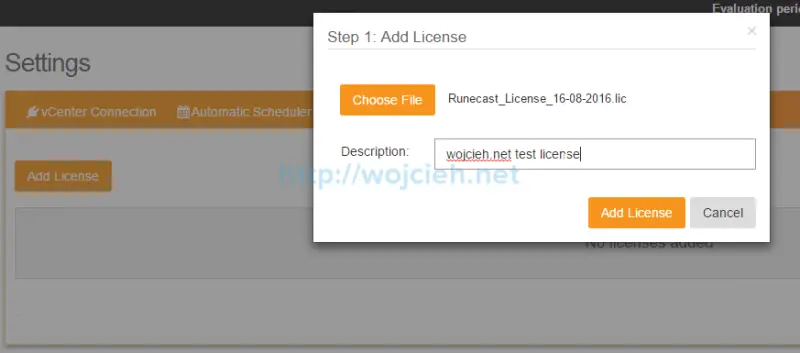
- Go to Licenses to change 30 day trial to your purchased license. Click Add License and use download file from Runecast portal.
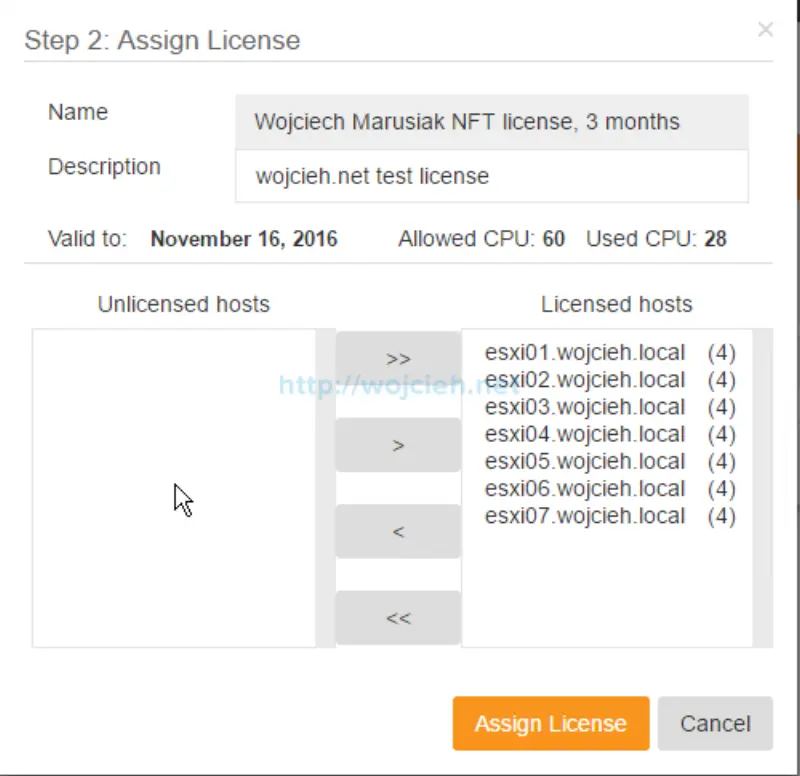
- Choose which ESXi hosts to license and click Assign License button.
Usage
To have full picture of environment ESXi logging configuration has to point to Runecast Analyzer. There are several ways how to do it - fastest way will be use PowerCLI script - one example could be PowerCLI – Configure Syslog for All Hosts.
The other way to do it is by using Runecast Analyzer itself.
- Go to Status and click on Host syslog settings section.
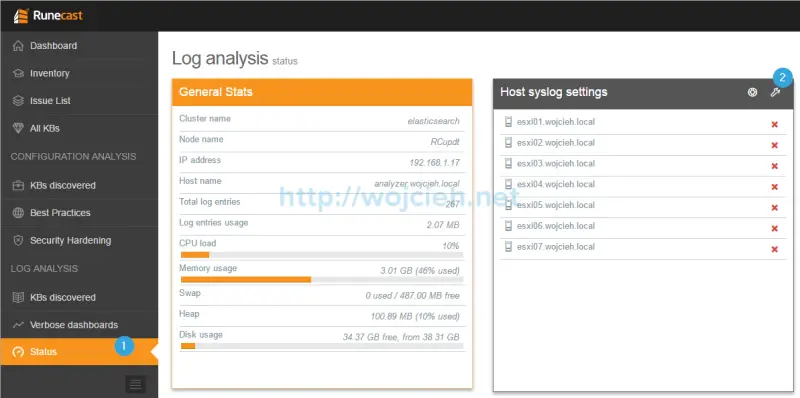
- Click wrench icon and choose all ESXi hosts. Don’t worry - original syslog settings are preserved and Runecast Analyzer is appended to configuration. ESXi supports multiple syslog servers.
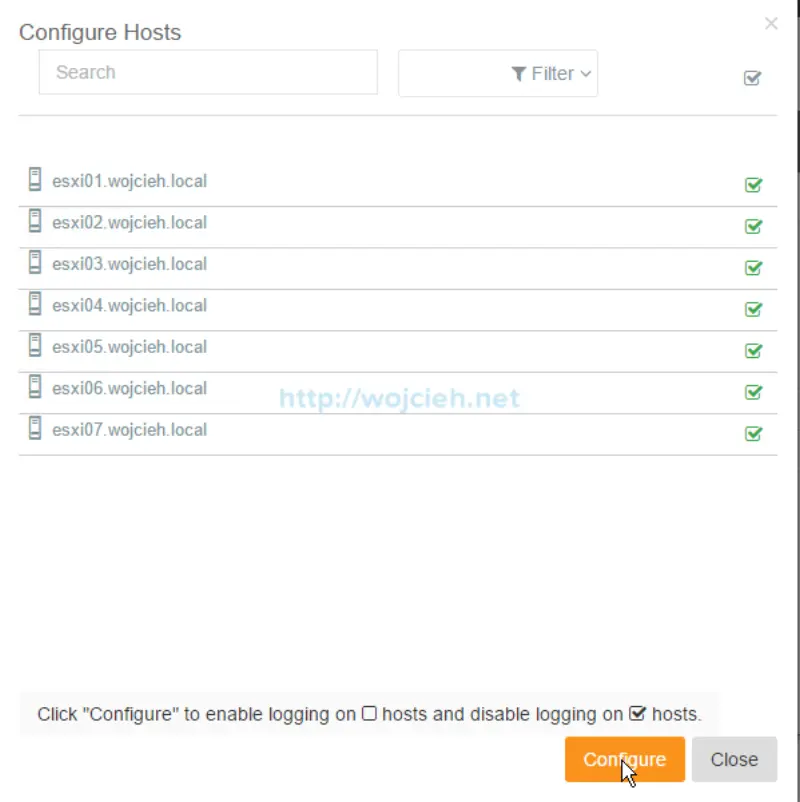
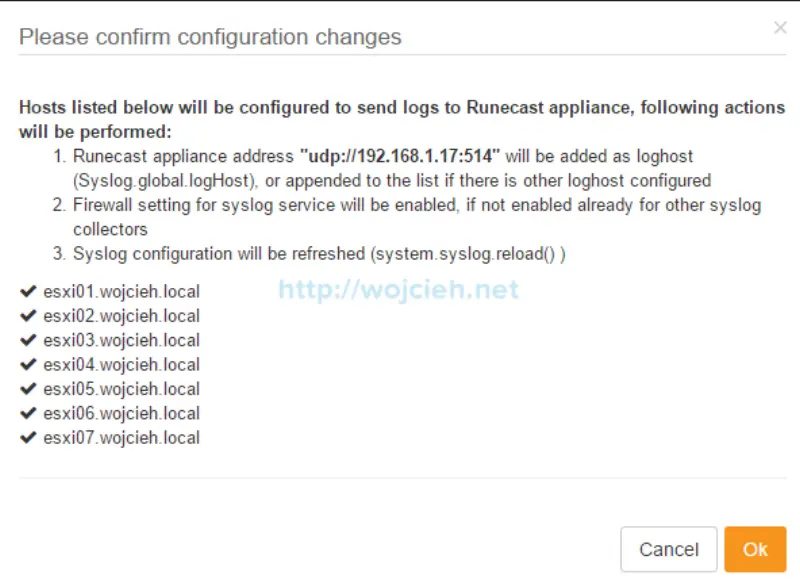
- Once Configure button is entered, confirmation window appears. Click Ok to finish syslog configuration.
- Recent tasks pane in vSphere Web Client we see that configuration is applied.

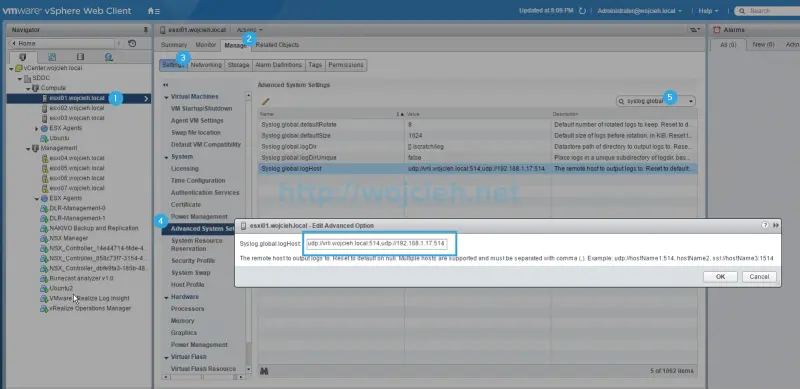
- To be 100% sure that previous settings were not overwritten and of course that Runecast Analyzer receives logs as well, ESXi Advanced System Settings has to be checked.
 6. Last step is to start analysis of environment. Click big orange button Analyze Now, wait few minutes so Runecast Analyzer scans whole environment.
Results
Finally we are in the most interesting part of review. I was extremely curious of what results Runecast finds in my lab. Scan itself took around 10 minutes for 7 ESXi hosts.
Dashboard
After first scan we go directly to Dashboard where we see result of scan. It has few sections nicely organized.
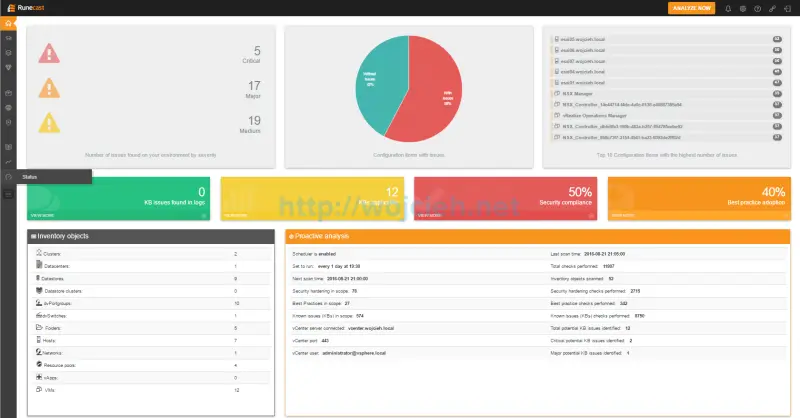
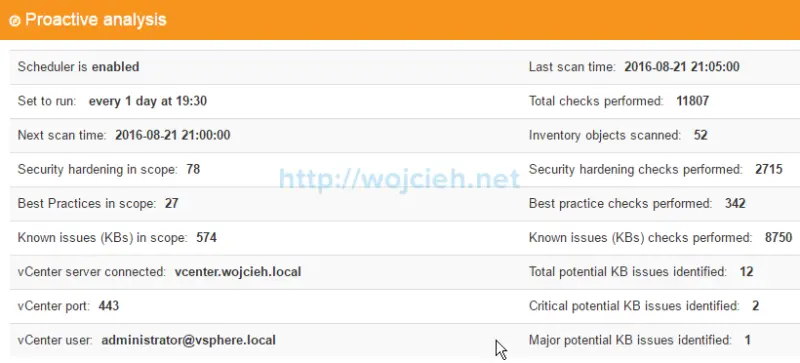
From dashboard we can easily see where and what we have to do. In my case we see the following:
Inventory
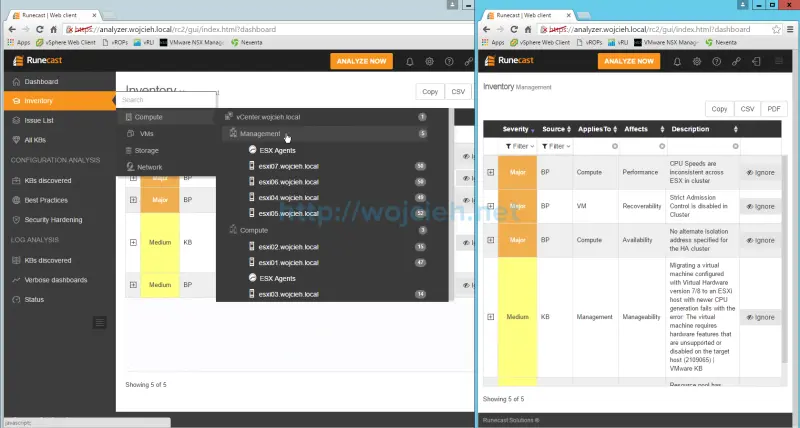
In inventory view we can focus on each part of environment: Compute, VMs, Storage and Network. Selecting each category it is possible to drill down to desired component of each section. Once resource is selected we have nice list of findings categorized by severity.
It was quite difficult to catch inventory and its result on one screen and I decided to open two browser windows so you could see it better.
Issue List
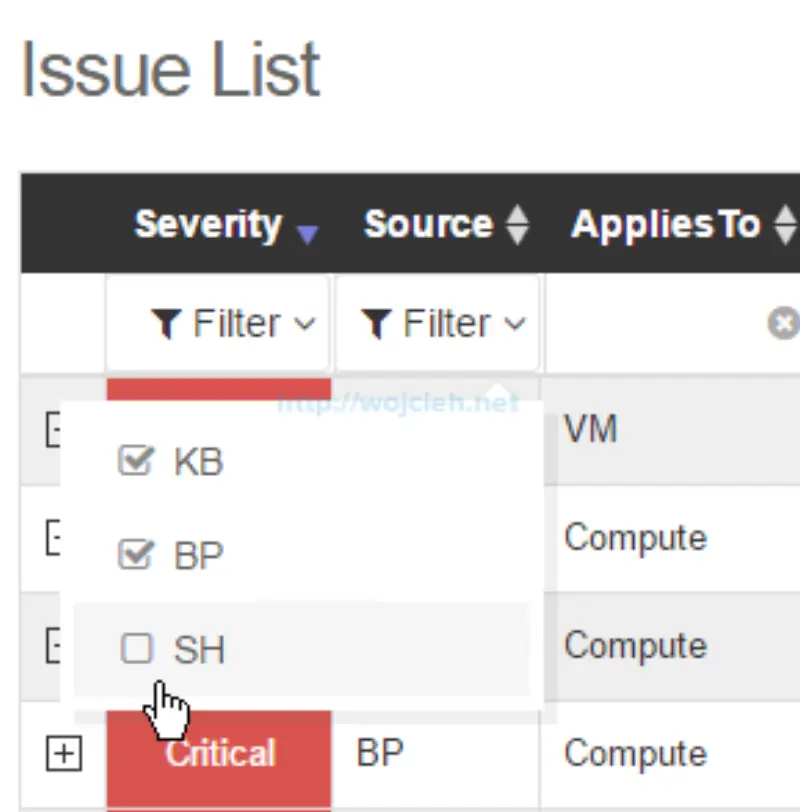
In Issue List view we simply see all issue categorized by severity. I find it really useful to remove filters per category and filter by keyword.
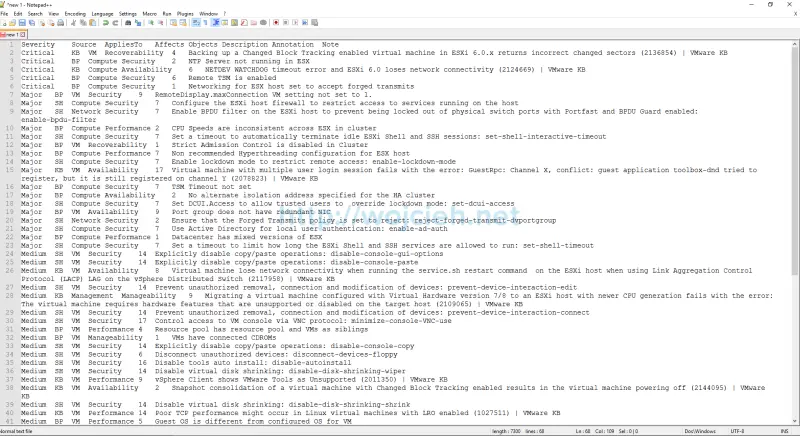
Another fantastic feature is Copy, CSV and PDF. Copy allows you to copy (of course, what else would it do 😀 ) and paste all results to clipboard and paste it later on to any editor.
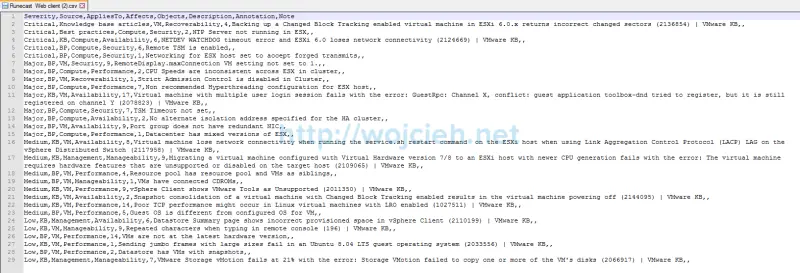
CSV allows you to quickly export to comma separated value file and then work on them in Excel.
PDF provides simple and quick export of report to pdf format.
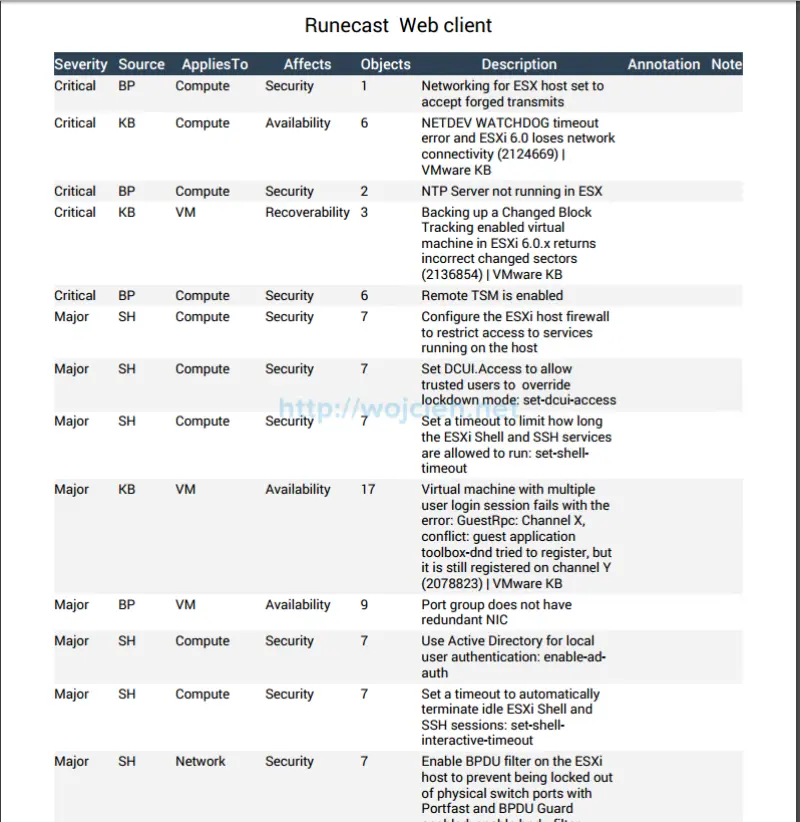
KBs discovered
First Critical Issue
Runecast Analyzer did fantastic job finding related things to my lab. First issue NETDEV WATCHDOG timeout error and ESXi 6.0 loses network connectivity (2124669)is as well in my environment.
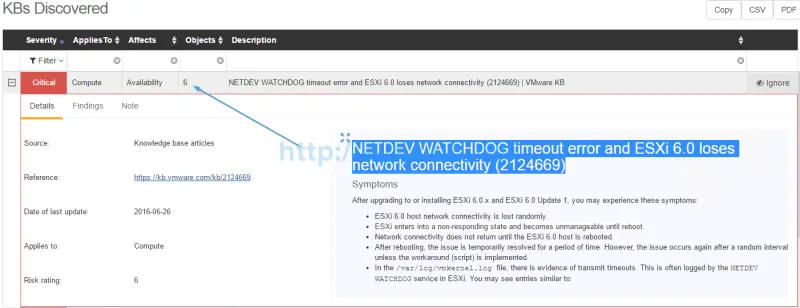
Note that affected objects count is 6 and I have 7 ESXi. Why not 7? KB relates to ESXi 6.0 Update 1 and one of the hosts is ESXi 6.0 Update 1b.
Second Critical Issue
Second issue found in my environment is as well related to ESXi patch level I am using - it is well-known CBT bug.
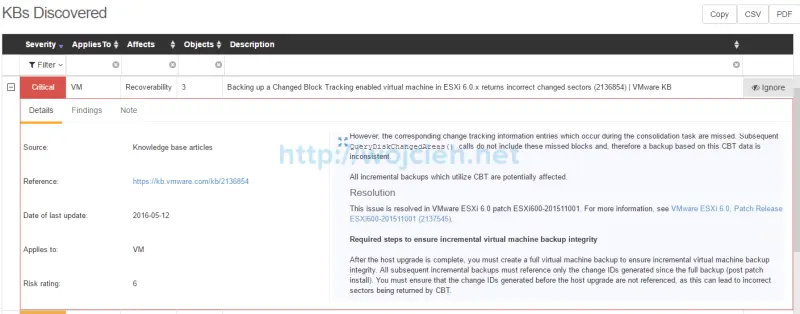
Of course I have more issues/KBs and I didn’t want to bore you to death with them.
Best Practices
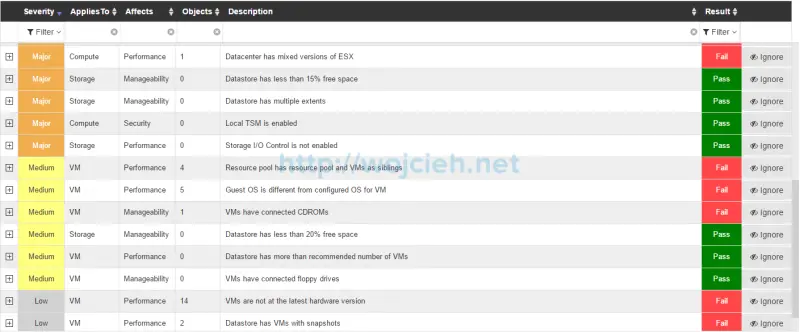
Best practices detected a lot of issues. I reviewed recommendations and from my experience perspective they are quite correct.
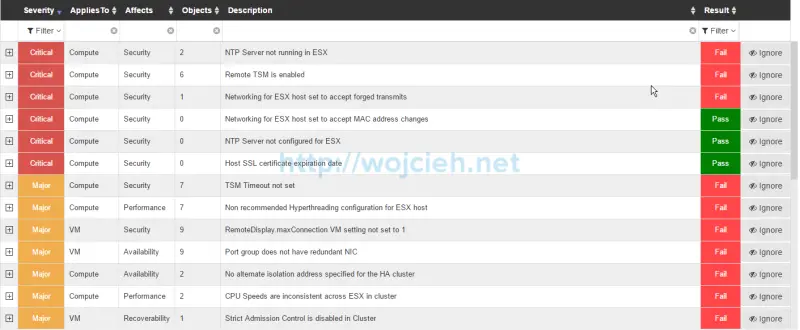
Security Hardening
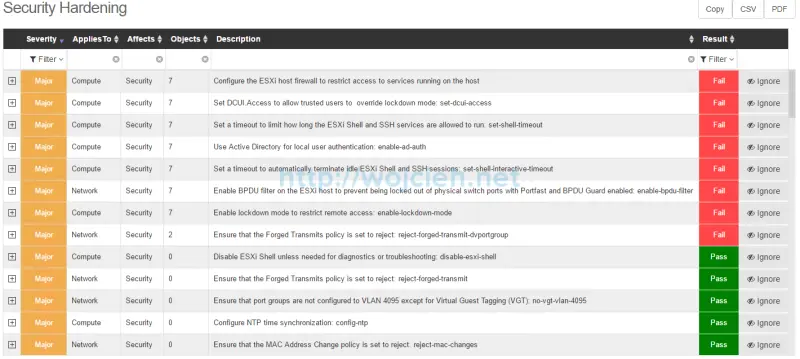
Same as above - I find all security hardening recommendations valid and they should be implemented. Hopefully your environment is better secured than my lab.
Summary
After spending few hours with Runecast Analyzer I am convinced that product is at least worth to test in your environment. As Runecast advertise it, its primary function is to scan your environment proactively and not reactively. So by having it in your environment you really can avoid a lot of issues. Of course if you will face unknown bug in your environment (and there is no KB released yet) that there is nothing you can do and to call VMware Support (and by the way they are superheroes!).
Here are companies who already decided to use Runecast Analyzer

To learn more about Runecast Analyzer follow link: https://www.runecast.biz/
This article was sponsored by Runecast.