In the second part of Auto Deploy configuration guide, we will continue with setup and we will boot ESXi.
vSphere Auto Deploy Software Depot - PowerCLI basic deployment
In order to provision ESXi hosts with Auto Deploy, we need to create Software Depot. In order to do it, you need to install PowerCLI. I am using latest version 5.5 which you can download from VMware website PowerCLI 5.5 Download link.
Connect to a vCenter server and start PowerCLI.
|
|
After successful connection, we have to add ESXi Offline Bundle ZIP file into the repository. But hey, first we need to download it. As always you can find it on VMware website, but I will provide direct URL to file - ESXi 5.5 Offline Bundle.
I placed it in following directory E:\SoftwareDepot\ and we add the repository using the following command in PowerCLI.
|
|

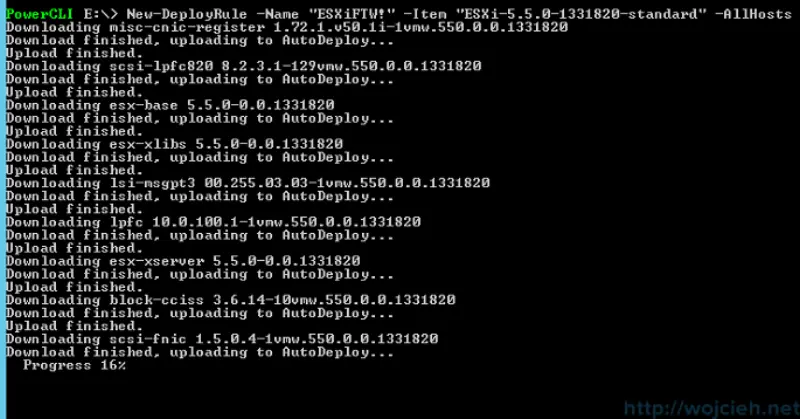
Now after creating Software Depot we can create first deployment rule
|
|
And as you see Image is imported into Auto Deploy.
After successful import, we just need to activate rule set by typing following command in PowerCLI.
|
|
As you see on screenshot ESXi is booting using Auto Deploy.

vSphere Auto Deploy Host Profile
After successful boot from the network, we have three new ESXi hosts connected to vCenter.
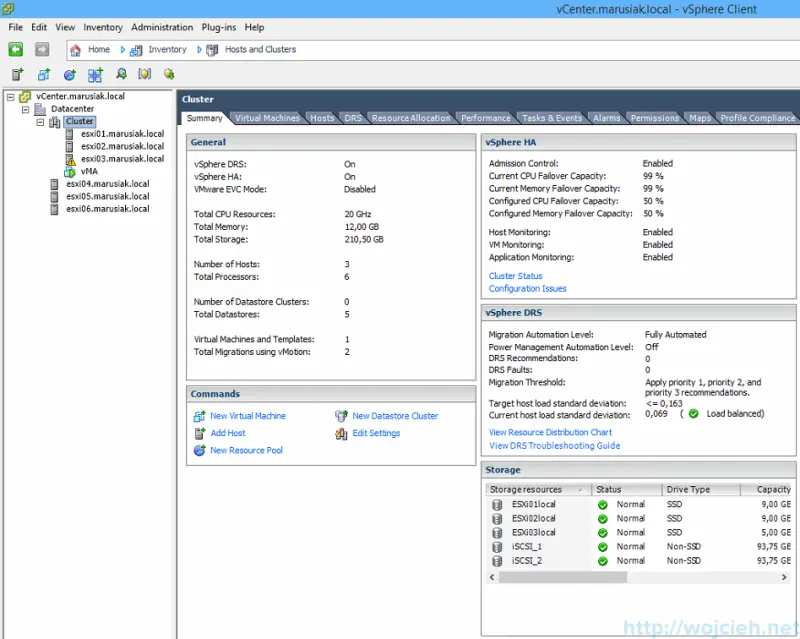
We see that deployment works fine but to make this easier and less time-consuming we will use Host Profile. Host Profile is captured configuration of ESXi hosts (we can call it a template or golden image) which can be applied to other ESXi hosts to have consistent and standardized configuration in the environment.
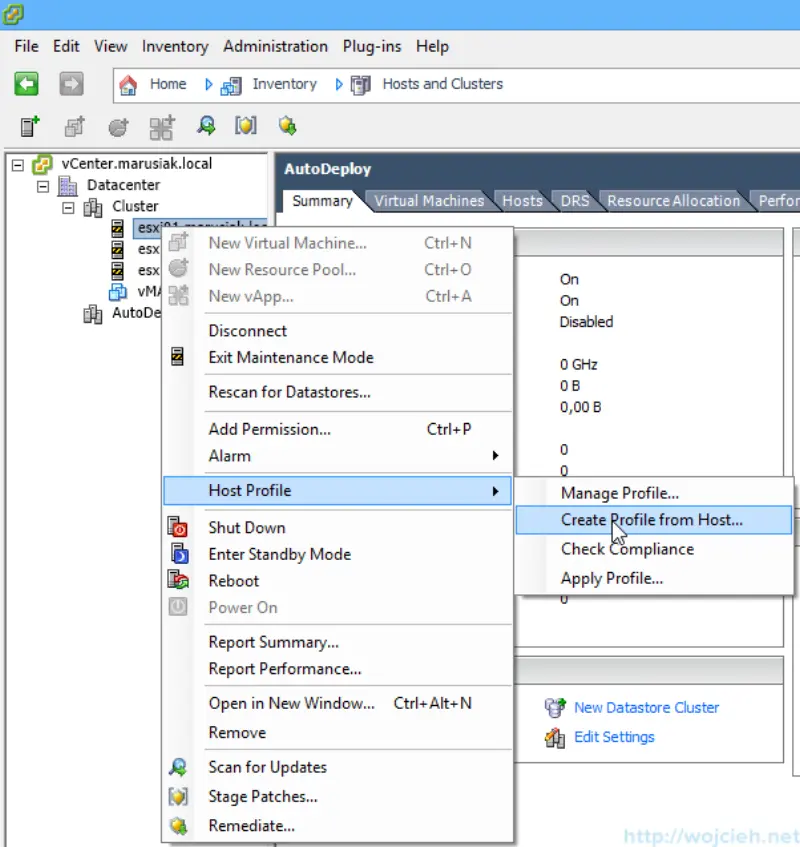
- Select ESXi hosts which are already configured so when you will apply host profile to Auto Deployed servers they will be already configured. In order to do it navigate to Host and Clusters and select host. Click Host Profile and Create Profile from Host.
- Provide a name for host profile and/or description and click Finish.
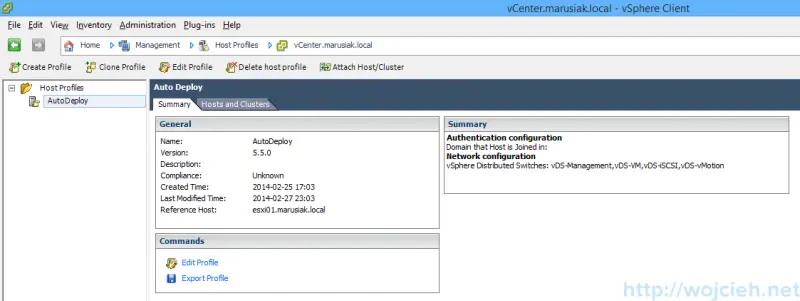
- Go to Host Profiles and you will see that profile was created.
vSphere Auto Deploy Software Depot - PowerCLI advanced deployment
In order to do more advanced and more automated deployment, we have to make adjustments in Software Depot. In just a few minutes we will create rules which will allow us to boot ESXi using Auto Deploy with enabled HA agent. The host will be added to the cluster and Host Profile will be applied.
Let us first drop previously created rule to avoid any confusion by typing
|
|
In order to check if any rules are still present use following command
|
|
- We add Software Depot - just VMware Offline Bundle.
|
|
- We add HA Software Depot from vCenter.
|
|
- We clone existing depot to add HA features. If you will be asked for vendor type it. In my case, it is VMware, Inc.
|
|
- We add HA features into an ESXi_5.5 profile.
|
|
- It is good to export newly created profile into Offline Bundle to store it locally after all changes we did. In order to do that use following command.
|
|
- We will create deployment rule. Where: -name is Rule name -item is Image Profile name, AutoDeploy is Host Profile name and Cluster2 is cluster name in vCenter. -Pattern might be vendor ID or IP range.
|
|
- Now we need to activate rule by typing.
|
|
-
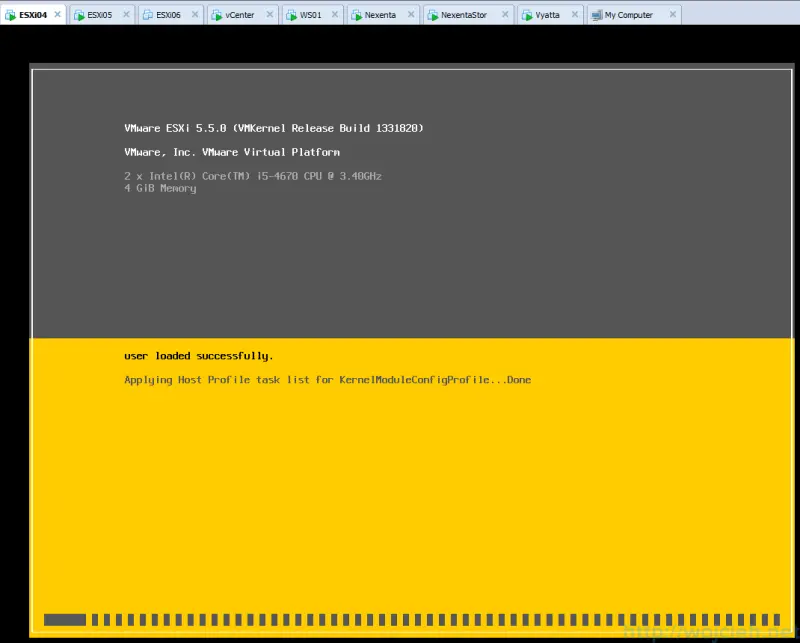
As you see on screenshot during boot Host Profile settings are applied.
-
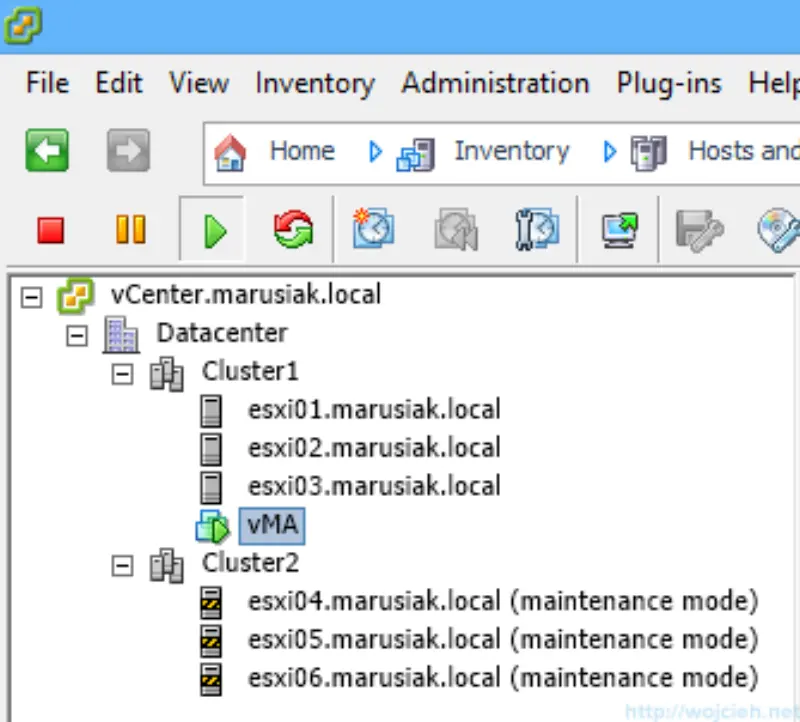
All three ESXi hosts are booted using Auto Deploy.
-
In order to complete our setup, we need to update Answer File.
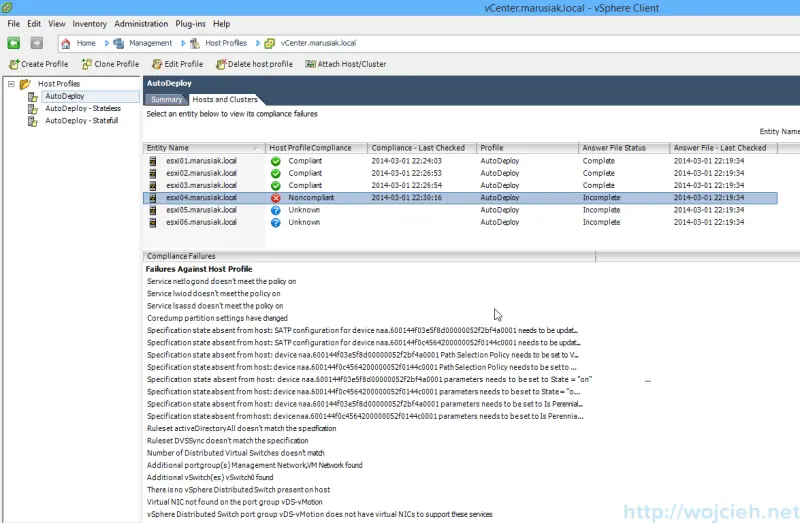
-
Click on the host and select Update Answer File.
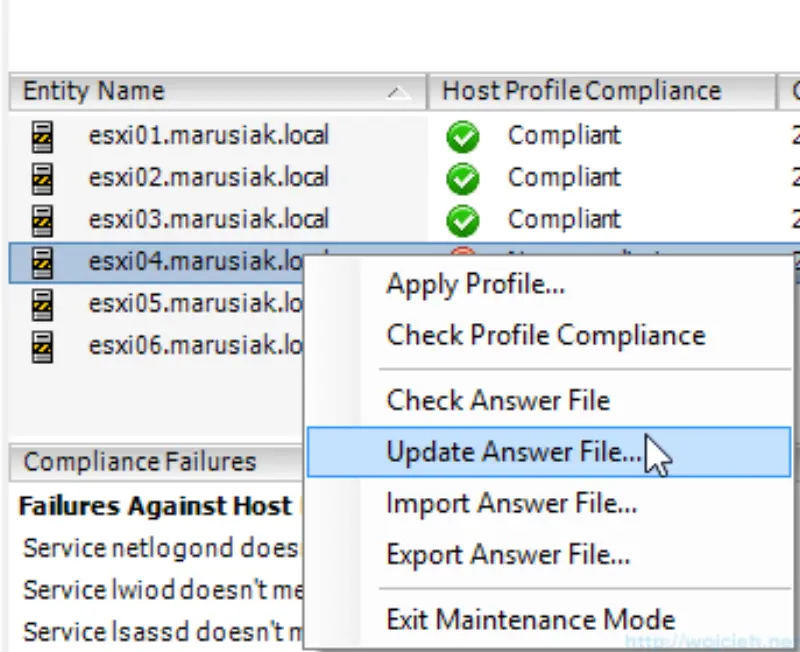
-
Fill all missing information
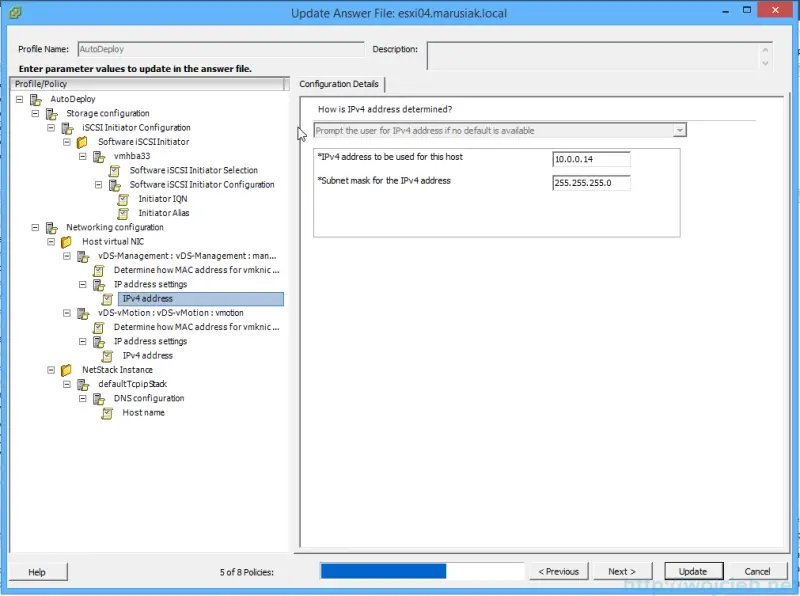
and apply Host Profile.
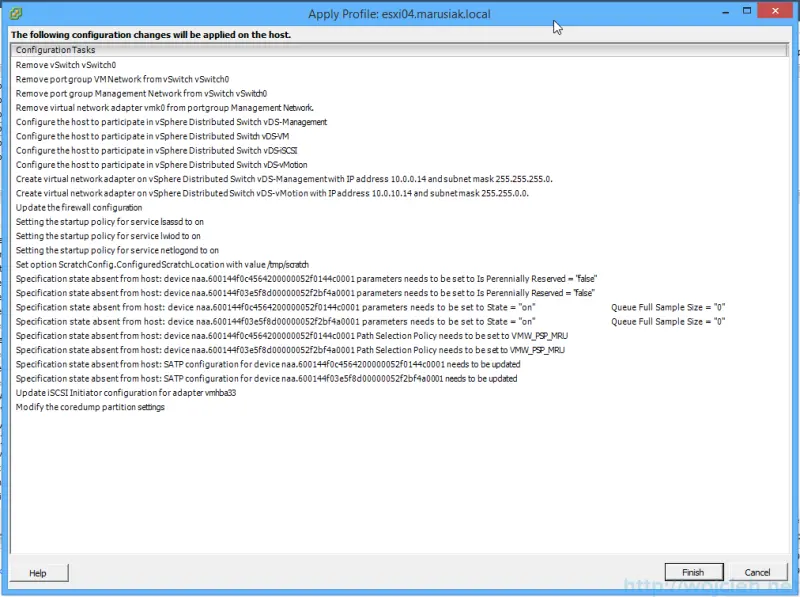
-
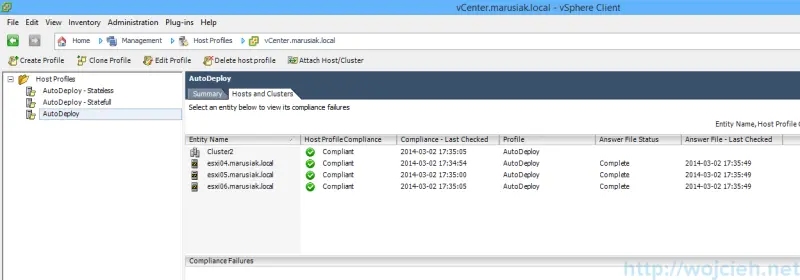
As you see on screenshot Cluster2 is compliant with host profile.
Stateful caching vs Stateless caching
Before we will finish the post with Cherry on Top let me explain what is stateful and stateless caching.
Stateful means that ESXi is deployed using Auto Deploy and image is saved to hosts internal storage. It can be a traditional hard drive or USB disk. First boot is initiated using network boot and image is deployed locally. Boot order on a host is set to boot from a network during first boot and later on, disk should be set to first. After other reboots disk is used to boot ESXi.
Stateless means that ESXi is deployed using Auto Deploy and image is cached to local USB. The host is using network boot, boot order is set to network first.
vSphere Auto Deploy - Stateful ESXi
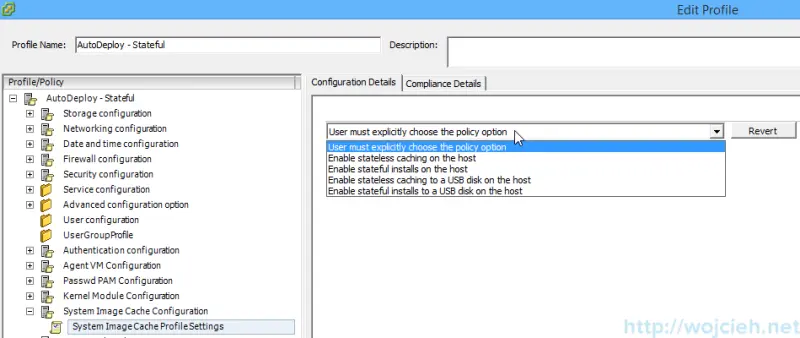
In order to deploy Stateful ESXi, we need to select in section SystemImageCacheProfileSettings several settings. First, we select Enable stateful installs on the host, second thing is to give arguments for the first disk. In our case local is correct setting - you can provide your own parameters. We want as well to overwrite VMFS on existing disk.
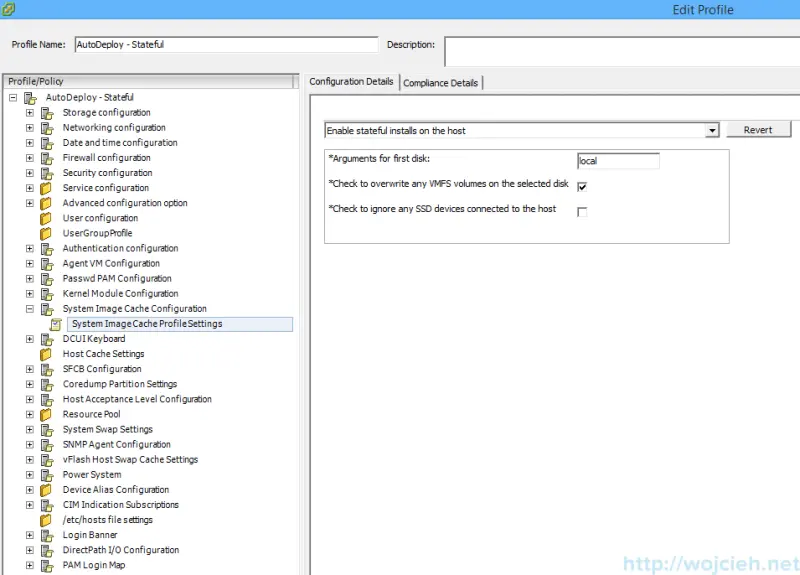
Here we see what changes will be applied to ESXi.

And we have summary after Host Profile was applied.
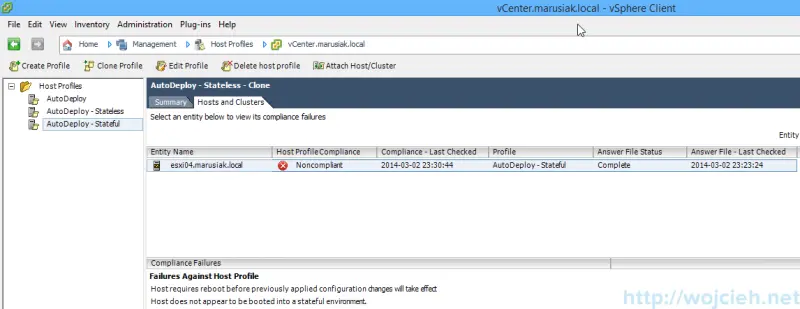
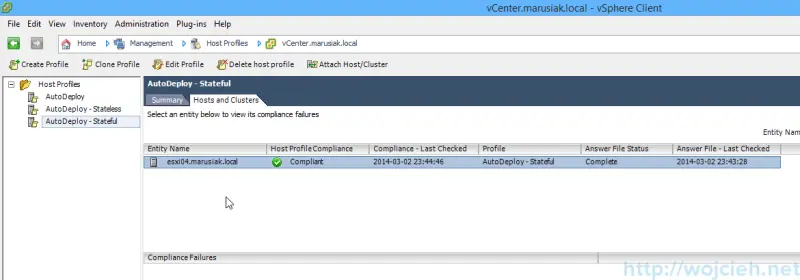
We are compliant 🙂
vSphere Auto Deploy - Stateless ESXi
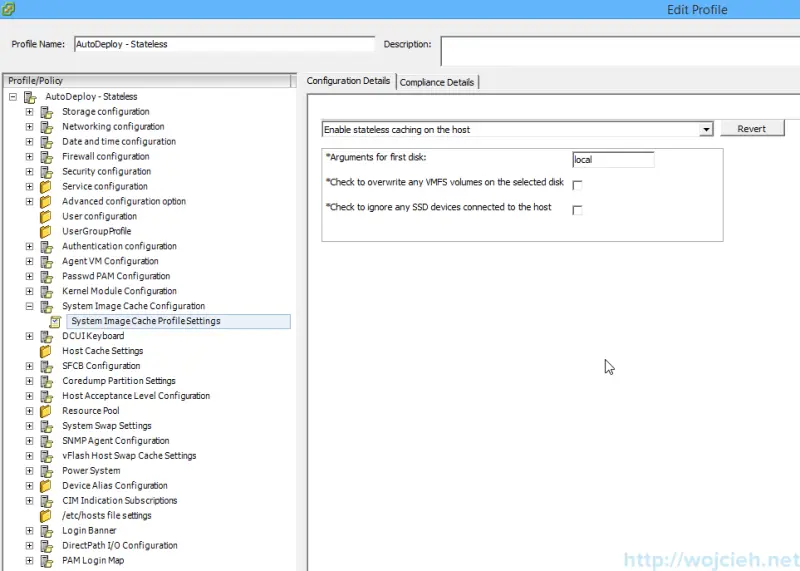
In order to deploy Stateless ESXi, we need to enable it in section SystemImageCacheProfileSettings. First, we select Enable stateless caching on the host, second thing is to give arguments for the first disk. In our case local is correct setting - you can provide your own parameters.
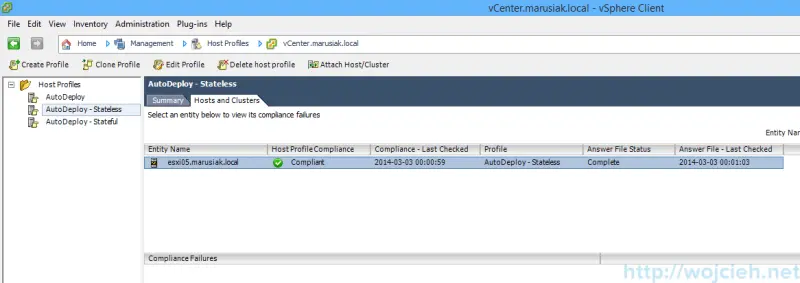
After applying host profile and reboot, our host is compliant.
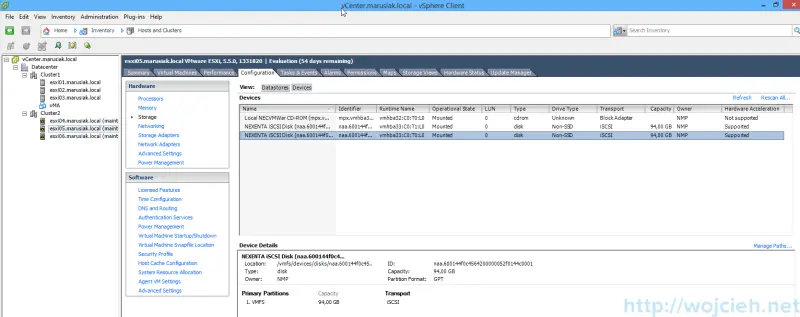
How do we check if it is really cached and not boot from disk? Simply we can see in host settings that it has only two iSCSI disks and CD-ROM. I removed as well disk from ESXi4 on purpose.
