With new VMware vSphere version 6 much more people choose vCenter Server Appliance instead of vCenter on Windows because now it has same limits. However there are still organisations which prefer to use vCenter Server on Windows Server. In first post - VMware vCenter Server 6 on Windows Server 2012 R2 with Microsoft SQL Server 2014 - Part 1 I will describe Microsoft SQL Server 2014 preparation and installation. In next post I will continue with database creation and vCenter Server installation.
Software versions
As usual below you will find software version I am using when writing this post.
Operating System - Windows Server 2012 R2 Standard
Database - Microsoft SQL Server 2014
vCenter Server 6 - vCenter Server 6.0.0b released 07.072015, build 2800571
Software minimal requirements
Windows Server 2012 R2 requirements - https://technet.microsoft.com/en-us/library/dn303418.aspx
Microsoft SQL Server 2014 requirements - https://msdn.microsoft.com/en-us/library/ms143506(v=sql.120).aspx#pmosr
vCenter Server 6 requirements - http://www.vmware.com/files/pdf/techpaper/VMW-vCTR-SRVR-Deployment-Guide-6-0.pdf page 6
By my calculation you need for the smallest environment (lab installation) we will need 2 vCPU, 12GB of RAM and about 140GB of storage and I will assign those resources to virtual machine.
Windows Server preparation
Even though this post describes installation for smallest environment which will be used as lab I want to show you how it should be installed in professional way. This involves correct disk alignment and SQL Server 2014 configuration.
I used following disk layout as described as in TechNet document http://blogs.technet.com/b/dataplatforminsider/archive/2012/12/19/disk-and-file-layout-for-sql-server.aspx.
- Disk C: OS - 60 GB
- Disk E: SYSDB - 10 GB
- Disk F: Tempdb - 10 GB
- Disk G: Tempdb logs - 10 GB
- Disk H: User databases - 10 GB
- Disk I: User DB logs - 10 GB
- Disk J: Database backup - 10 GB
- Disk K: vCenter Server binaries -20 GB
Another thing that we have to do before installation is enabling of .Net Framework 3.5 Service Pack 1. We can do it simply from PowerShell by executing following command. Start Powershell console as Administrator and connect Windows Server 2012 R2 to CD Drive.
|
|
Wait for installation to finish and start SQL Server installation.

Microsoft SQL Server 2014 installation
- Launch SQL Server installation and select first option.

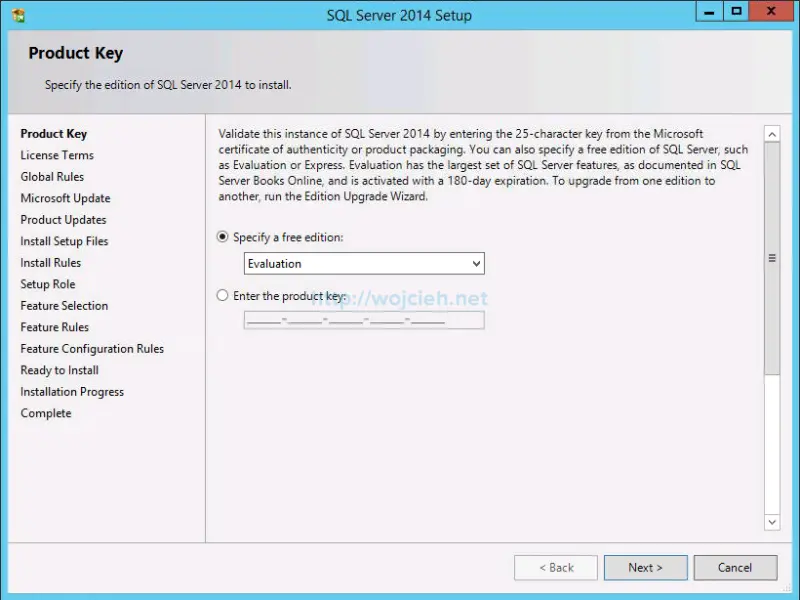
- Select instance to install. I will use this SQL Server as evaluation but if you have product key enter it below.
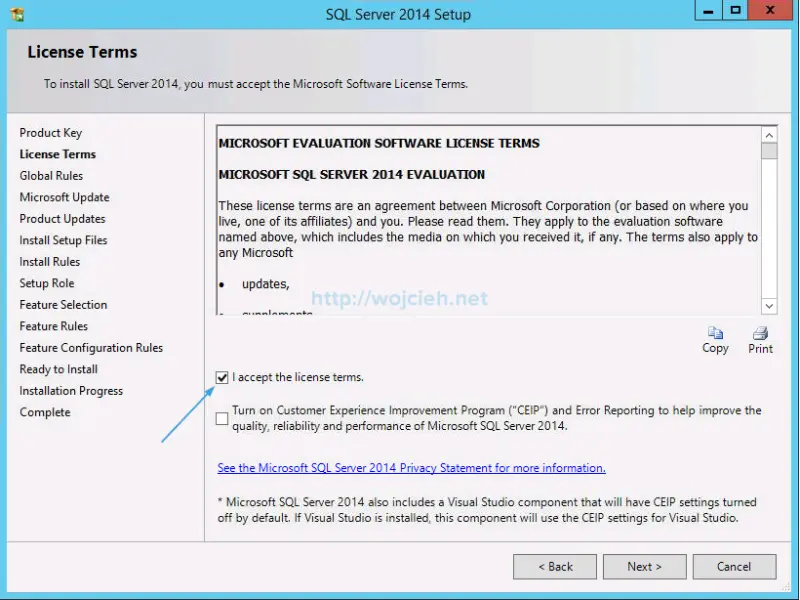
- Accept license terms and click next.
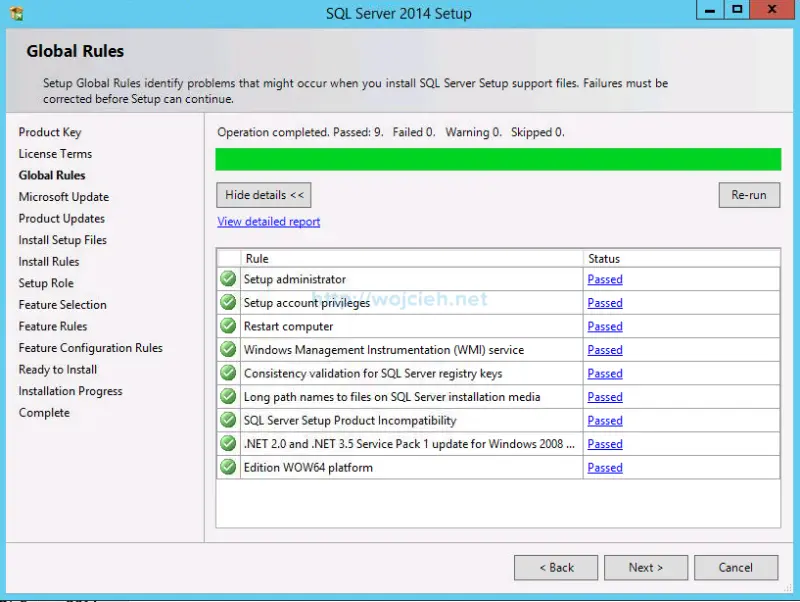
- On the next screen you will see simple checkup if all components needed for setup are installed.
- Choose if you want to use Microsoft Update to check for updates.
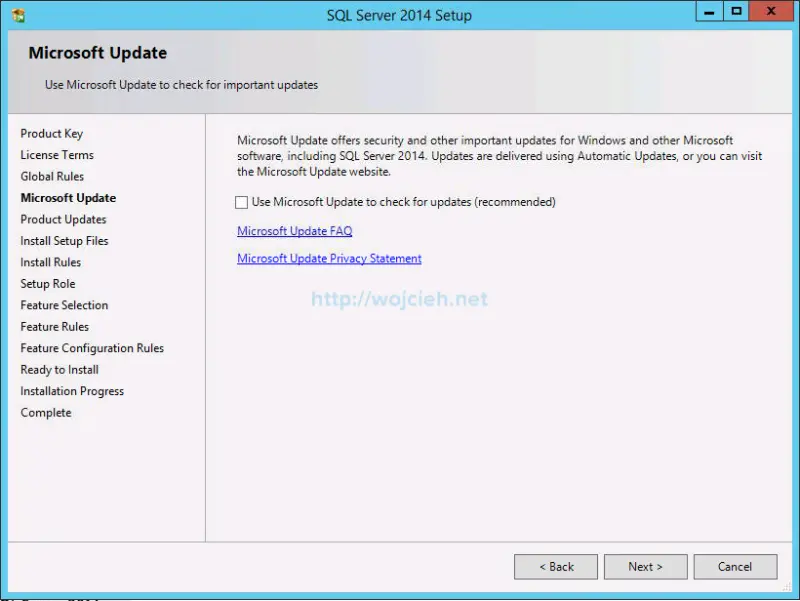
- Wait for SQL Server installer installs binaries.
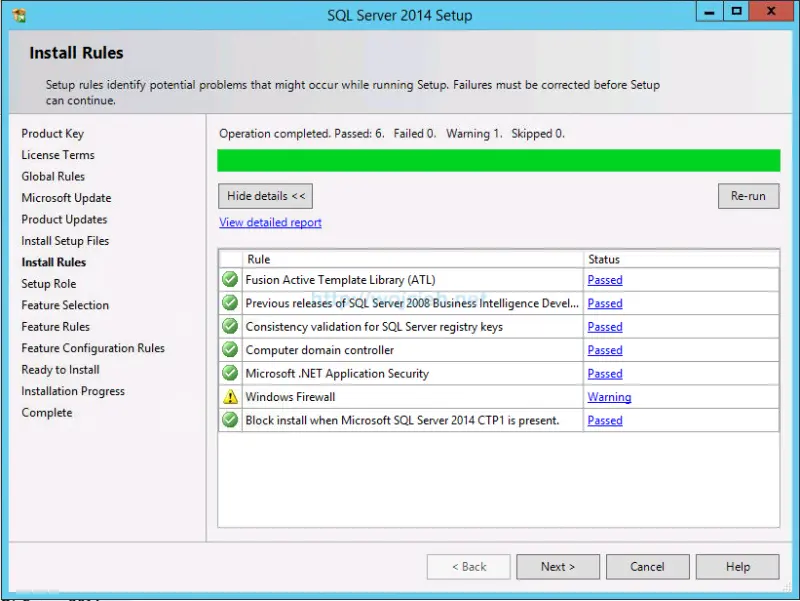
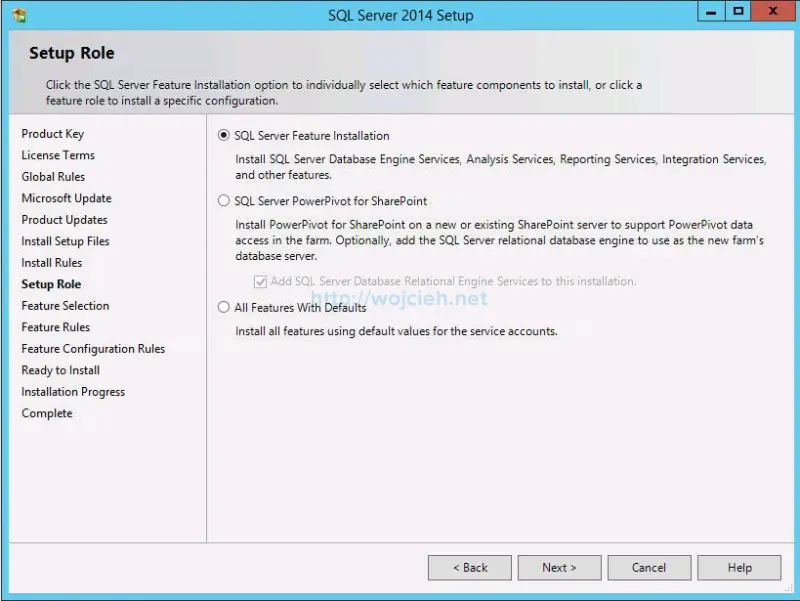
- On next screen we need to choose which features will be installed. Choose SQL Server Feature Installation.
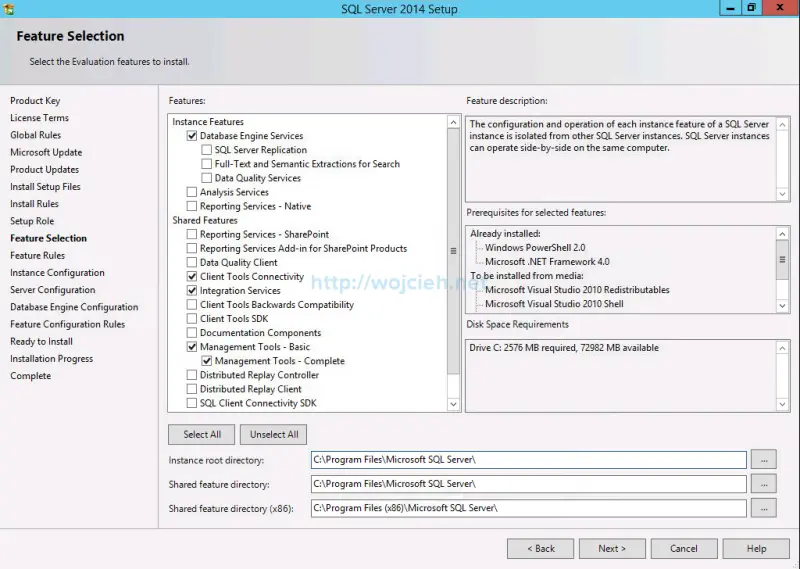
- Select following features:
- Database Engine Services
- Client Tools Connectivity
- Integration Services
- Management Tools – Basic
- Management Tools – Complete
- Specify the name and instance ID for SQL Server. I choose default one - MSSQLSERVER.
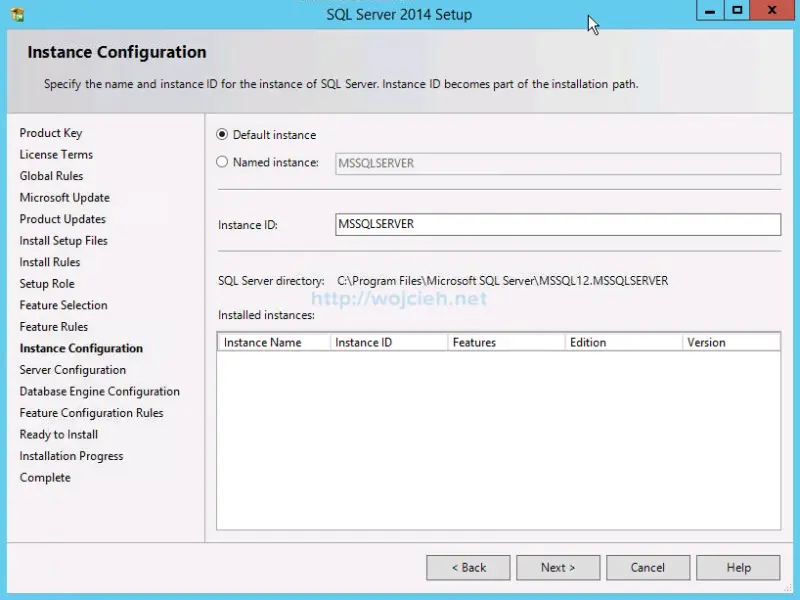
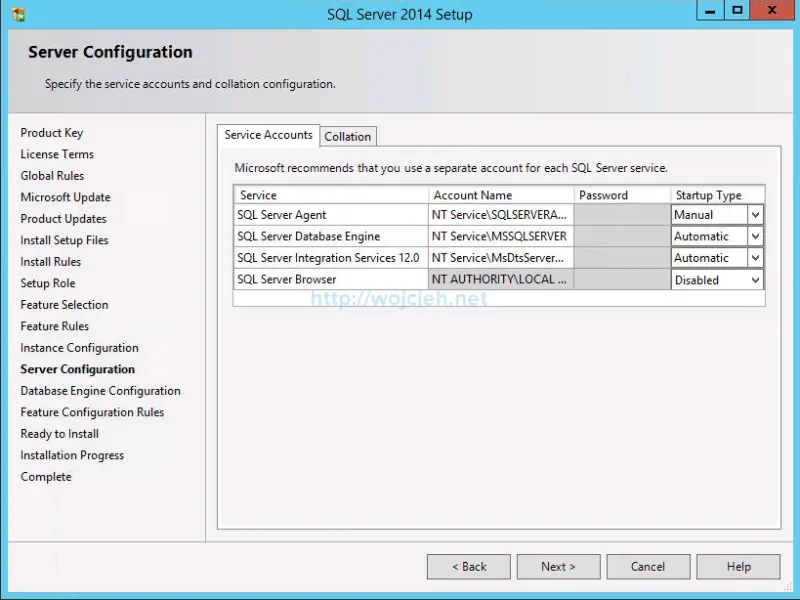
- In Server Configuration section - Service Accounts tab leave defaults.
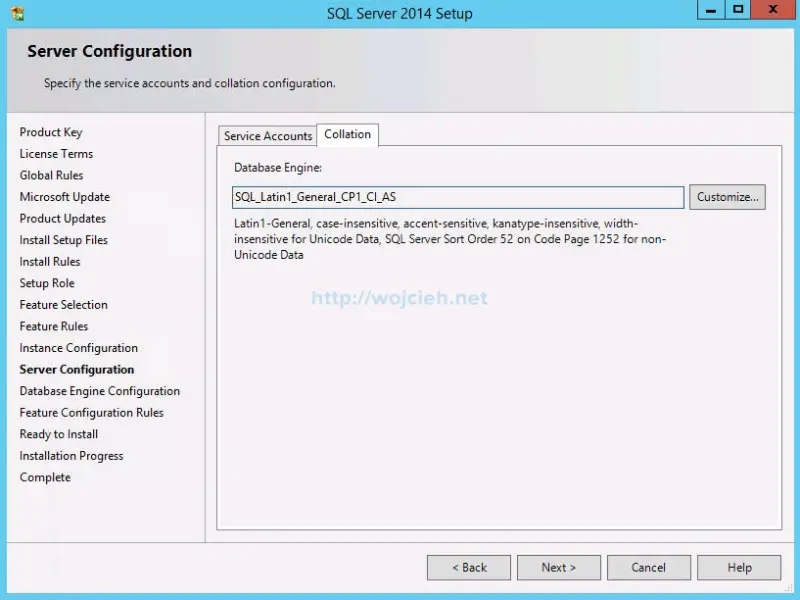
- Switch to Collation to check if you have **SQL_Latin1_General_CP1_CI_AS **collation.
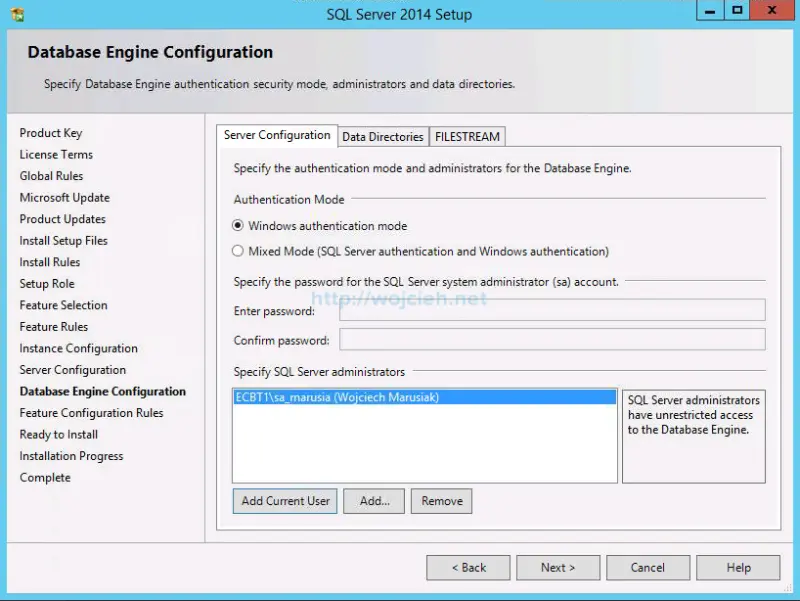
- Click next and first we will configure authentication mode and SQL Server administrators. I suggest to use Windows authentication mode because you can specify Active Directory group instead of local SQL Server accounts. I added my account to admin group but it might be that someone else in your organization will be SQL Server administrator.
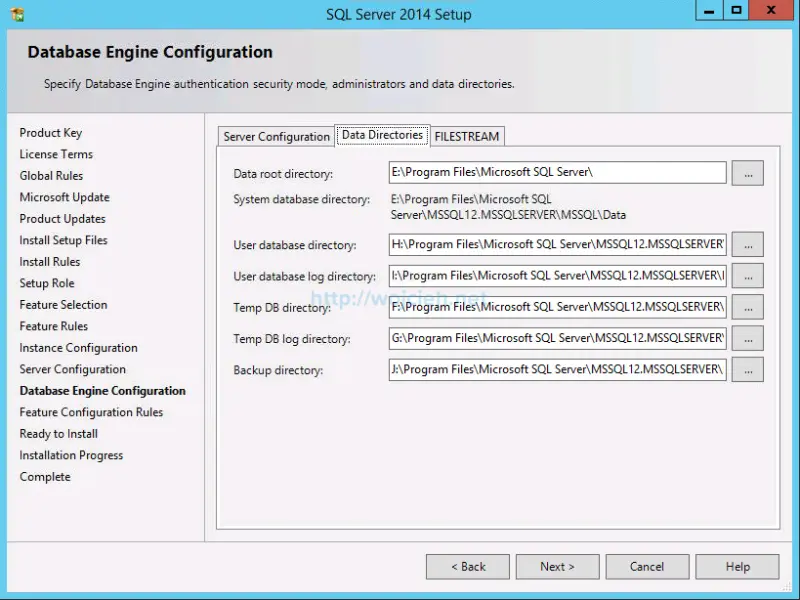
- Switch to Data Directories tab. I changed pretty much every directory to avoid filling up database disk by transactional logs. I suggest you do the same to ensure smooth SQL Server operation.
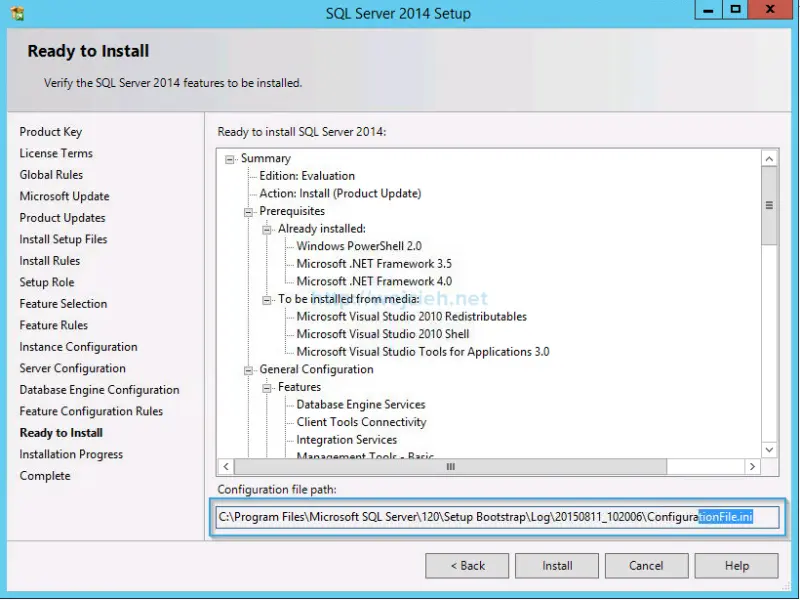
- Click Next and review settings you provided. Please bare in mind that you can use ini file to install new services with your setting you just provided. Simply start setup.exe from iso file and point to ini file.
Setup.exe /ConfigurationFile=MyConfigurationFile.INI
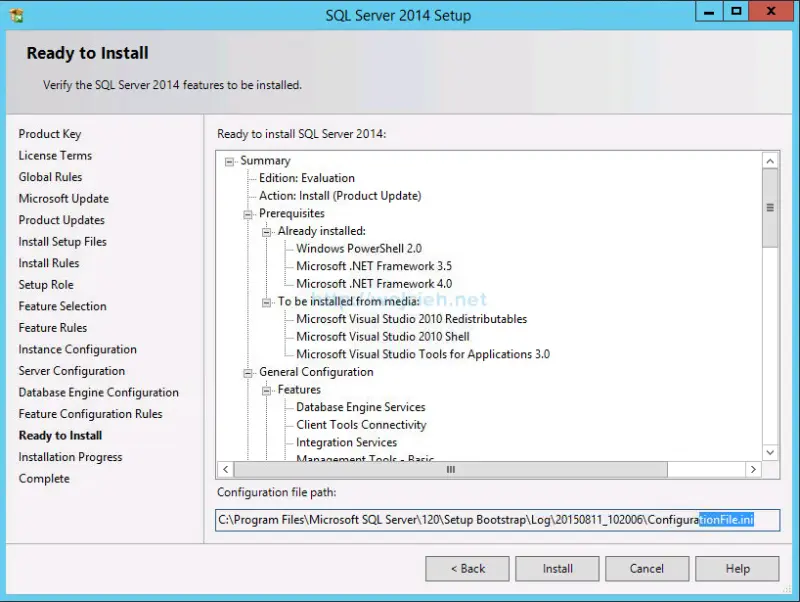
14. Click Install and wait for installation to finish.
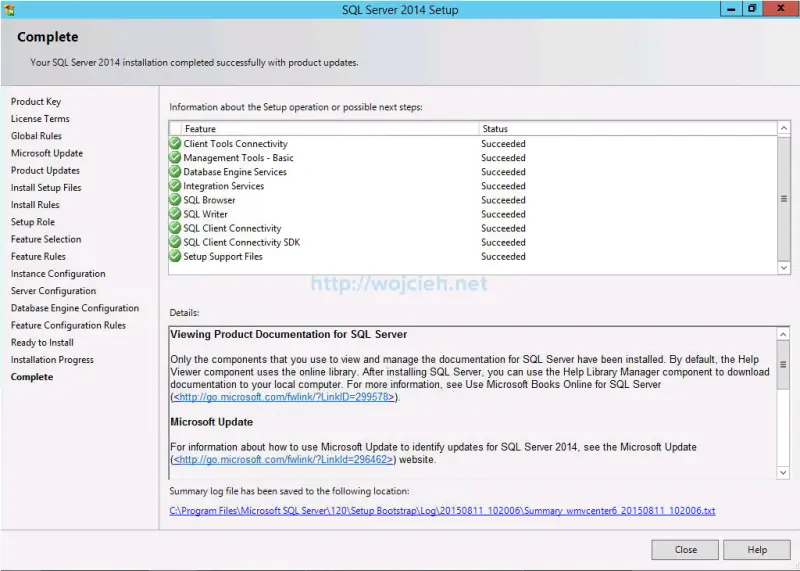
15. Success!
Next steps
In next post I will guide you through vCenter Server database and ODBC creation. Here is the link to next part of article VMware vCenter Server 6 on Windows Server 2012 R2 with Microsoft SQL Server 2014 – Part 2.