vCenter Server Appliance 6 (vCSA) configuration
In my earlier post vCenter Server Appliance 6 (vCSA) installation I guided you through vCenter Server Appliance 6 installation. Next step is to configure our Appliance so we can use it in our environments.
vCenter Server Appliance 6 configuration
We will cover configuration of several components:
- vCenter Server Appliance 6 configure SSO to authenticate with Active Directory
- vCenter Server Appliance 6 join Active Directory
- Assign permission to Active Directory group in vCenter Server Appliance 6
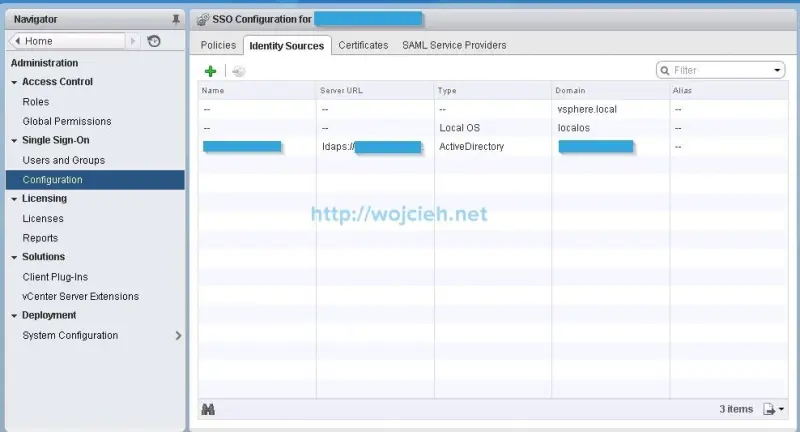
vCenter Server Appliance 6 login address
To login use simpler to remember IMHO web address https://FQDN/vsphere-client or and use username and password setup during installation.
vCenter Server Appliance 6 configure SSO to authenticate with Active Directory
Version 6 of changed a bit of user interface. In earlier version we had two URLs to manage appliance. One for vSphere management itself and second one for Appliance configuration. In version 6 we have only one place to manage whole appliance.
I always start configuration of Appliance with SSO configuration.
-
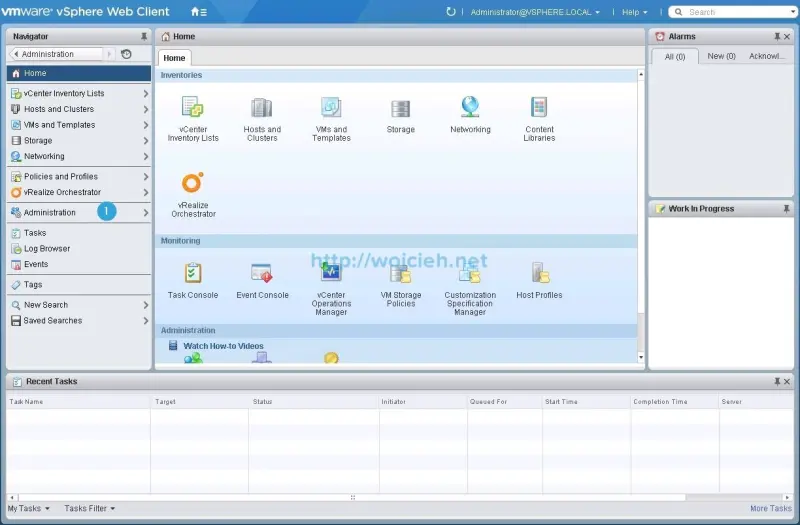
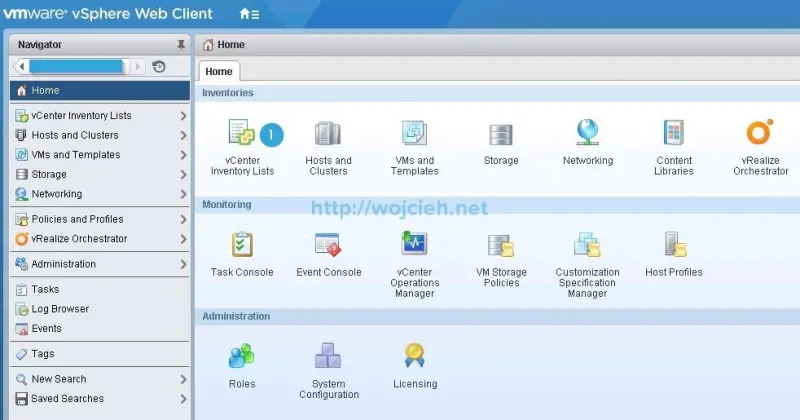
On Home screen click Administration.
-
In Navigation panel click **Configuration **and later on green plus.
-
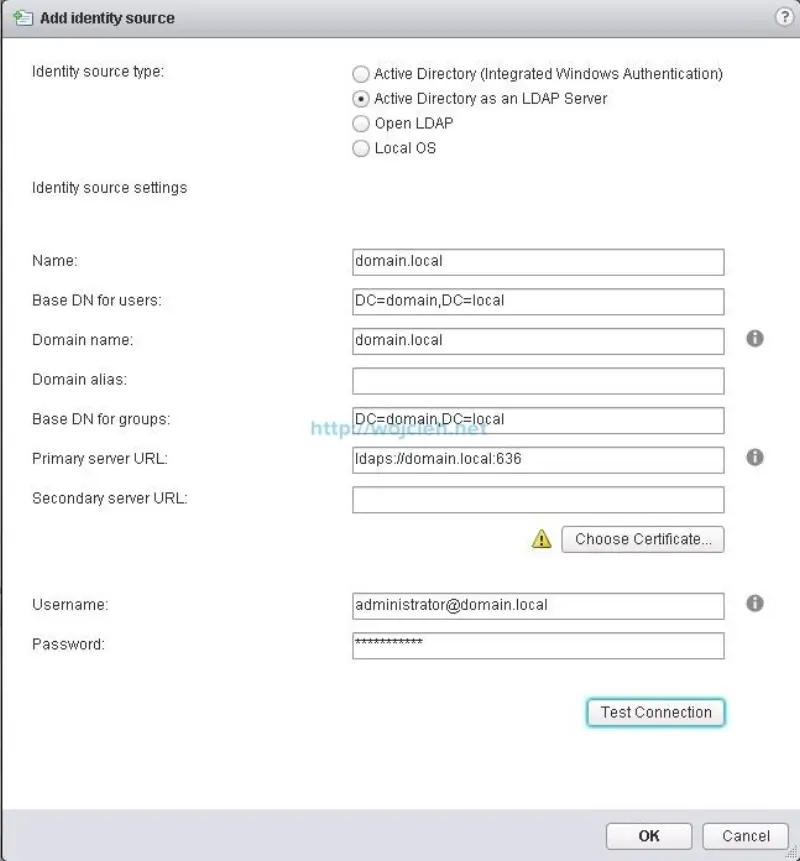
In the Add identity source window fill all information.

-
Identity source type - I selected Active Directory as an LDAP Server
-
Name - provide your domain name. For example: domain.local
-
Base DN for users - it is distinguished name of OU or container from where you want to perform search for users. If you want whole Active Directory domain to be queried use only domain component. For example: DC=domain,DC=local
-
Domain name - provide your domain name.
-
Domain alias - not required field.
-
Base DN for groups: same as above. I selected DC=domain,DC=local.
-
Primary server URL - provide address of LDAP server. For example: ldap://your.domain:389 if you wan to use standard connection or ldaps://your.domain:636 if you wish to use SSL connectivity. When you use ldaps you are required to import certificate into vCenter Server Appliance.
-
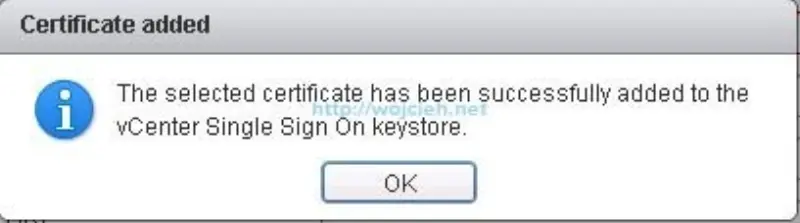
Choose Certificate - used only if ldaps is selected in previous point. Select valid certificate and click Open. If you have correct certificate you will see this message.
-
Type username who from you Active Directory domain.
-
Type password.
-
Click Test Connection. If all information you provided were right you will see this message.

-
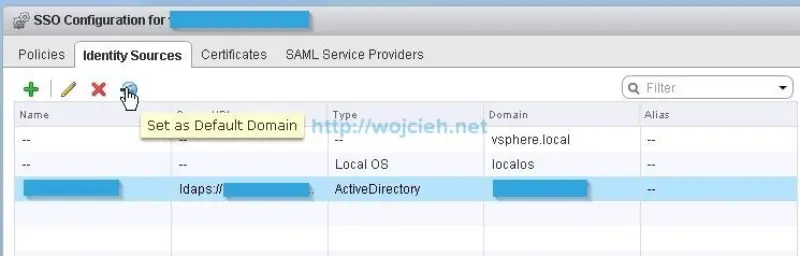
Click Ok and your Active Directory should be listed as Identity Sources.
-
Here is summary of settings in earlier window.
-
Next step is to choose your Identity Source as default domain. Simply highlight your domain and click icon.
-
Click Yes.

vCenter Server Appliance 6 join Active Directory
After Single Sign-On configuration we now can join vCenter Server Appliance to Active Directory.
- Navigate to **System Configuration **and click it.
- Click on your vCenter Server Appliance.
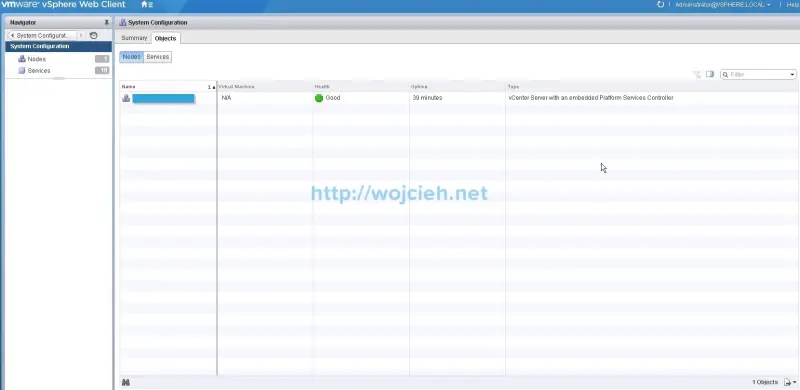
- Switch from Summary tab to Manage tab.

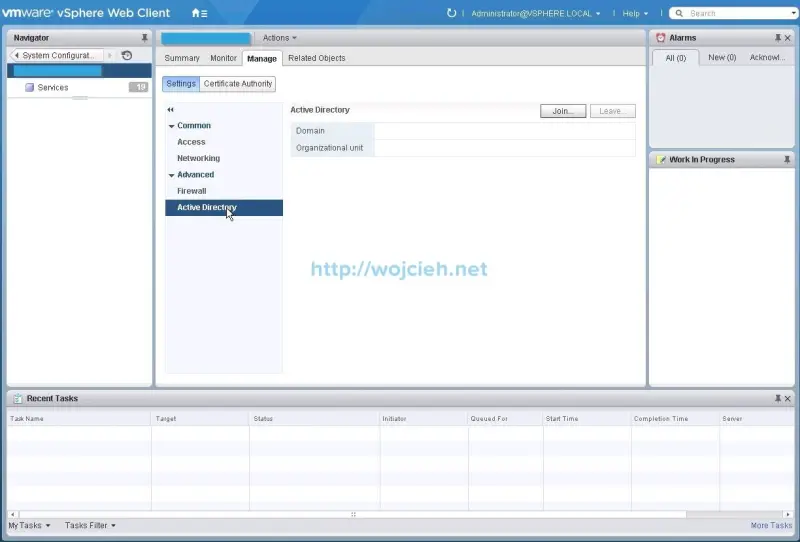
- On Manage tab click **Settings **and select Active Directory.
- Click Join and new window will be open. Fill all information and click ok.
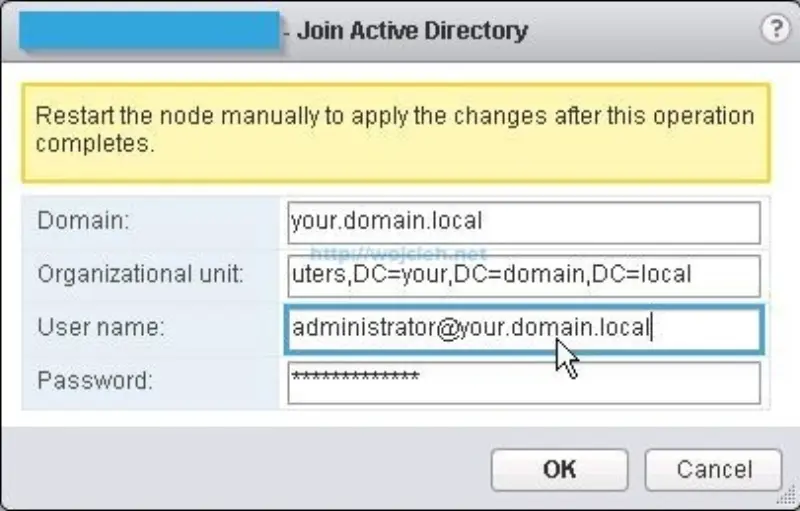
- Domain - simply put your domain
- Organizational unit - optionally provide it distinguished name. For example: CN=Computers,DC=your,DC=domain,DC=local
- User name - username in upn format. For example username@your.domain.local
- Password
- Progress of joining Active Directory might be observer in Recent Tasks.

- Unfortunately there is no information if you joined Active Directory domain or not. Reboot Appliance and navigate to settings again and you will see if it was successful.
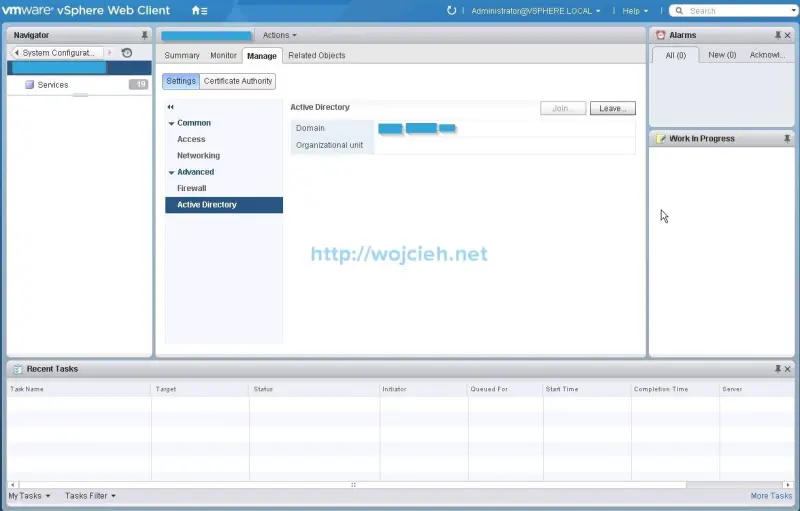
- After joining Active Directory reboot appliance.
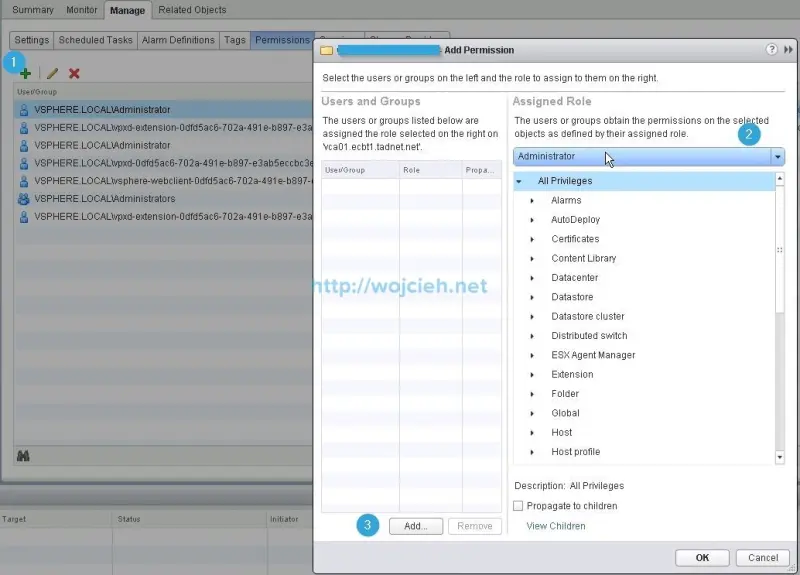
Assign permission to Active Directory group in vCenter Server Appliance 6
Last step will be to add group from Active Directory and assign administrator permissions in vCenter.
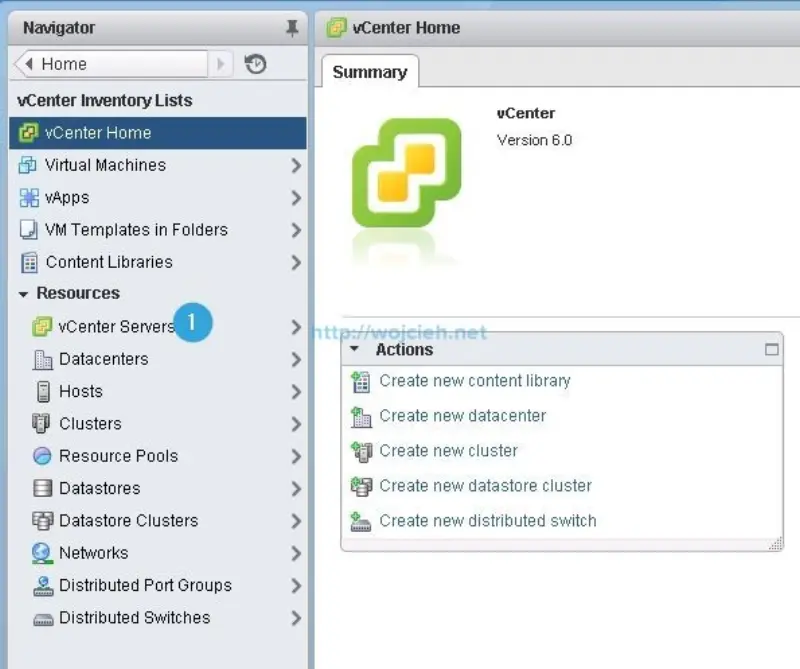
- On Home Screen click vCenter Inventory List and click it.
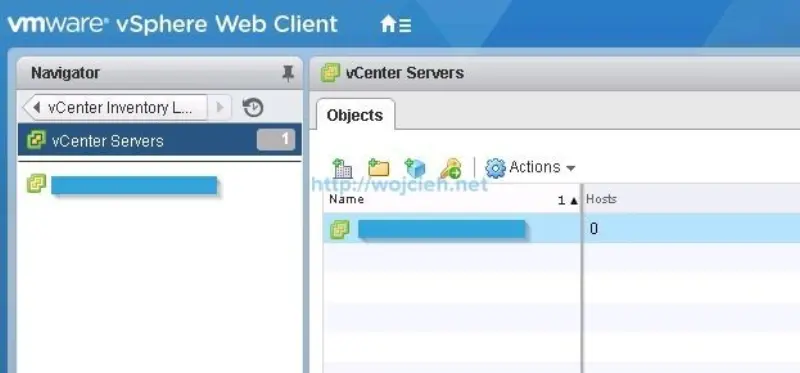
- Click vCenter Servers.
- Select your vCenter Server.
- Switch from Summary tab to **Manage **and click Permissions.
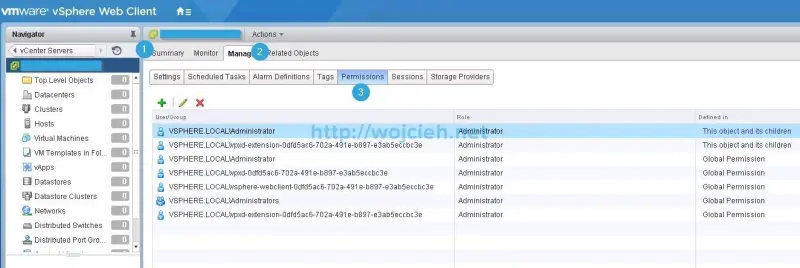
- Click green plus icon, select desired role (in my case Administrator) and click Add.
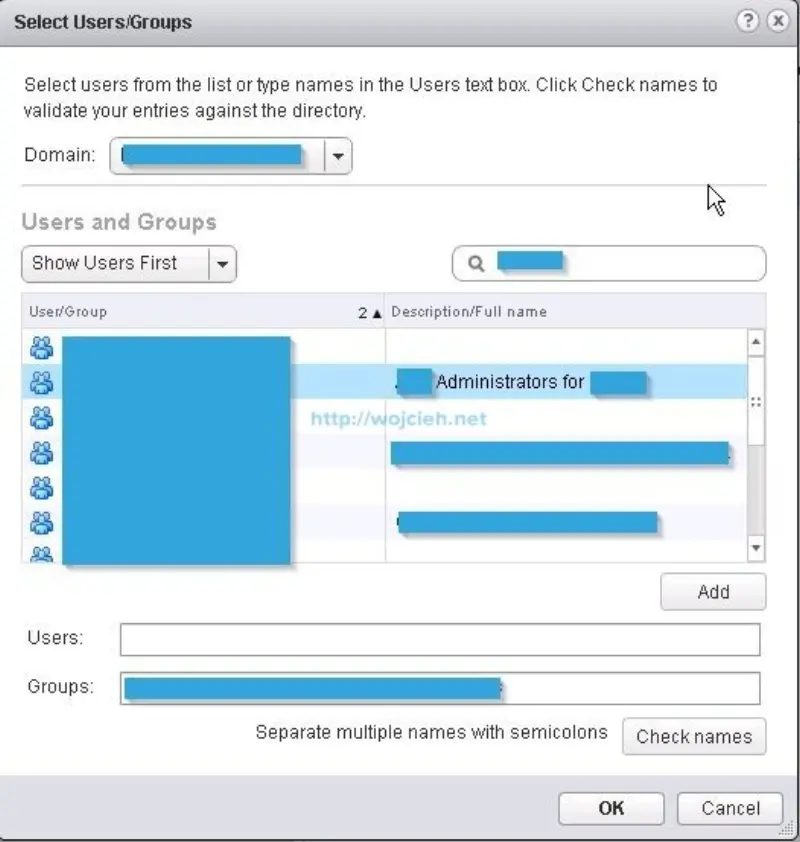
- Once you clicked Add you seen that your Active Directory domain is pre-selected as default identity source. Use search field to find your username or group you wish to add. In my case it is group.
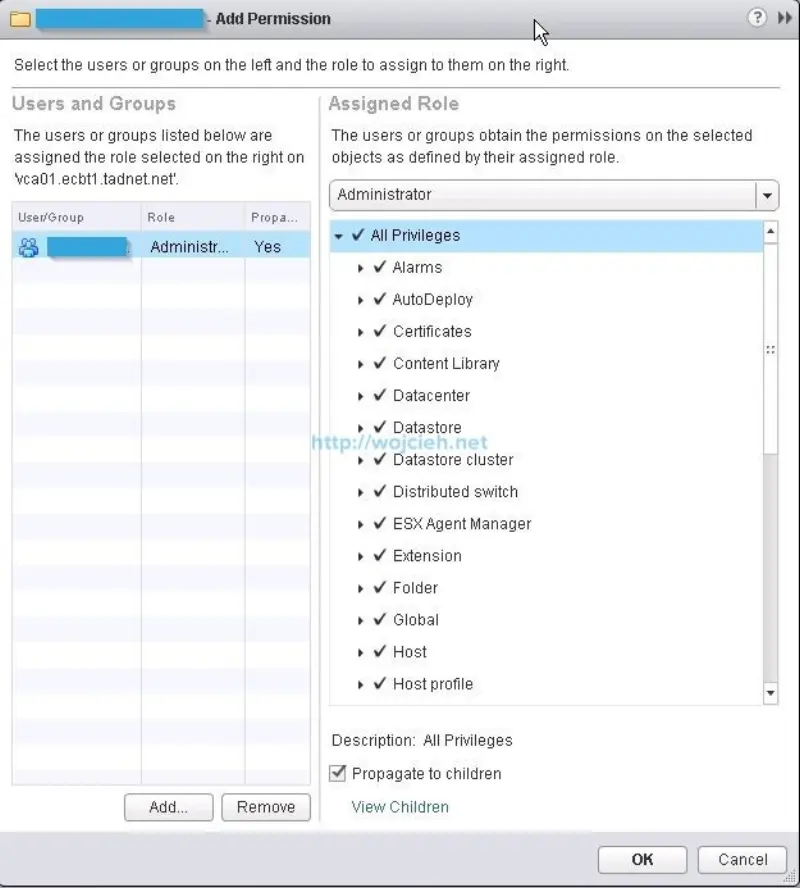
Click OK to go ahead. - Select Propagate to children and click OK.
- Test if it is working by logging out and logging back again with domain credentials.
Summary
This concludes configuration of vCenter Server Appliance 6. If you have more questions about appliance configuration feel free to contact me.