In the second post of vCenter installation on Windows Server 2012 R2 with Microsoft SQL Server 2014, I will cover vCenter Databases creation and ODBC connectivity.
I used ISO VMware-VIMSetup-all-5.5.0-2183112-20140901-update02.iso which translates to the following version of vCenter Server 5.5 Update 2b, released 09 OCT 2014 with build number 2183111.
Microsoft SQL Server 2014 configuration
- Open SQL Server 2014 Management Studio and authenticate with username and password.
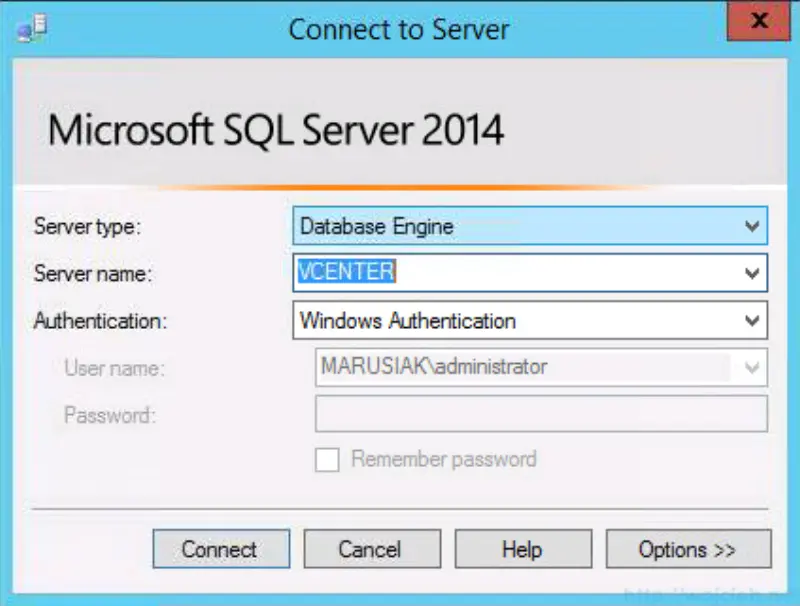
- Provide username and password.
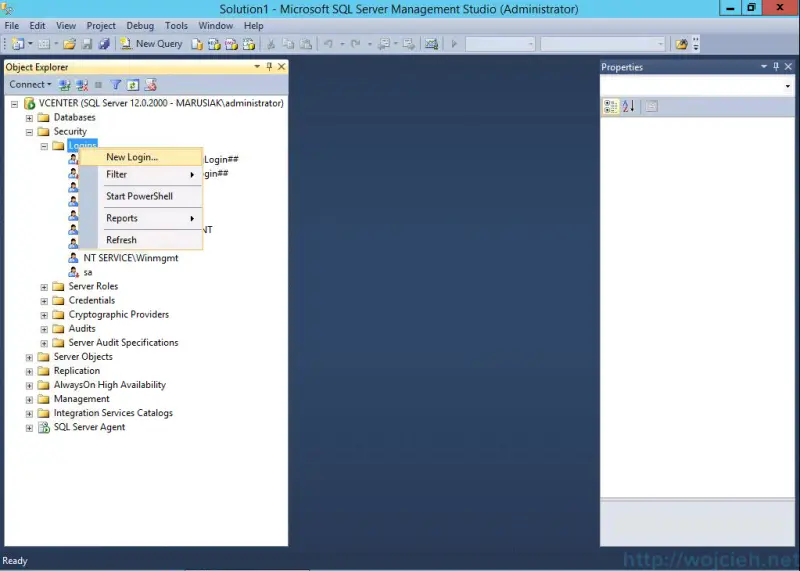
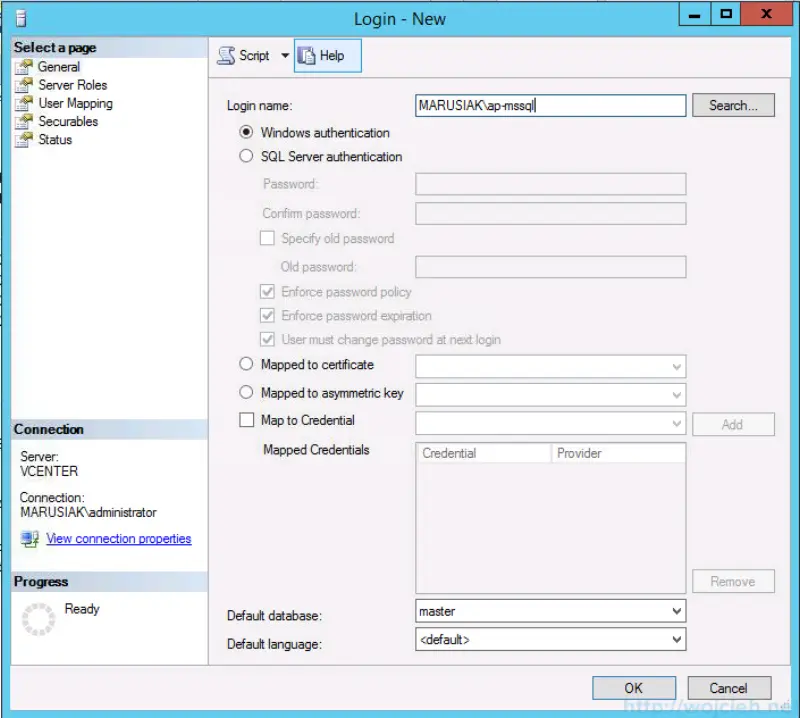
- In SQL Server 2014 Management Studio and navigate to Security \ Logins and click New Login.
- In a previous post, we created application user called ap-mssql and ap-vcenter. I used the ap-mssql user to start all SQL Server 2014 services and ap-vcenter will be used to start all VMware services. I will use the ap-mssql user to connect to vCenter and SQL server.
- In General section I provided username.
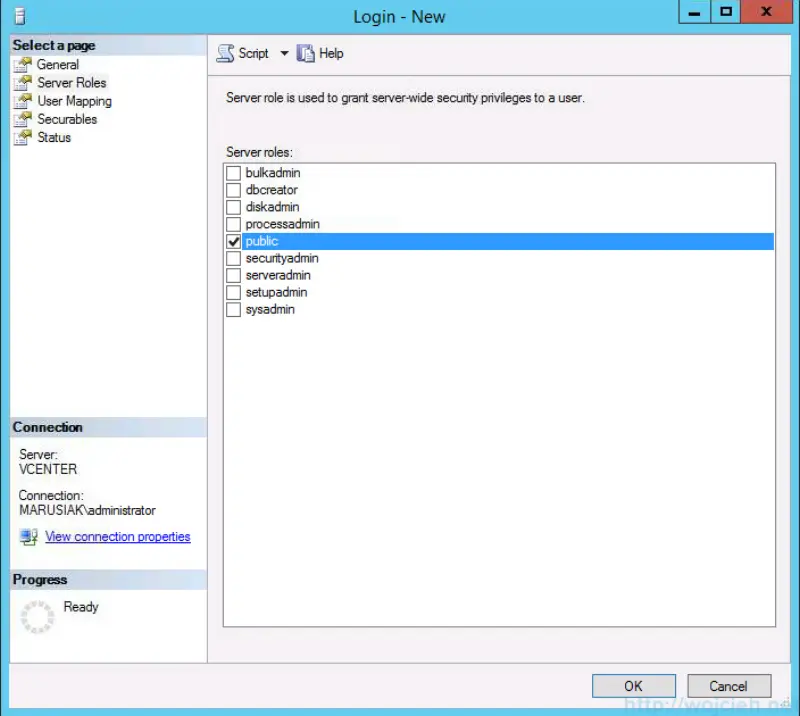
- In Server Roles section we select only public.
vCenter Server 5.5 database creation
We will create a vCenter database manually. We will use following options:
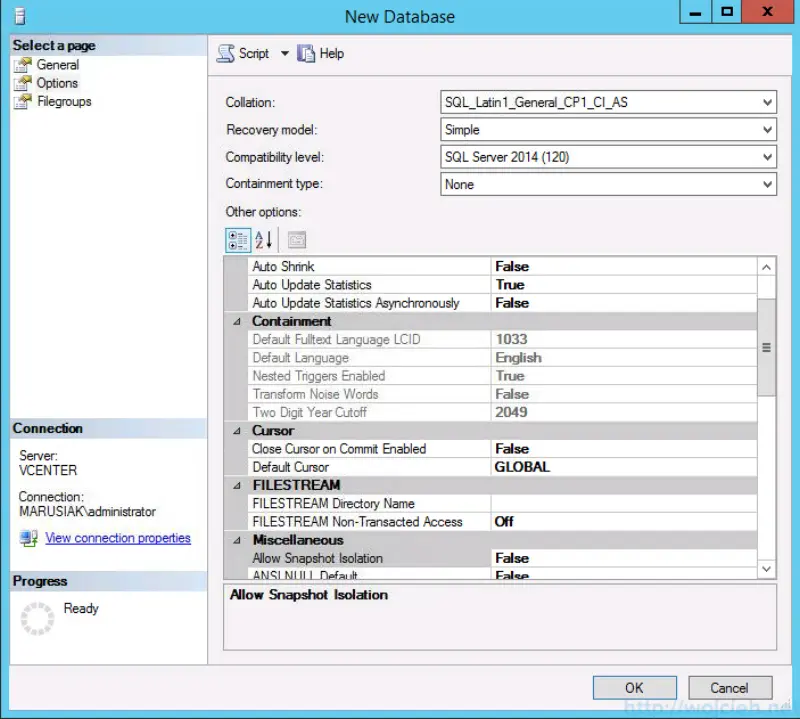
- Collation - SQL Server Collation Model: SQL_Latin1_General_CP1_CI_AS.
- Recovery model - Full
- Compatibility type - SQL Server 2014
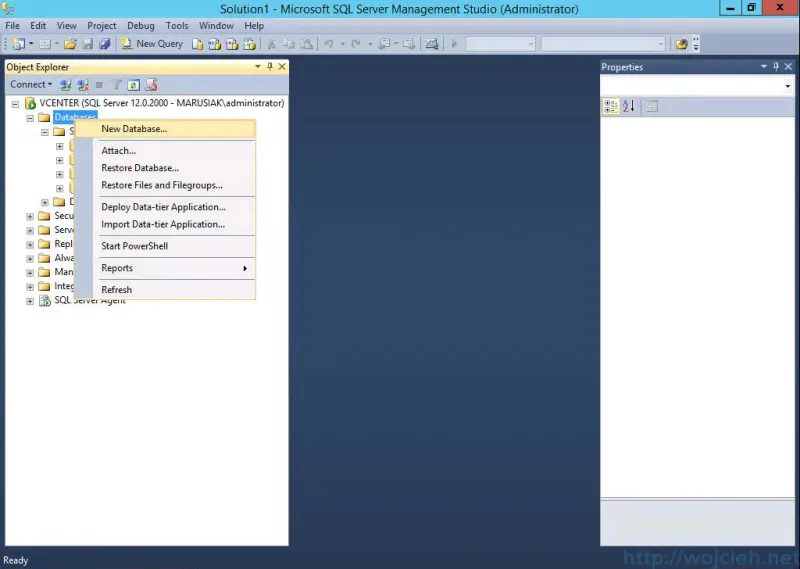
- Click on Databases and select New Database.
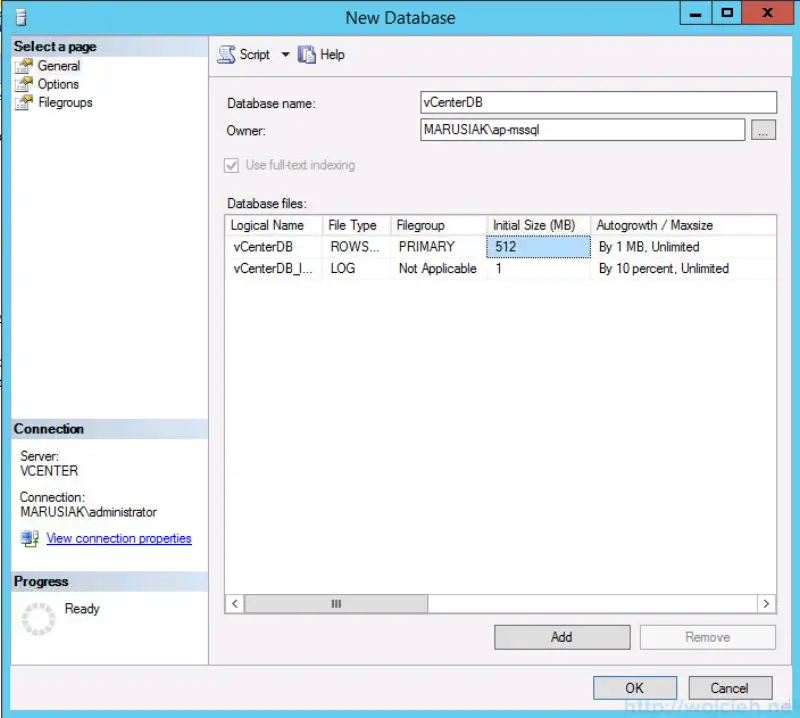
- Enter your database name. I used a simple name **vCenterDB **and owner of DB is previously created user ap-mssql.
- In Options, I changed collation to SQL_Latin1_General_CP1_CI_AS, recovery mode to Simple and SQL compatibility model to SQL Server 2014.
- Click OK.
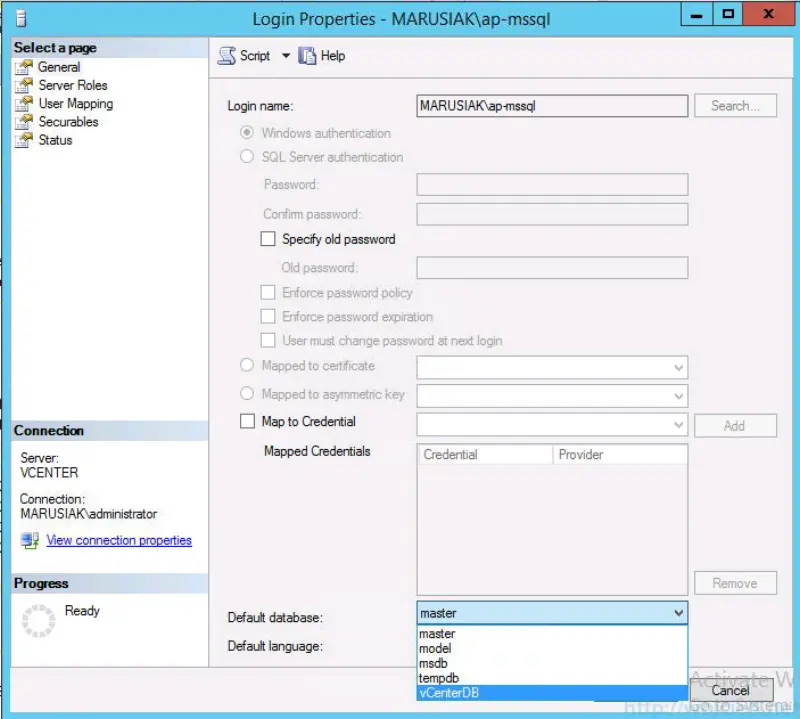
- The last step is to change application user ap-mssql Default Database. Navigate to Logins and select your user. In General select Default Database to your vCenter Database.
- Now we are ready to install vCenter.
vCenter Database backup
In the earlier post I wrote that I will follow SQL Server Best Practices and I would like to configure Transaction Log backup in advance. Before we can execute Transaction Log backup we have to start the full backup.
After full backup is completed we can prepare **Transaction Log **backup.
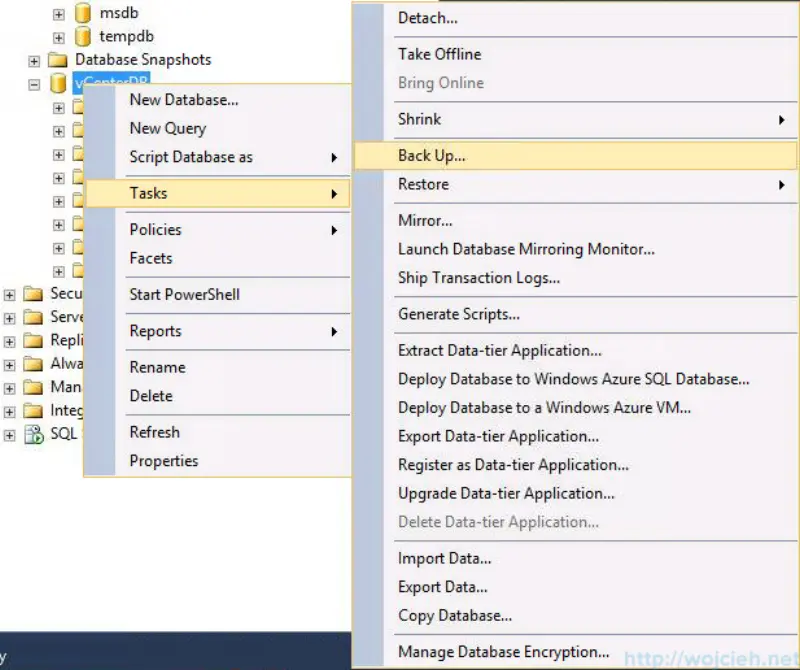
- Click on vCenter Database, select Tasks and Backup.
- In General select backup type as Transaction Log. If you configured disks and SQL server as I did in the earlier post, then the backup destination will be pre-selected.
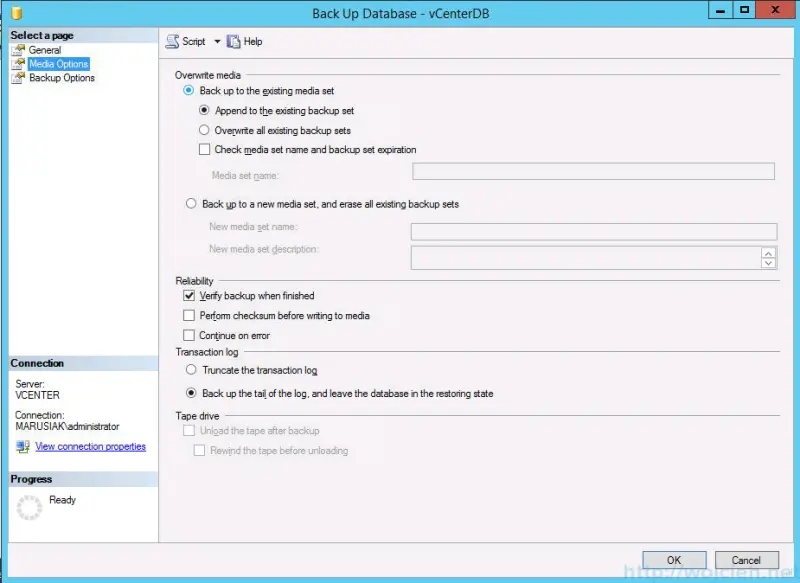
- In Media, I selected Append to the existing backup set, V**erify backup when finished **and Back up the tail of the log, and leave the database in the restoring state.
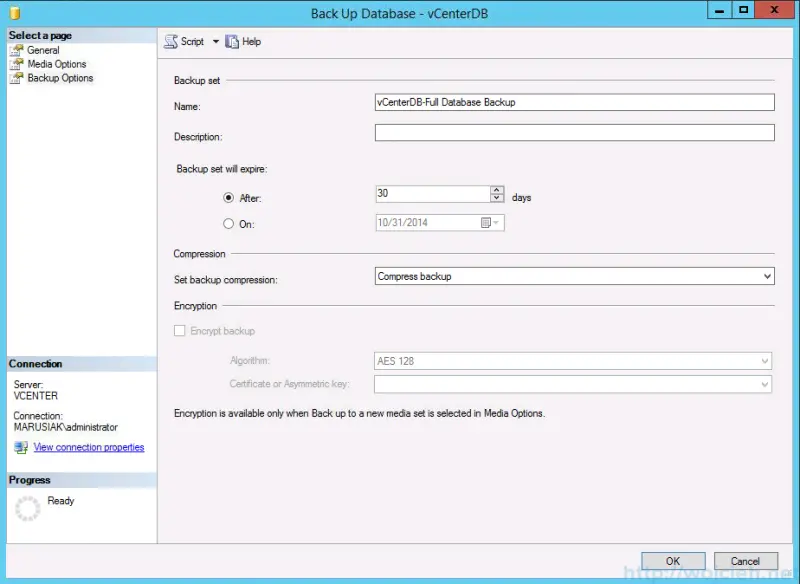
- In Backup Options, I selected expiration date of backup and compression level.
- Click ok.
More detailed description is available on Microsoft MSDN article http://msdn.microsoft.com/en-us/library/ms189606.aspx.
MSSQL ODBC configuration
The last step before we will install vCenter Server Database is ODBC configuration.
- Go to Control Panel and then to **Administrative Tools **and we select ODBC Data Sources (64-bit).
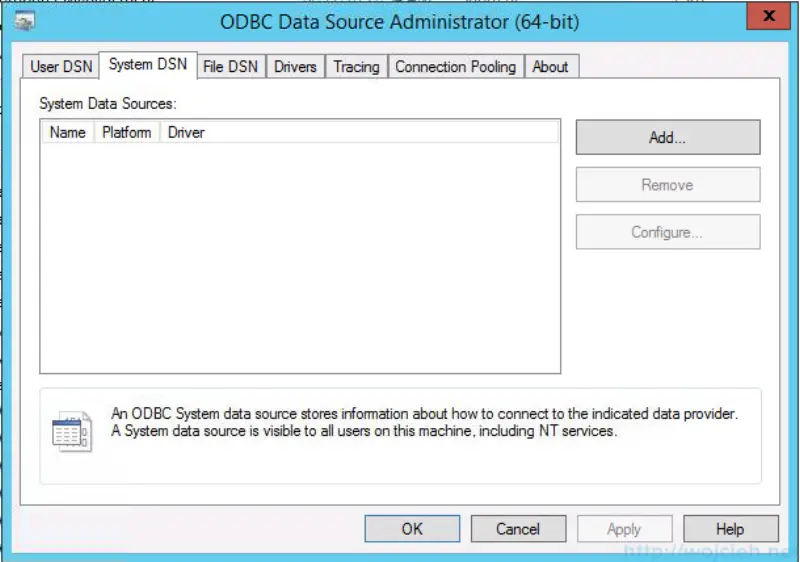
- Click System DSN, select Add and click SQL Server Native Client 11.0.
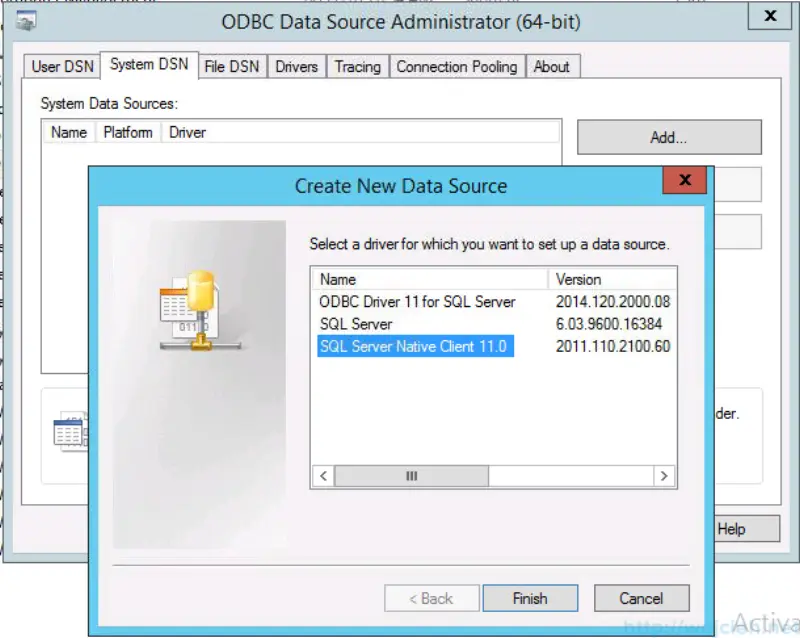
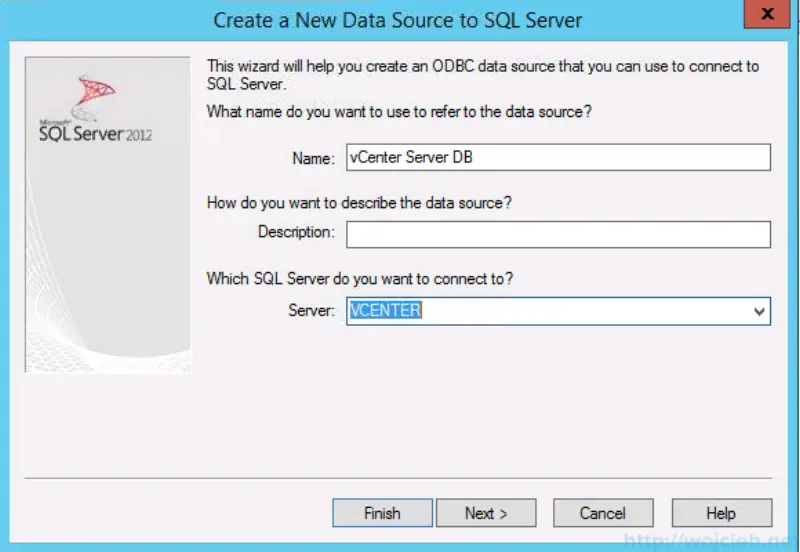
- Provide the name for the ODBC connection and select your SQL Server.
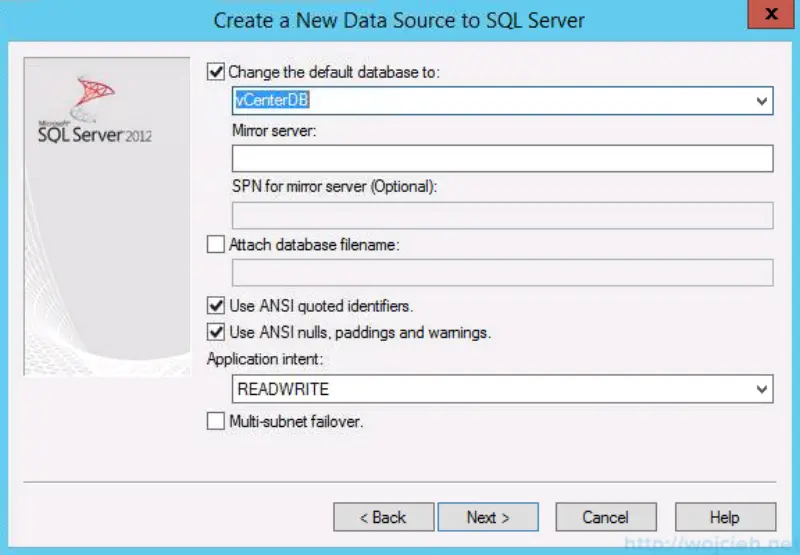
- Select Change the default database to: and select your database.
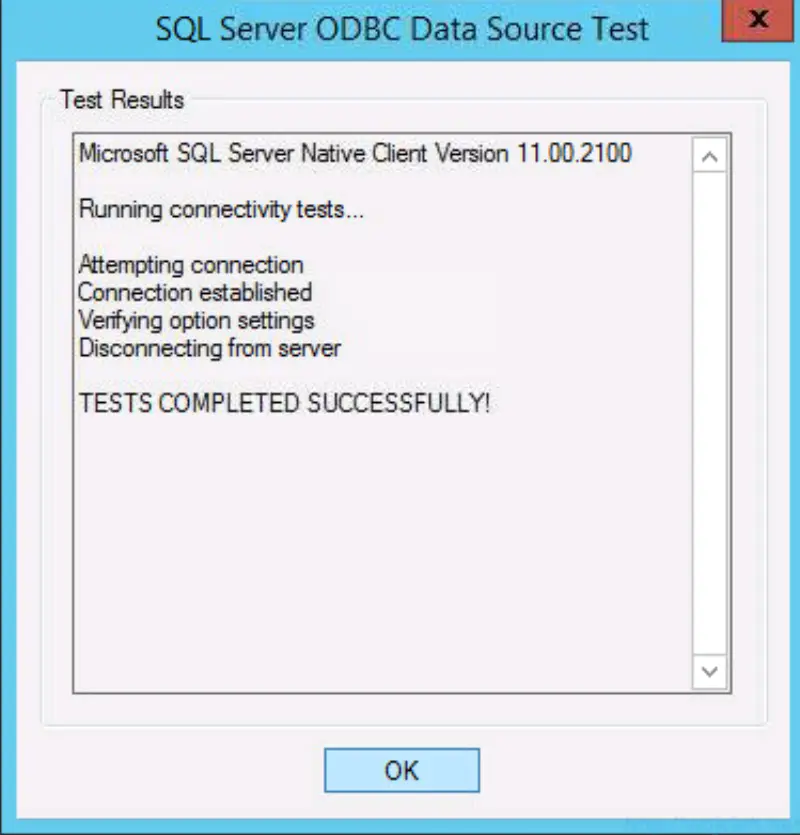
- Click next and finish. At the end click Test Data Source. If you configured everything correctly then you should see the same result as I have.
Summary
After preparing ODBC connectivity we can proceed with vCenter Server installation. This will be covered in the third post.