Nexenta iSCSI installation and configuration for ESXi
![]()
Software Defined - things
Have you ever wanted to have participated in revolution we are experiencing right now in Data Centers? Cool! I like it as well. The (r)evolution we are part of is called Software Defined Data Center. One of its key components is SDS - Software Defined Storage. NexentaStor is not the only one on the market, but in this post, I would like to use it as one of the examples.
NexentaStor
NexentaStor is software which allows you to have fully functional storage with enterprise features like deduplication, block, and file replication, block level mirroring powered by powerful ZFS filesystem. I like it already 😉 As usual, if you want to know more about it please follow a link to detailed overview: NexentaStor Overview.
A colleague from work mentioned about NexentaStor to me that it has really interesting features and he switched from OpenFiler to it and he is quite happy. I tried it and so far I love it. In Today’s post I will show you how to:
- install NexentaStor as Virtual Machine
- define storage pool with SSD as cache
- configure iSCSI to work with VMware ESXi
NexentaStor limitations and requirements
First of all you need to download it. There is Community Edition of NexentaStor which has following features:
- Free for up to 18 TB of overall used storage capacity
- Support for user and group quotas
- The ability to automatically expand pools
- Copy on write
- Checksummed datablocks and metadata for reliability.
Download link to NexentaStor Community edition: http://www.nexenta.com/corp/downloads/download-community-edition
Recommended system requirements:
- 64 bit processor (32 bit not recommended for production)
- 1GB RAM minimum for evaluation, The more ram the better..
- 2 identical relatively small disks for high-availability system folder (for operating system and the rest appliance’s software), requires less than 10GB
- Additional drives/storage for data volumes
NexentaStor installation
- Create new Virtual Machine with following settings:
- OS - Solaris 11 64-bit
- 1vCPU
- 2GB RAM
- 10GB Disk
- 1+ vNIC’s
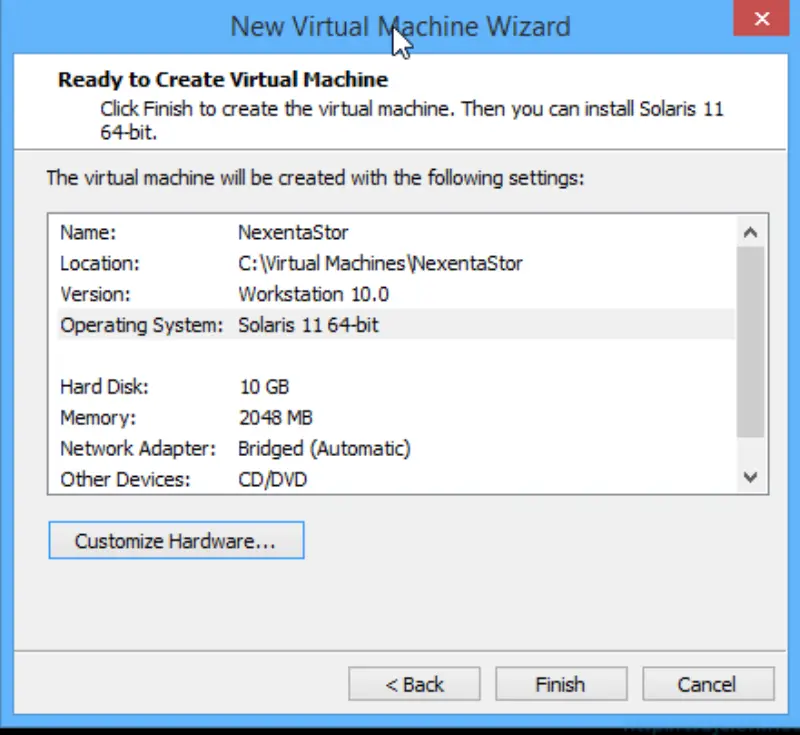
- This are setting I used for Virtual Machine in VMware Workstation. On ESXi host please consider 2 or more VMXNET3 uplinks for best performance.
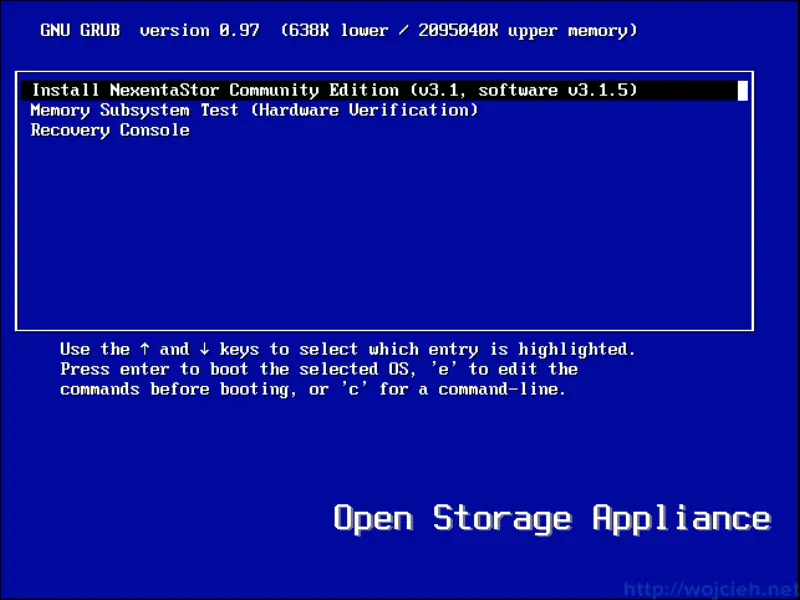
- Power on Virtual Machine, select install and wait for an installer.
- Accept EULA and select disk where would you like to install NexentaStor.
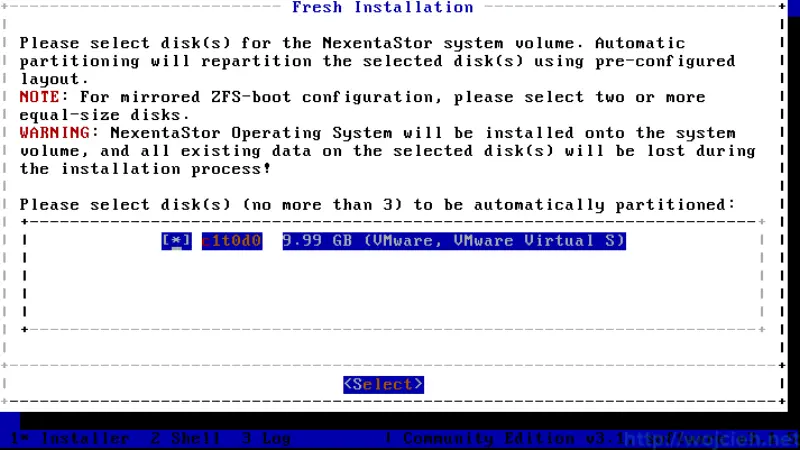
- After disk partitioning installer will continue and at the end it will be rebooted. As instructed on the screen you need to register your copy of NexentaStor. It can be done by following this link: http://nexenta.com/corp/downloads/register-community-download
- Next step after you provide license key is to configure a network interface. Set it up and visit NexentaStor via HTTP/HTTPS (depends on how you configured it) with the configured port. In my case it was
- On welcome page provide more information - host name, domain name, etc.
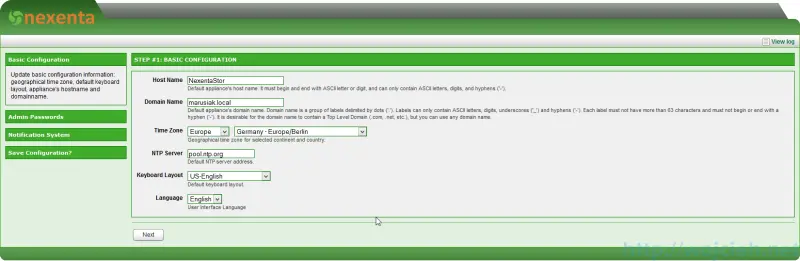
- On next screen enter credentials for root and admin - easy. On next screen you can configure SMTP alerting - I skipped this because I don’t have a local email server. The last screen displays summary about your configuration. For easier setup, I went with all defaults in Wizard 2. We will configure everything from GUI.
NexentaStor iSCSI configuration
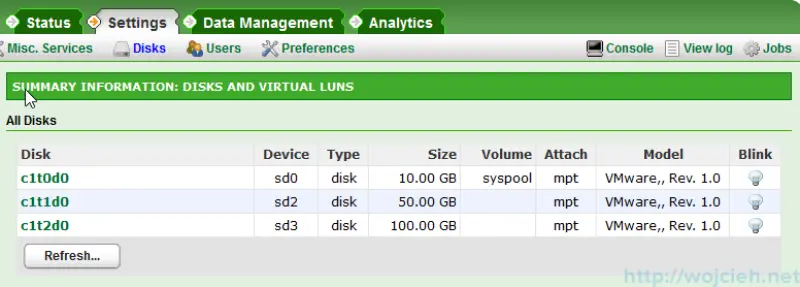
- Before we configure iSCSI storage we need to add it to Virtual Machine. I used 50GB from SSD for cache and 100GB from SATA drive. After you add it go to Settings \ Disks and hit Refresh and Rescan all HBAs and refresh device links in order to see them.
- Now we need to create Data Set which later on will be shared via iSCSI to ESXi host. Go to Data Management \ Data Sets and click Create on the left side of the window.
- This is how I configured it. 50GB to cache and 100GB to pool. Later on, we will be able to check a percentage of cache hit by Virtual Machines.

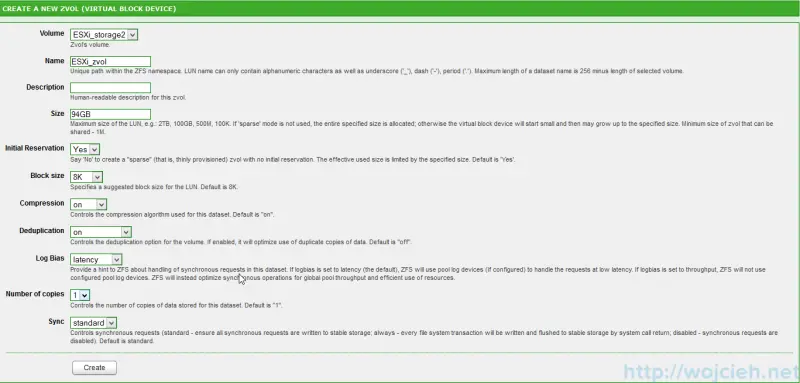
- After Data Set creation we need to create zVol (virtual block device). Give it a name, size and select deduplication and compression if desired and hit create.
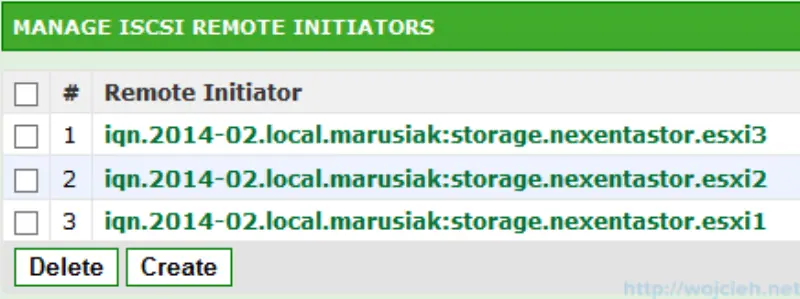
- Next step is iSCSI target configuration. I used the following name for it iqn.2014-02.local.marusiak:storage.nexentastor but please refer to IQN or EUI format from RFC 3720. In order to share storage with specific ESXi hosts, I suggest creating iSCSI Initiator Groups. Click Data Management \ SCSI Target \ Remote Initiators and either give IQN or EUI names you know from ESXi or create one by yourself. I followed the second path and I configured ESXi initiators by myself. This implicates that you will need to change this on ESXi side as well.
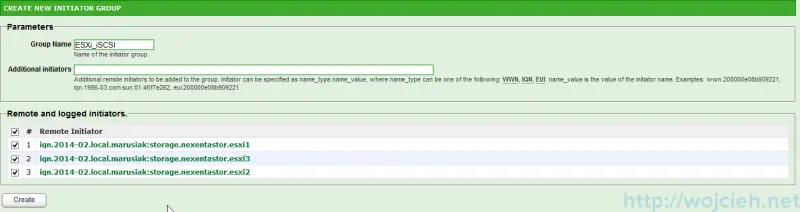
- After Remote Initiator creation, it is a good idea to group them for easier management and configuration.
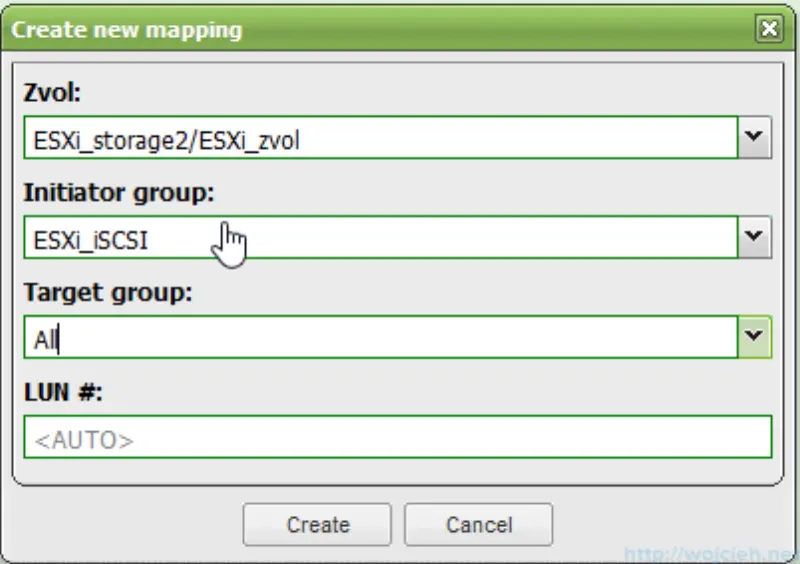
- And finally, at the very end, we can share volume we created over the network. Click Mappings and create the mapping.
- If everything is configured correctly you (your ESXi hosts) should see iSCSI storage.
Summary
In next post, I will go through configuration of ESXi https://www.wojcieh.net/iscsi-software-adapter-configuration-using-vsphere-web-client