
Certificates are very common in our daily life. Starting from logging to your banking account, checking email or simply visiting social media, we use secure communication. One of ingredients of it are certificates. I will not describe you in details how do we use them - if you are reading this most likely you know what you are doing.
Today blog post How to replace VMware ESXi 6. SSL certificate* will describe you how to replace SSL certificates on ESXi hosts.
Prerequisites
First of all you need ESXi host, certificate authority and few minutes to replace certificates.To generate SSL certificate for your ESXi host you need OpenSSL version 0.9.8 installed on your local system or tool called XCA. In VMware documentation all certificate signing requests are done using OpenSSL but I will show you how to do it in faster and more efficient way with XCA.
- Certificate Authority
- Template for VMware in Certificate Authority - follow VMware Knowledge Base Article for details: Creating a Microsoft Certificate Authority Template for SSL certificate creation in vSphere 6.0 (2112009).
- OpenSSL 0.9.8 - follow VMware Knowledge Base Article for details: Configuring OpenSSL for installation and configuration of CA signed certificates in the vSphere environment (2015387).
- XCA - Optional to replace OpenSSL
- SSH access to ESXi
How to replace VMware ESXi 6.* SSL certificate
Procedure of replacing ESXi certificate is not complex one, but if you want to replace more certificates in your environment some things have to be prepared first to make procedure smooth.
Generate certificate signing request (CSR)
One of the first steps in certificate replacement is to correctly identify settings which certificate has to have. If some certain parameters will not be included or configured, either certificate replacement will fail or you might encounter more serious problems in your environment.
Certificate template
I am using fantastic tool called XCA to store certificate template, certificates, private keys and certificate signing requests. First step to replace ESXi SSL certificate is to create template.
- Download XCA from SourceForge XCA download page for your platform.
- Once installed start XCA and create new database.
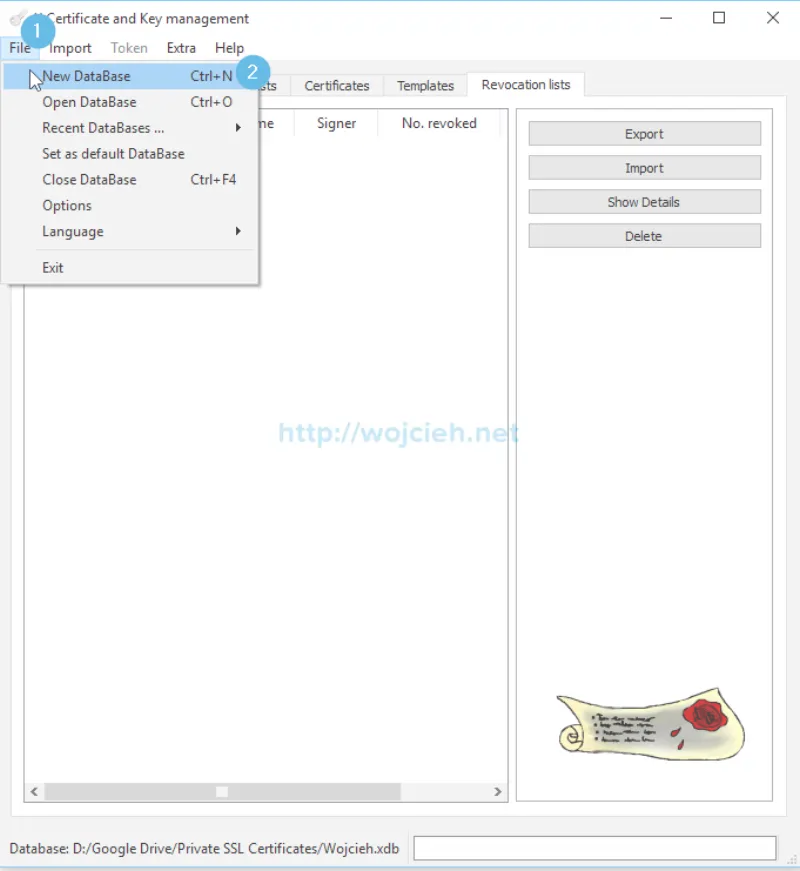
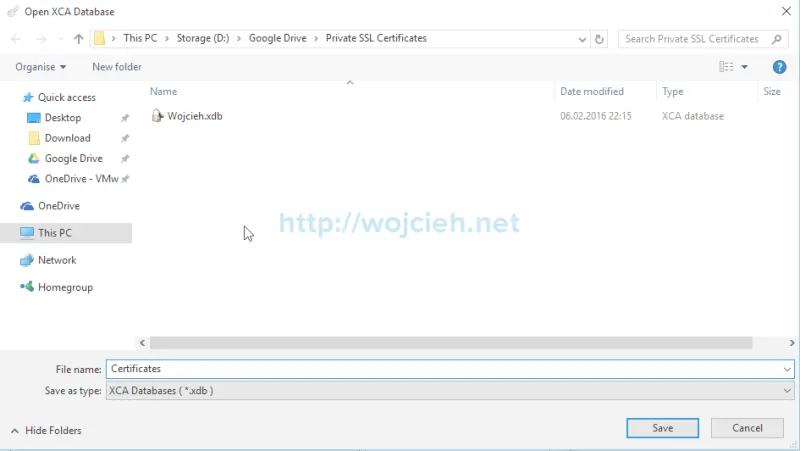
- Enter the name for the new database and select desired location.
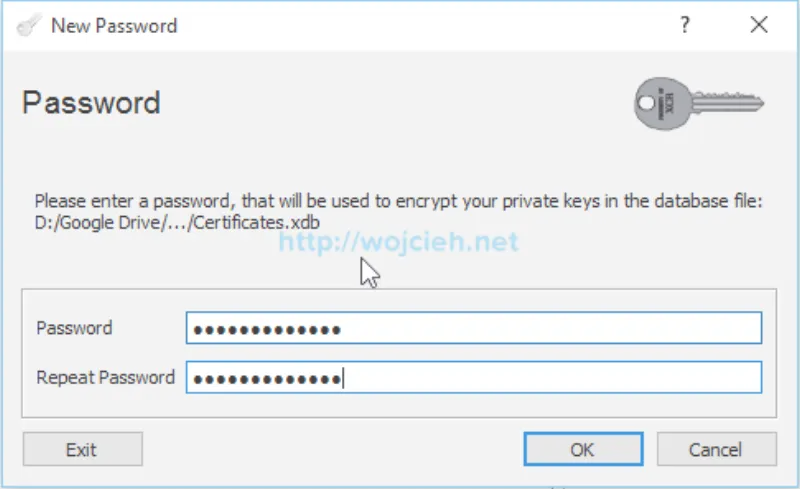
- Enter password to your database.
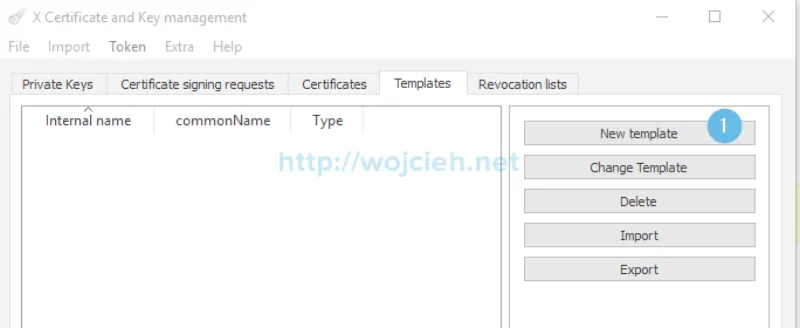
- Database was successfully created. We will create new template for our ESXi hosts. In XCA switch to templates tab and click New template.
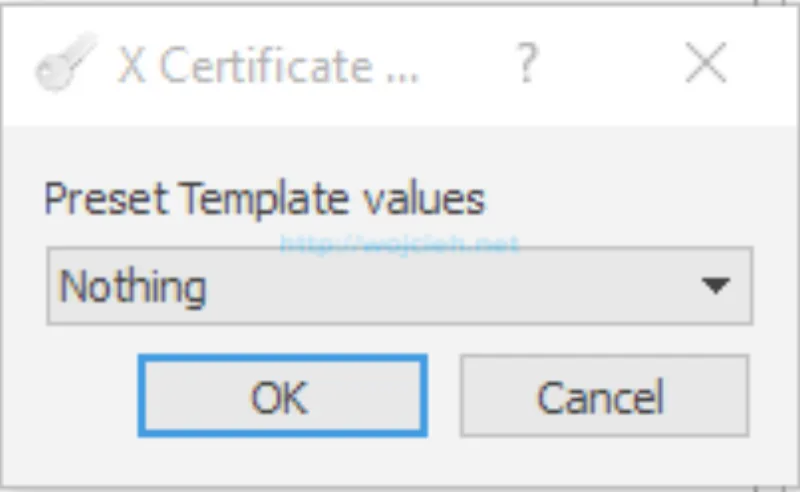
- We are asked now what preset templates values we should import. Select Nothing.
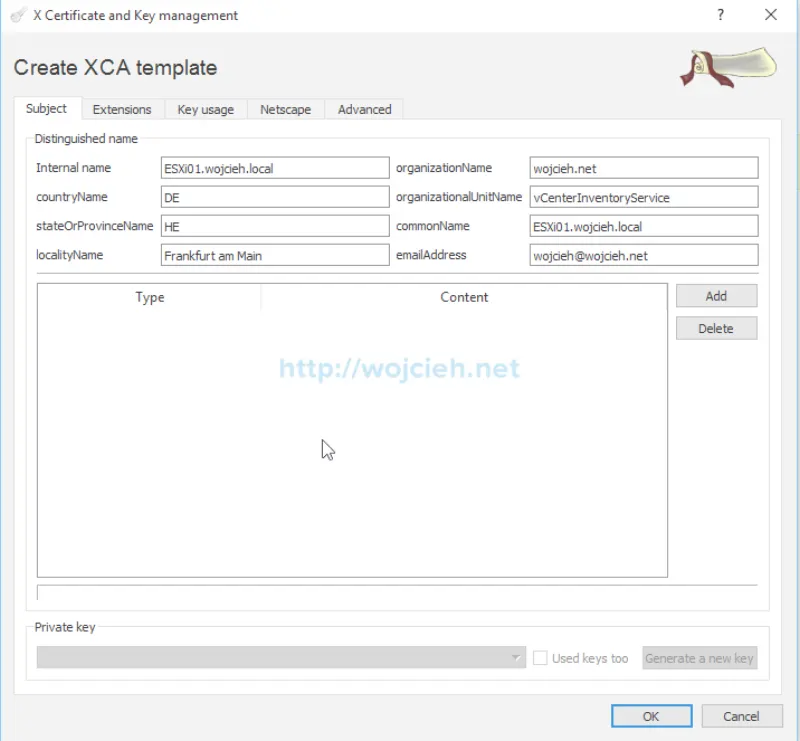
- Fill Subject section with following values.
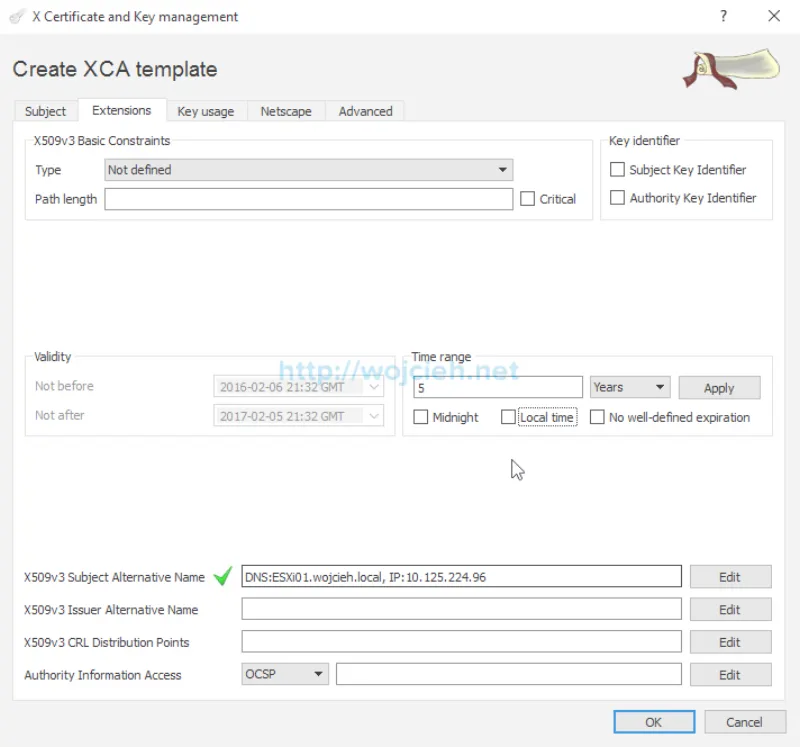
- Switch to Extensions tab. Fill X509v3 Subject Alternative Name with ESXi FQDN and IP address.
- Switch to Key Usage tab and select displayed values.
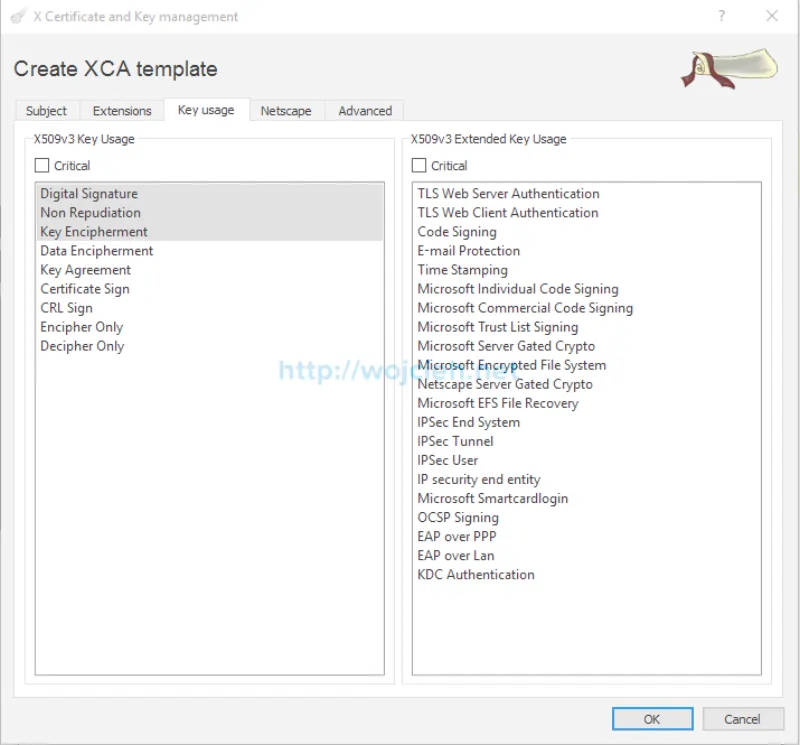
- This are all settings we need to successfully generate certificate signing requests.
Certificate signing request
Once our preparation with certificates is done we can initiate certificate signing requests.
- To generate certificate signing request select template we just created and click Create request.
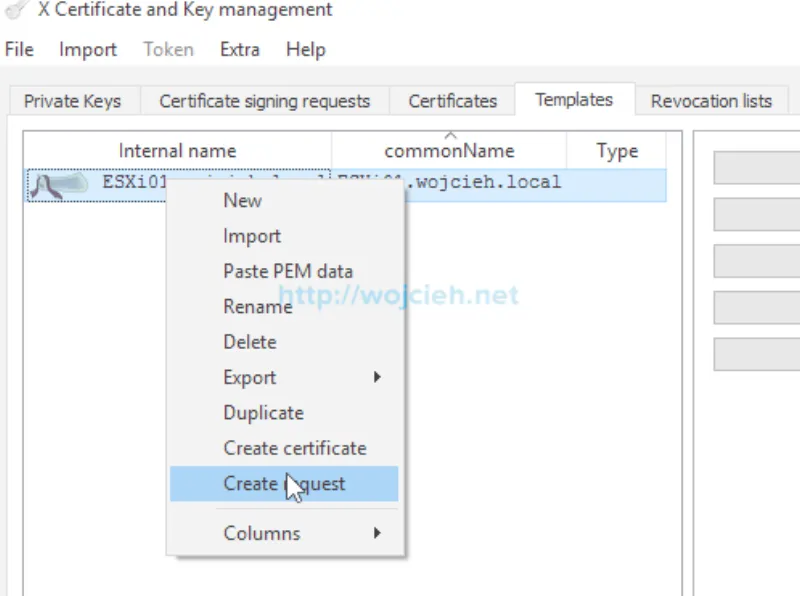
- Switch to Subject tab and enter Internal name - this is just name displayed internally in XCA. Change as well commonName field to match new server name. Once field 1 and 2 are filled click on field 3 Generate a new key.
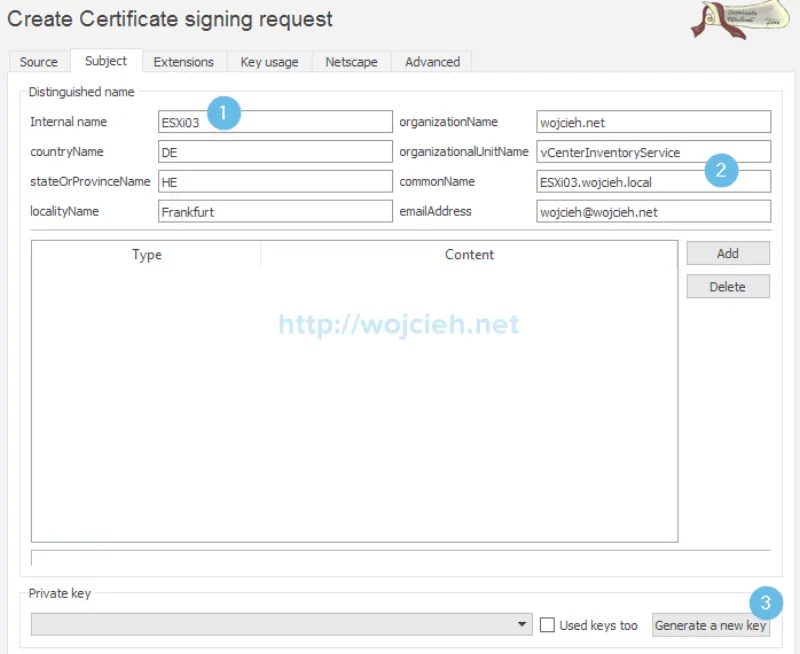
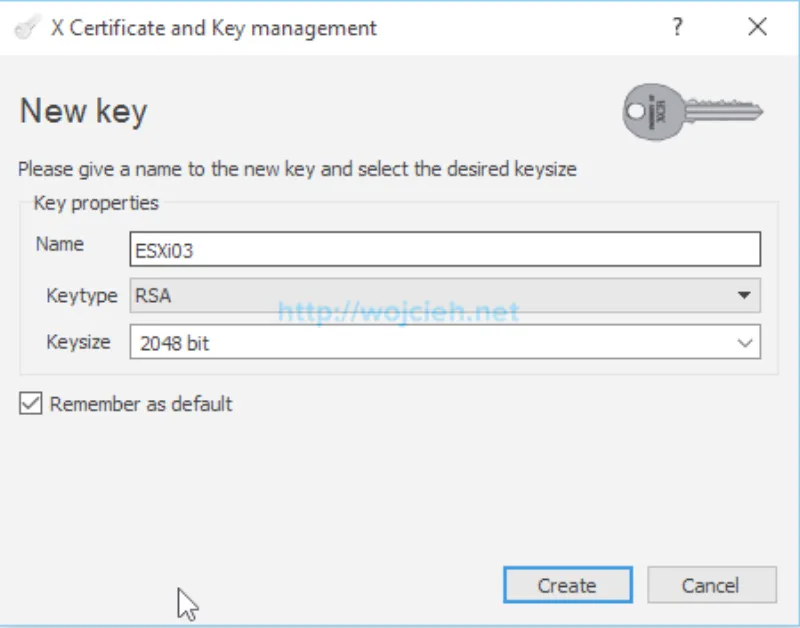
- We have to generate private key which we will upload to ESXI host and it will be validated with certificate we will get from this certificate signing request. Type Name matching Internal name to easily correlate private key and certificate.
- Private key was successfully created.
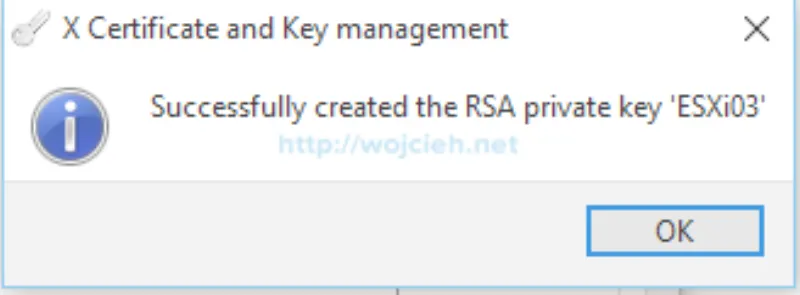
- Click OK and you will see confirmation that we successfully created certificate signing request for our ESXi host.

Generate certificate
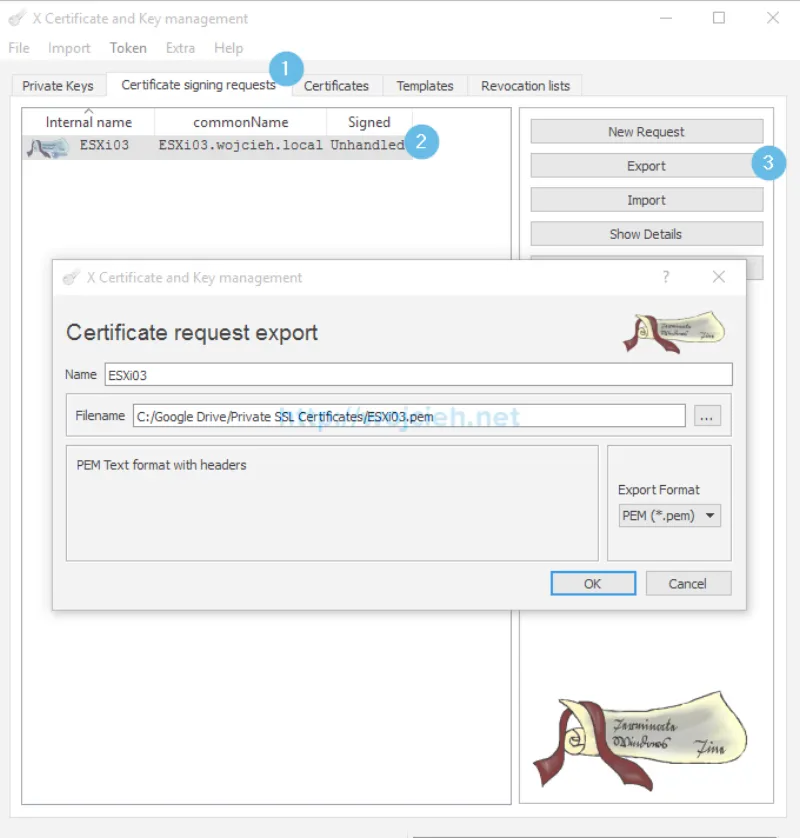
- Last step to receive certificate is to export it from XCA. Switch to Certificate Signing Request tab and select friendly name you have choose for your ESXi. In my case it is ESXi03.wojcieh.local. Click Export. We simply use PEM format to export CSR.
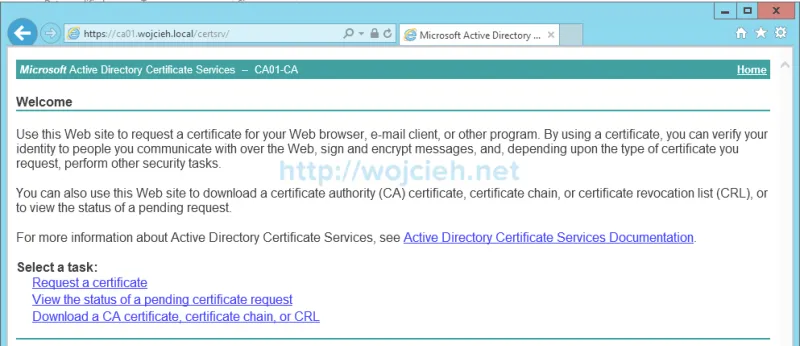
- Once we exported certificate we need to request certificate with our Certificate Authority. In my case it is Certificate Authority installed on Microsoft Windows Server 2012 R2. Navigate to CA https://FQDN/certsrv. Click Request a certificate link.
- Choose advanced certificate request.

- Click Submit a certificate request by using a base-64-encoded CMC or PKCS #10 file, or submit a renewal request by using a base-64-encoded PKCS #7 file.

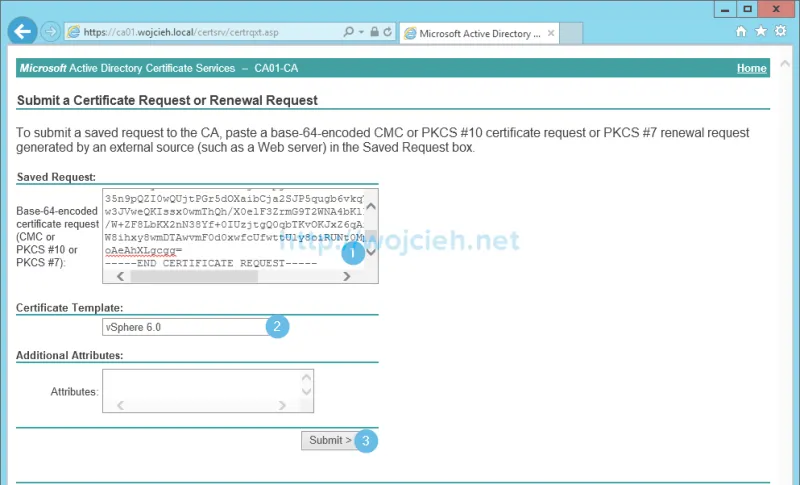
- Open with any editor previously saved CSR and paste it to CA, select previously created vSphere certificate template and click Submit.
- Depending of you certificate authority configuration you will receive certificate immediately or certificate will have to be approved. In my case since I am in lab environment, certificate was immediately approved and ready to download. Select Base 64 encoded and click Download certificate.

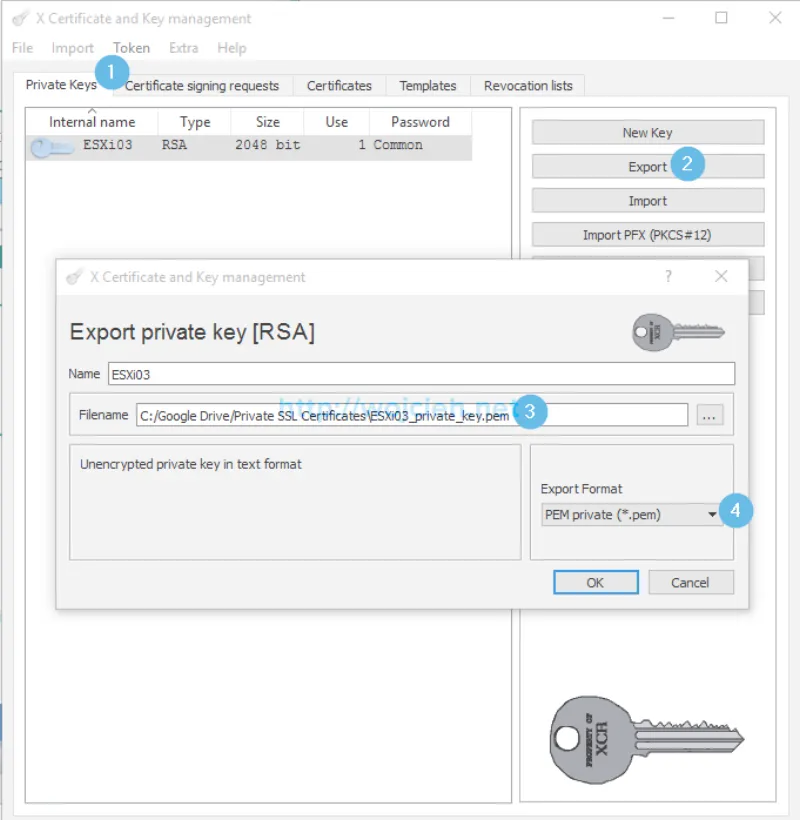
- Export private key from XCA. Switch to Select ESXi host and
Replace certificate on ESXi host
We are nearly at the end of the of the process of replacing SSL Certificate on ESXi 6.*. We will simply follow VMware Knowledge Base Article: Configuring CA signed certificates for ESXi 6.0 hosts.
- Log in to vCenter Server.
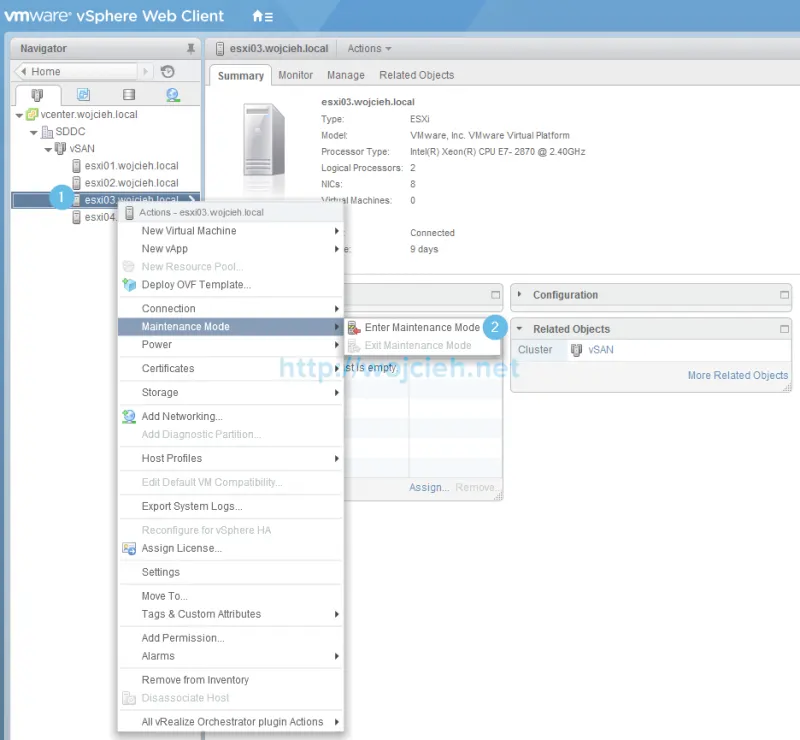
- Enter maintenance mode on ESXi server we will replace certificates on.
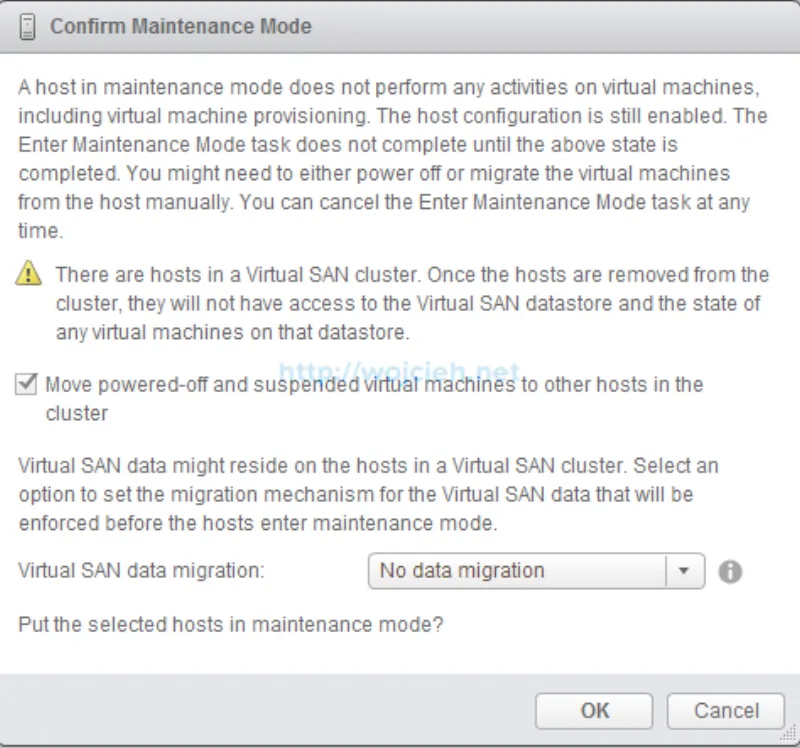
- In my case, I have vSAN working in this cluster and this is why have an additional question about data availability. I selected No data migration because I don’t have any virtual machines running in that cluster.
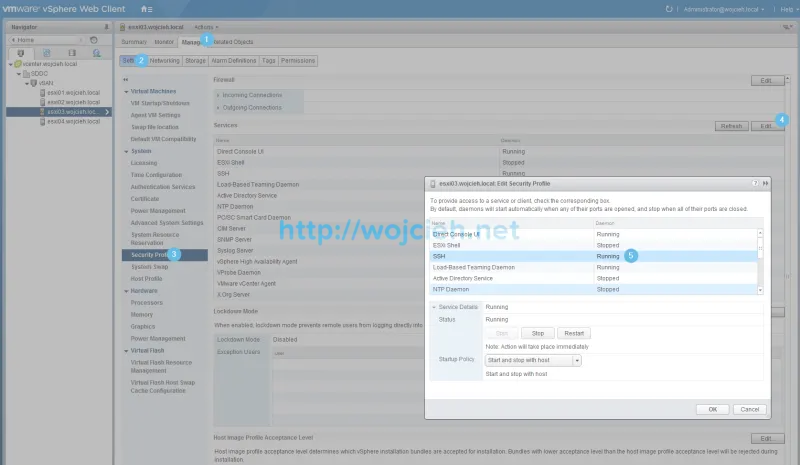
- Start SSH service on ESXi.
- Upload private key and certificate for your ESXi to local datastore or upload it via SCP protocol.

- As you see on the screen I have two filenames. Rename certificate to rui.crt and private key file to rui.key.

- No we will move old certificates from /etc/vmware/ssl to local datastore.

- Now we will move CA signed certificates to /etc/vmware/ssl directory.
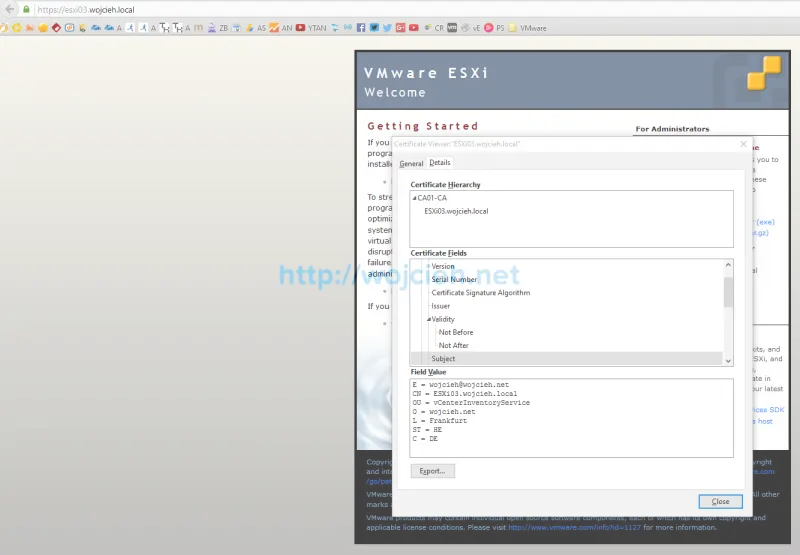
- Once certificates are replaced we just need to restart management agents. Simply type services.sh restart. As you see below certificate was successfully replaced. ![How to replace VMware ESXi 6. SSL certificate - 29][29]
Summary
As you see the procedure to replace ESXi 6.0 SSL Certificates is not that complex. More time you spend preparing template, receive a certificate or upload it to ESXi.